Squarespace is quite a unique platform, so many people keep on using it. The platform offers excellent features and a user-friendly interface, even when building custom pages. It offers plenty of awesome templates.
Check it out by yourself by watching this list of 15 Amazing Squarespace Templates

At some point, site owners may want to change their Squarespace template to a choice they like better or one that serves their needs more comprehensively. The release of a new version with better features can also be another reason for a template change.
However, the process can pose a challenge to someone unfamiliar with it. Here are all the things you need to know to change your Squarespace template in less than 20 minutes.
- What You Need to Know About a Squarespace Template Change
- Precautions When Changing the Squarespace Template
- How To Change Template In Squarespace 7.0
- How to Change Template In Squarespace 7.1
- How to Uninstall Squarespace Templates
What You Need to Know About a Squarespace Template Change
Changing a template or switching from one to the other is done to get better layouts, colors, buttons, and other exciting features. The process gives your website a better design and structure overall.
Are you worried about what happens to the website’s content? Don’t worry. If you follow the steps we indicate here, everything will remain the same and not affect your visitors’ user experience.
After you change your Squarespace template, you can preview the entire system to see if you like the new template before going live.
The Preview is not limited to just the site owner. You can test it on visitors, too, and see what kind of response you get.
Precautions When Changing the Squarespace Template
When you change Squarespace templates, one must know the best practices to follow to ensure that the process goes smoothly.
- Some template preview changes can affect the live site.
- Some changes can be transferred across templates and affect the outcome.
- Some changes may not appear on the Preview until the template is published.
As a result, you should only make the template-specific changes to ensure there is no effect on your live website until you are done with the whole process.
The main template versions for Squarespace are versions 7.0 and 7.1. They are different in their features and the installation process. As a result, one has to consider and follow the procedure for each of them.
Change Template In Squarespace 7.0
Step 1: Pick the Right Template

The first step is to make sure that you pick the right template. This involves going through the templates and studying their functionalities and features and how they will work for you. Features to identify here include sidebars, banners, footer navigation, index page, background images, footers, and page headers since they vary from one template to the other.
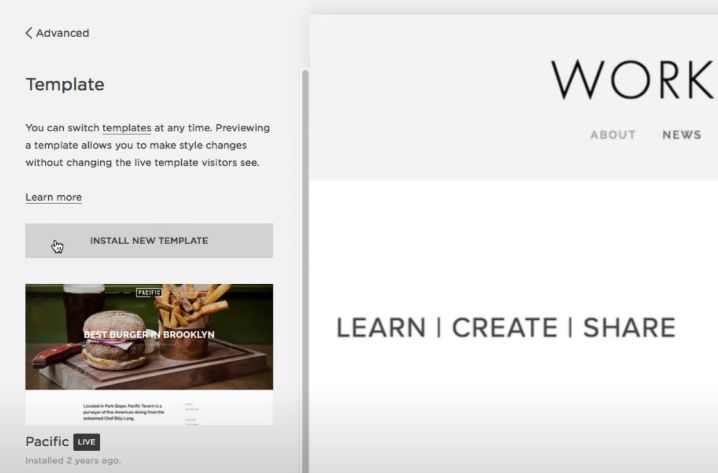
Step 2: Install the New Template
To change the Squarespace template, start with installing a new one.
-
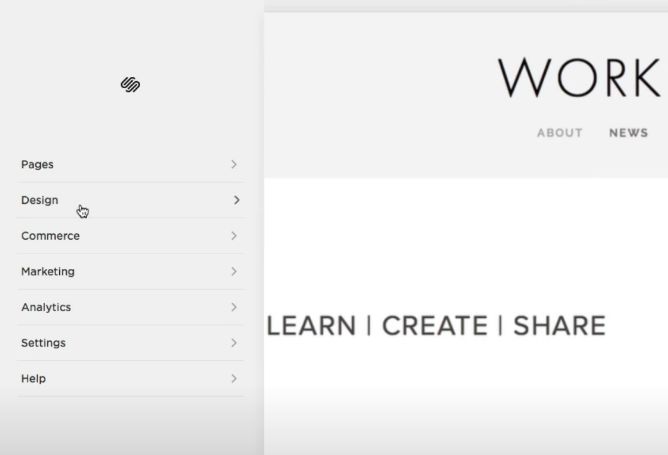
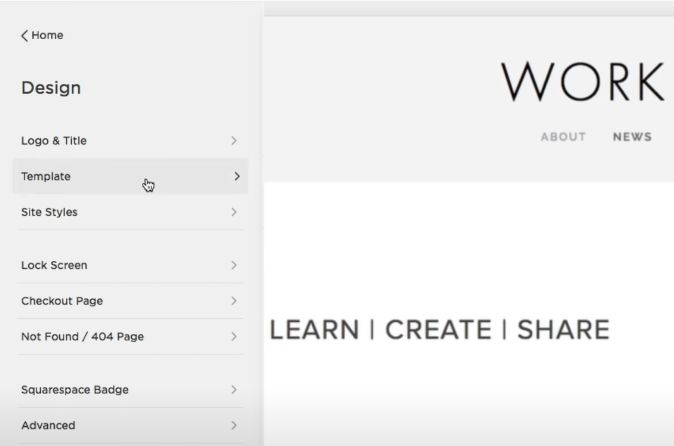
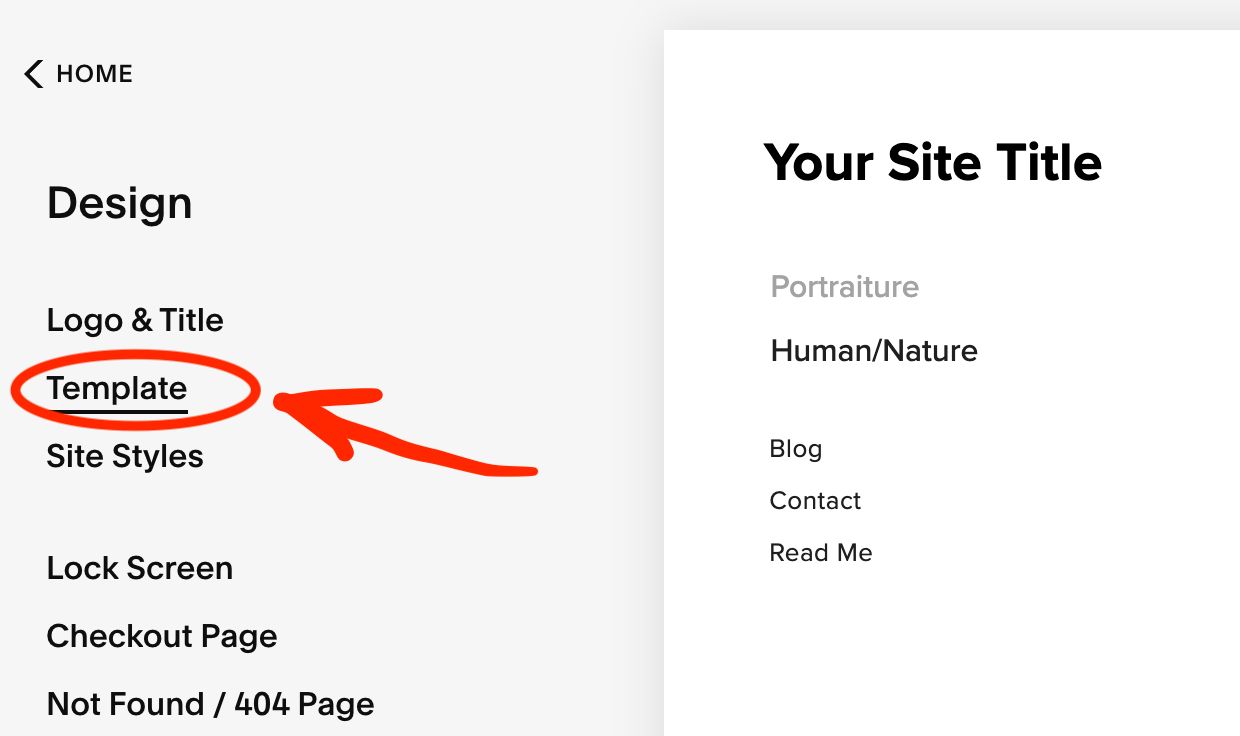
Go to the home menu of the website back-end, then click Design.

-
Click on Template
-
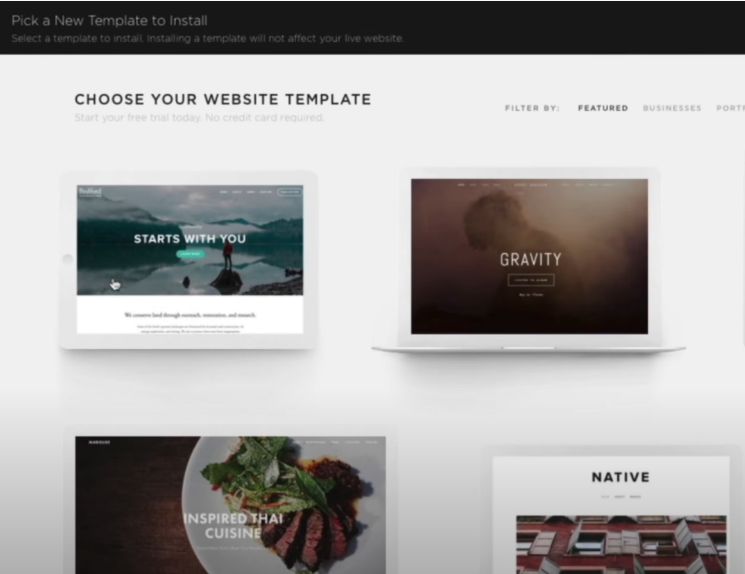
Click on Install new template.
-
Here, you will have a list of available templates to go through and hover over.
-
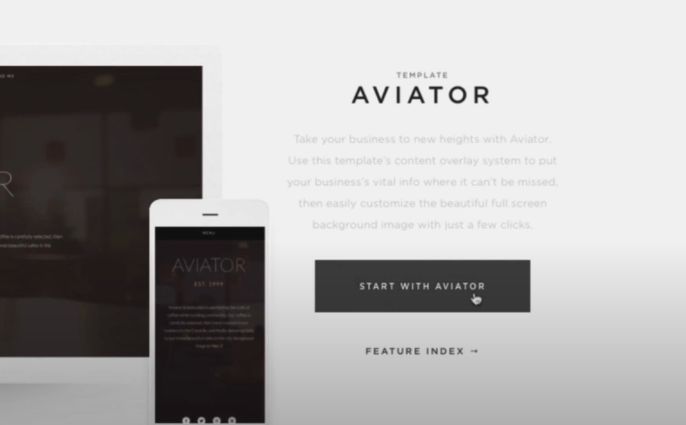
Once you find a preferred template, click on Start with. After this action, the template will be made available on your template panel.
Step 3: Template Preview
This is the stage where site owners can see the overall look and structure of the new template. To do this, hover over the template and click on Preview.

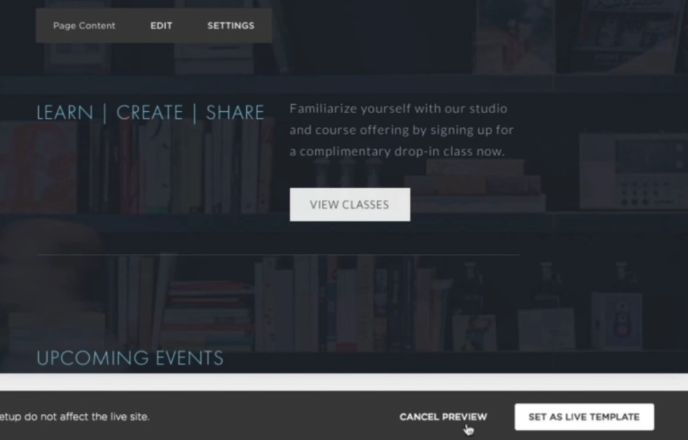
In the preview, you will be able to see the new template plus demo content to give you an idea of its styles and structure. This preview is not visible to the visitors.
You can also cancel the Preview by going to the live template section and clicking on the Cancel Preview button located at the bottom.
Step 4: Edit Preview Pages
On the Preview, you can edit your site pages before publishing the new template. This gives you a chance to make sure every page is in order before making the new template live.
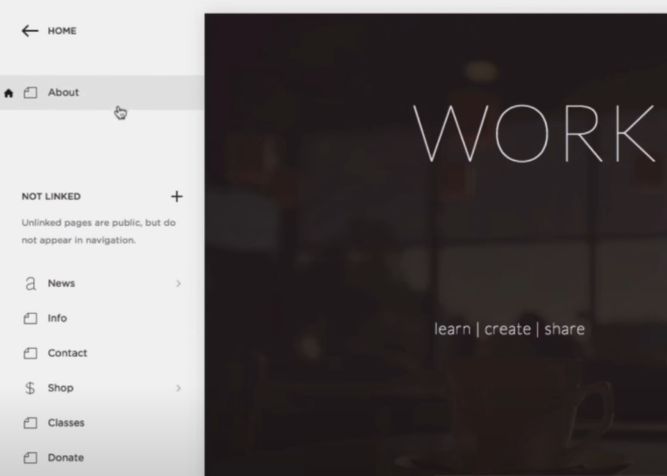
Click on Home Menu, then Pages. From this point, you will be able to remove the demo content and use your pages which can be found in the Not Linked section.
When working on the preview mode, do not delete the pages but move them to the Not Linked area when not in use.
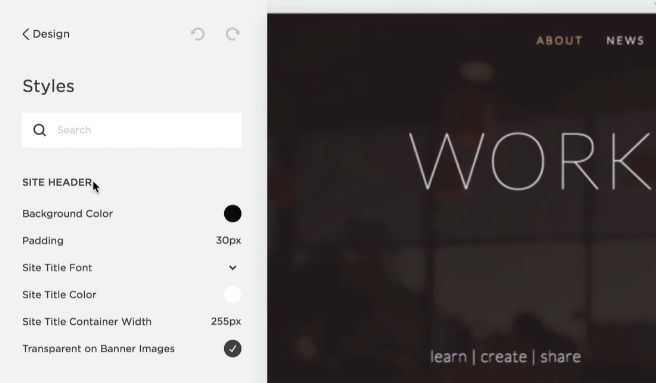
Step 5: Style Your Template
It is crucial to work on the site styles on the new template before publishing.
Some of the elements to edit include backgrounds, padding, colors, and fonts. Every template comes with its own visual design, which may or may not work for your particular site.
Styling is a way to make sure the new styling matches your liking or the one on your website. When doing this, the new template won’t be visible to your visitors until it is published. Go to “Design>Site Style”
Step 6: Template Publishing
This is the last step once you have prepared your new template for completion.
Once satisfied with the pages, click on Set as live template at the bottom bar.
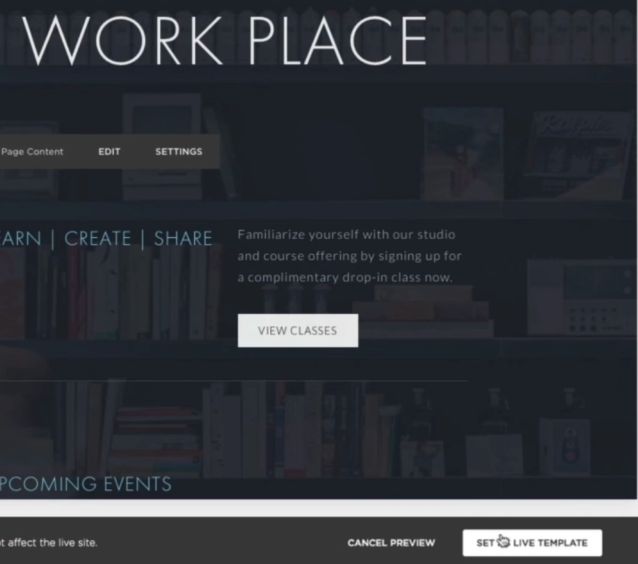
You will be prompted with a message to confirm the process and click on Confirm, which makes your changes to the Squarespace template permanent.
Related article: How to find the Squarespace block identifier
Change Template In Squarespace 7.1
Version 7.1 has eliminated the need to switch templates. All version 7.1 sites are part of the same template family, with the same features and style options.
The template you choose when creating a 7.1 site is a starting point. Then you can always change the design of your template by switching to a different look or adding different page types without starting over.
Option 1: Switch To A Different Look
You can reset or change your template’s style tweaks to other colors, fonts, and styles using the Site Styles panel.
-
Step 1: Go to the home menu of the website back-end, then click Design.
-
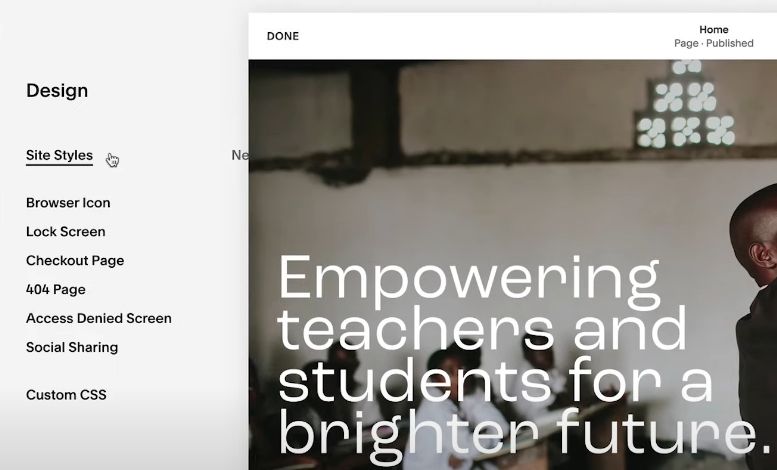
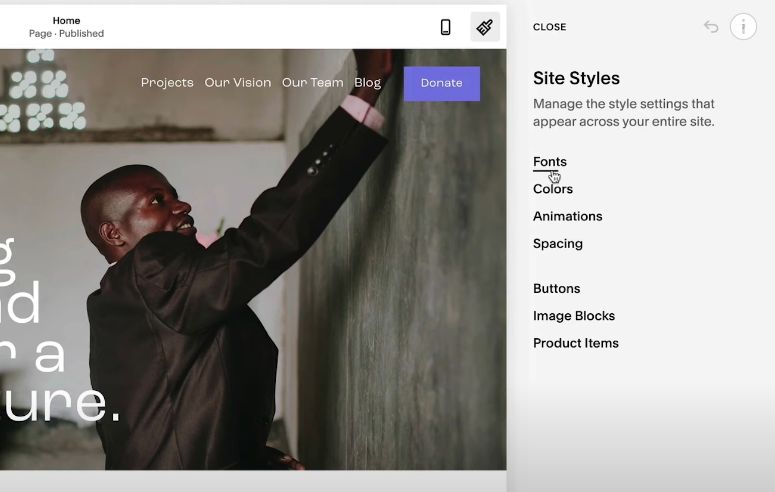
Step 2: Click on Site Styles
-
Step 3: Manage the style settings changing fonts, colors, animations, buttons, etc.

Option 2: Add Different Page Types
You can remove or add different page types to change the style of your website. These are the steps you have to follow:
-
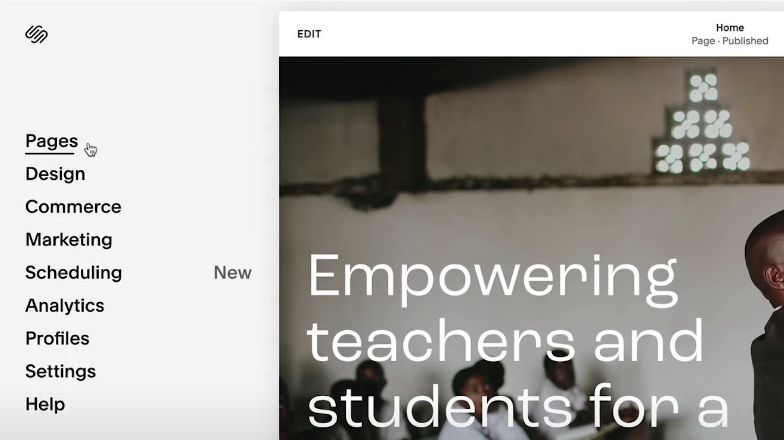
Step 1: Go to the home menu of the website back-end, then click Pages.
-
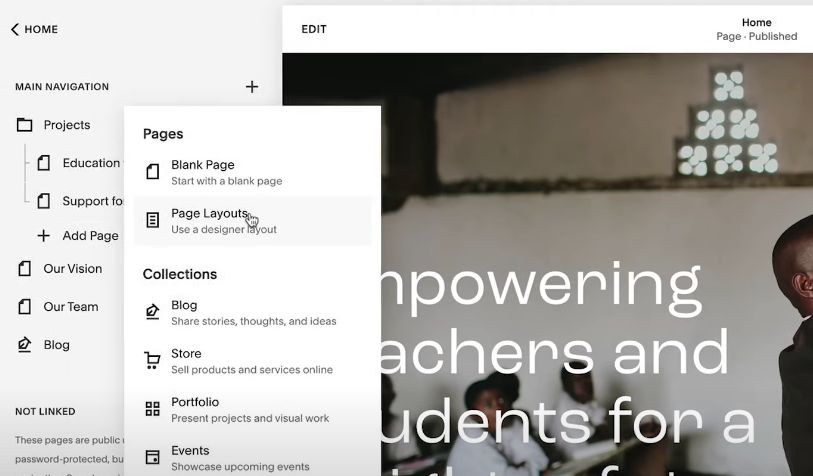
Step 2: Add pre-built pages or collections by clicking on the “ + ” icon next to Main Navigation.
-
Step 3: Click on Page Layouts to use a pre-built designer layout.
-
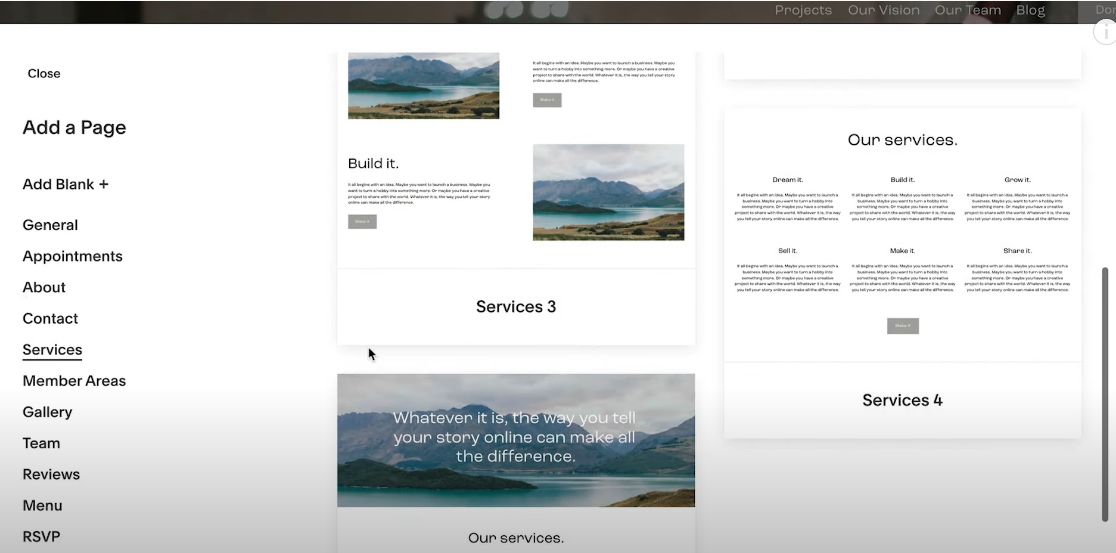
Step 4: Browse the available layouts and select the best one for you.
How to Uninstall Squarespace Templates
Before you change any Squarespace template and install a new one, you may need to uninstall one for various reasons.
It is important to note that when you uninstall a template, all the changes made to the template, including footer content, sidebars, navigation order, and styles are lost permanently.
The process is as follows.
Step 1
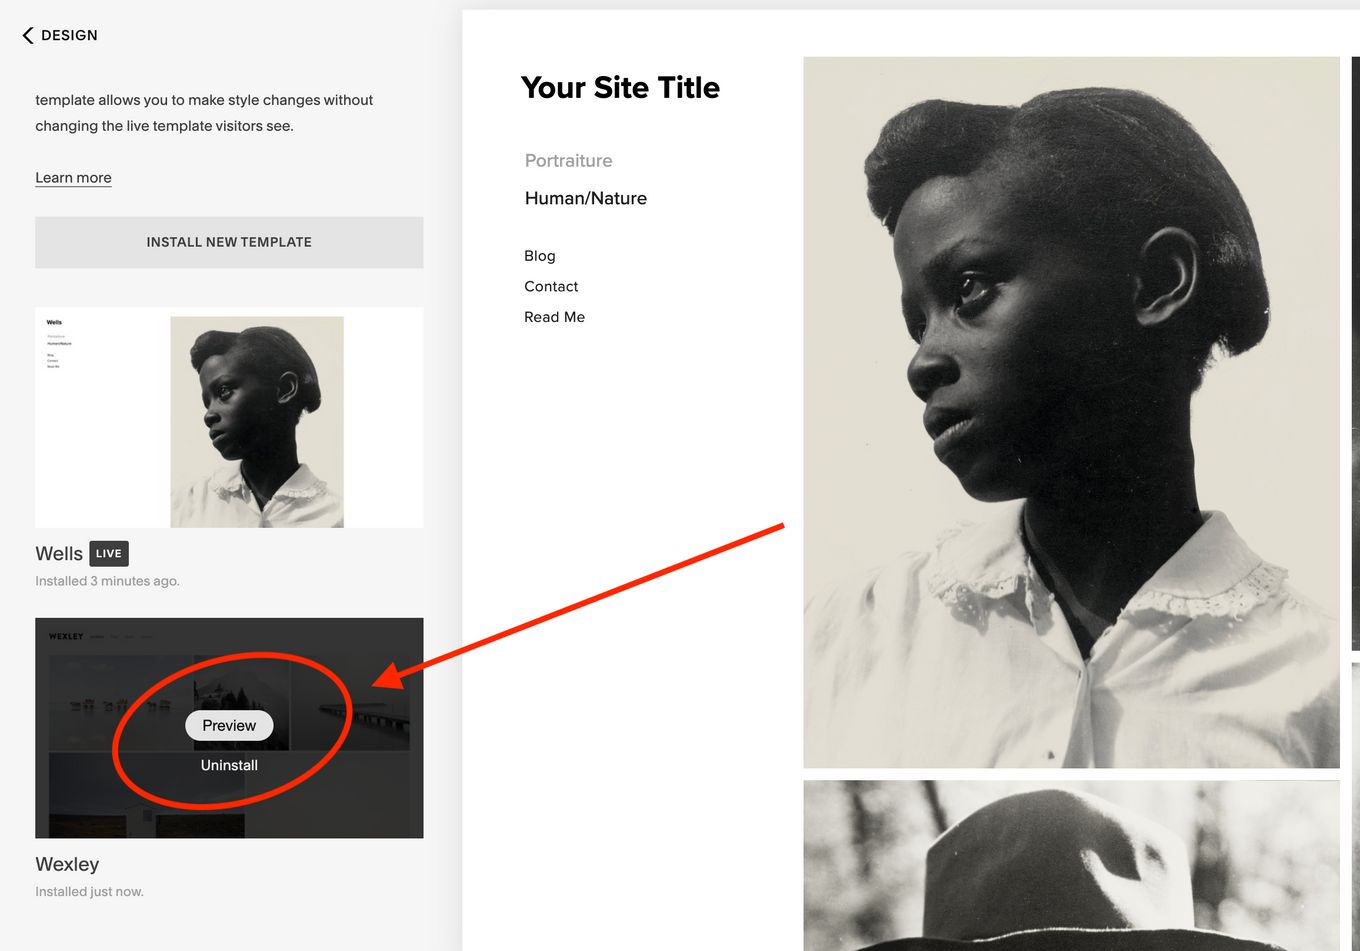
Visit the Home Menu, then click on Design and Template.
For cases where you already have that template on your live site, it is crucial to then set another template live, as discussed in the guide above. Remember, a live template cannot be uninstalled.
Step 2
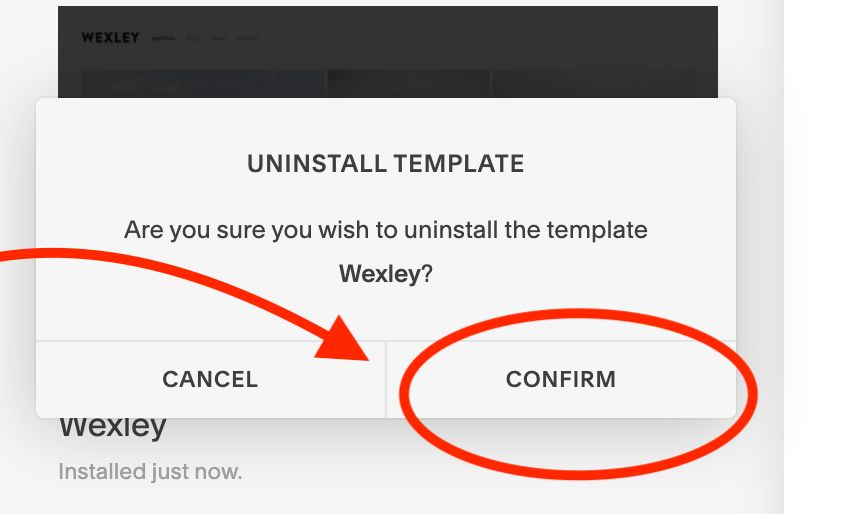
Once on the select template, hover over it and click on Uninstall.
Step 3
You will then get a prompting message. Click Confirm to complete the action.****