One of Mac users’ most common frustrations is finding screenshots on their laptops. If you have ever taken a screenshot on your Mac and it magically vanished, you are not alone.
Keep reading to discover how to find screenshots on Mac. We’ll also discuss the various ways of changing the location of your files to help you solve this problem. Let’s get started.
Where Do Screenshots Go on Mac?
By default, screenshots taken on Mac are saved on your Desktop. They are saved with the date and time indicated. For instance, you should see an image file labeled “Screen Shot [date] at [time].png” pop-up on the desktop.
However, the default location where screenshots go on Mac can be changed in macOS Mojave or later operating systems. That’s why you may not find your screenshot. You may also have so many files on the desktop that you cannot find the screenshot you’ve just taken.
Learn more about taking screenshots on your Mac on Apple.
Below, we explain two ways to find your screenshots on Mac.
2 Easy Ways to Find Screenshots Taken on Mac
These are the methods to access screenshots on Mac that have mysteriously disappeared:
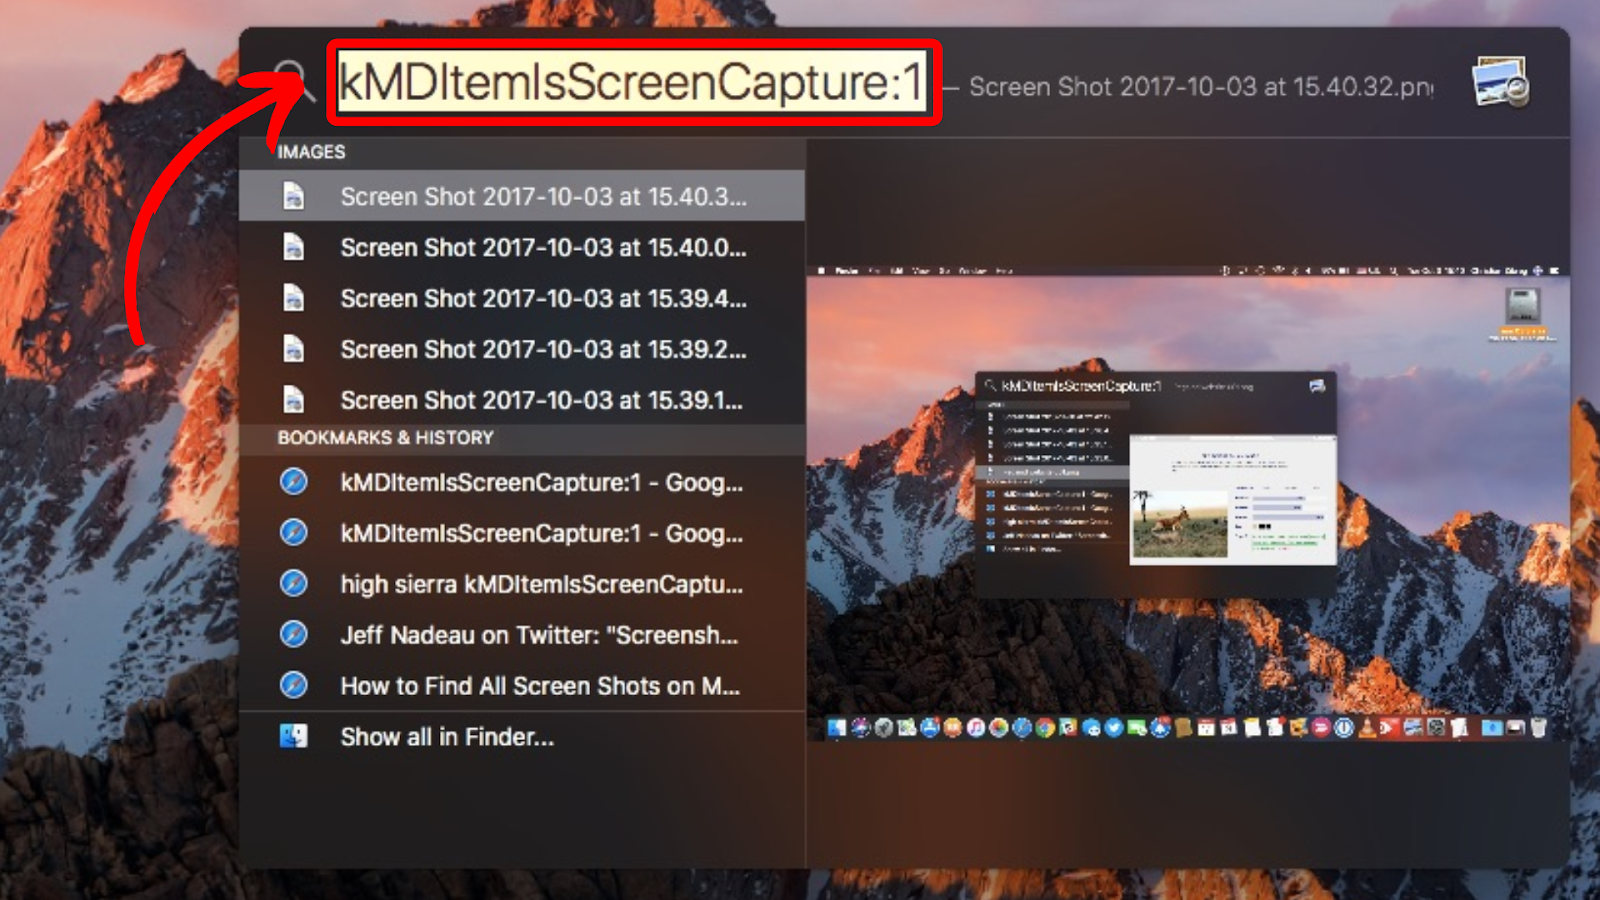
1. Using Spotlight
Here are steps to find screenshots taken on Mac using Spotlight:
- Step 1. Open “Spotlight Search”.
Press “Cmd + Spacebar” to open Spotlight anywhere on your Mac desktop. - Step 2. Type “kMDItemIsScreenCapture:1” in the search field and click “Enter”.
All your screenshots will appear in the spotlight.
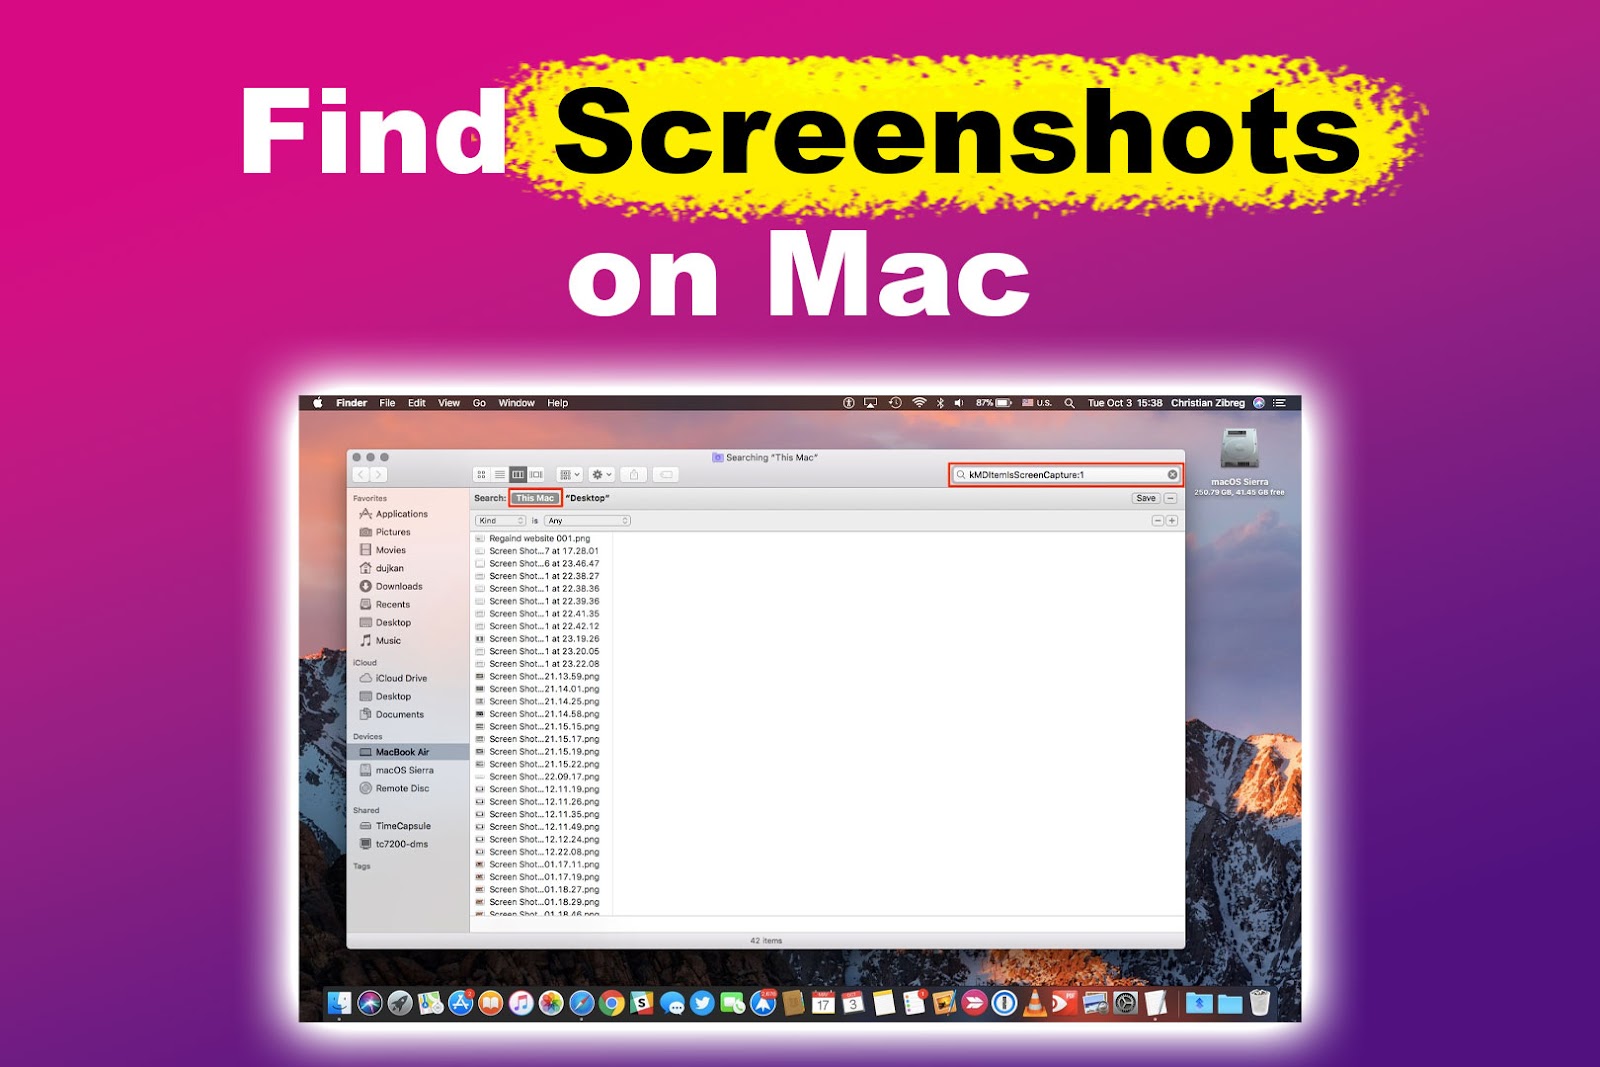
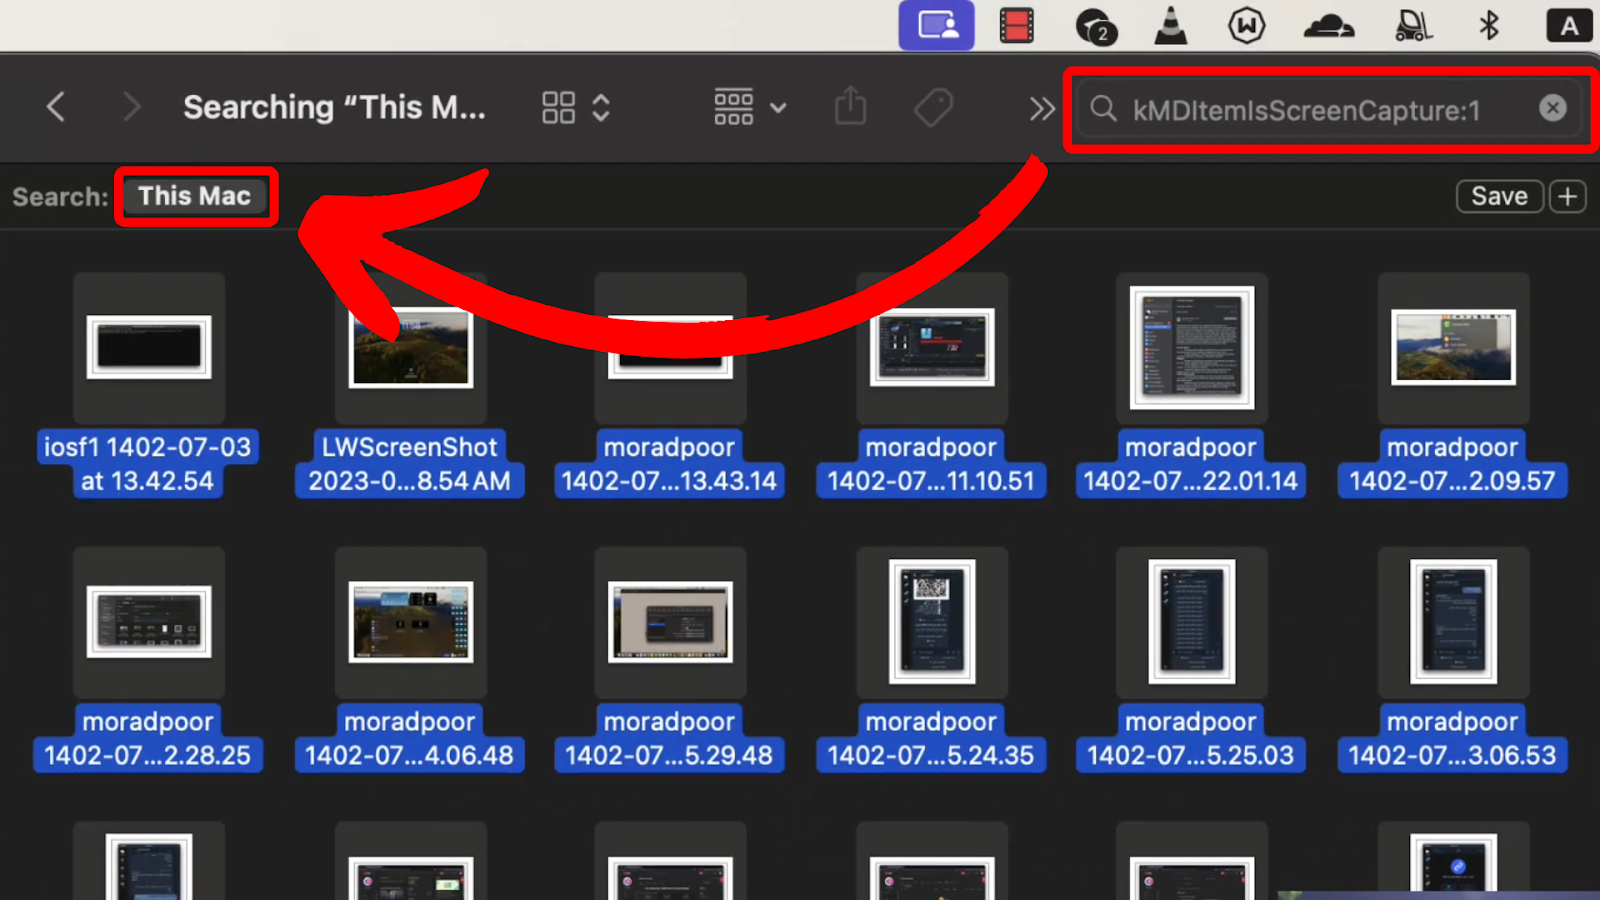
2. Using Finder
Here are simple steps to find screenshots on Mac using Finder:
- Step 1. Open “Finder > File > Find”.
You can also use the shortcut “cmd + f”. - Step 2. Click “This Mac”.
- Step 3. Type “kMDItemIsScreenCapture:1” in the search field.
All screenshots will appear in the results.
If screenshots don’t appear as single images, click on the “screenshot” thumbnail, “right-click > view > as icon”.
Related Post: How to Reverse Image Search on Mac
How to Change Where Screenshots Are Saved on Mac
You can easily change the location where screenshots are saved on Mac to easily retrieve them instead of doing a manual search every time. There are two ways to do this: through the Screenshot App options or the Terminal.
1. Through Screenshot App Options
This alternative is available on macOS Mojave or newer (anything bought or updated after 2018). It provides numerous options for capturing and recording your screen and choosing where you want the files to be saved.
Here are steps to change where screen captures go on Mac using the screenshot command:
- Step 1. Create a new folder on your Mac and label it.
- Step 2. Press “Shift + Command + 5”.
A toolbar will pop up at the bottom of the screen.
- Step 3. Select “Options > Other Location”.
-
Step 4. Select the folder you’ve created and click “Choose”.

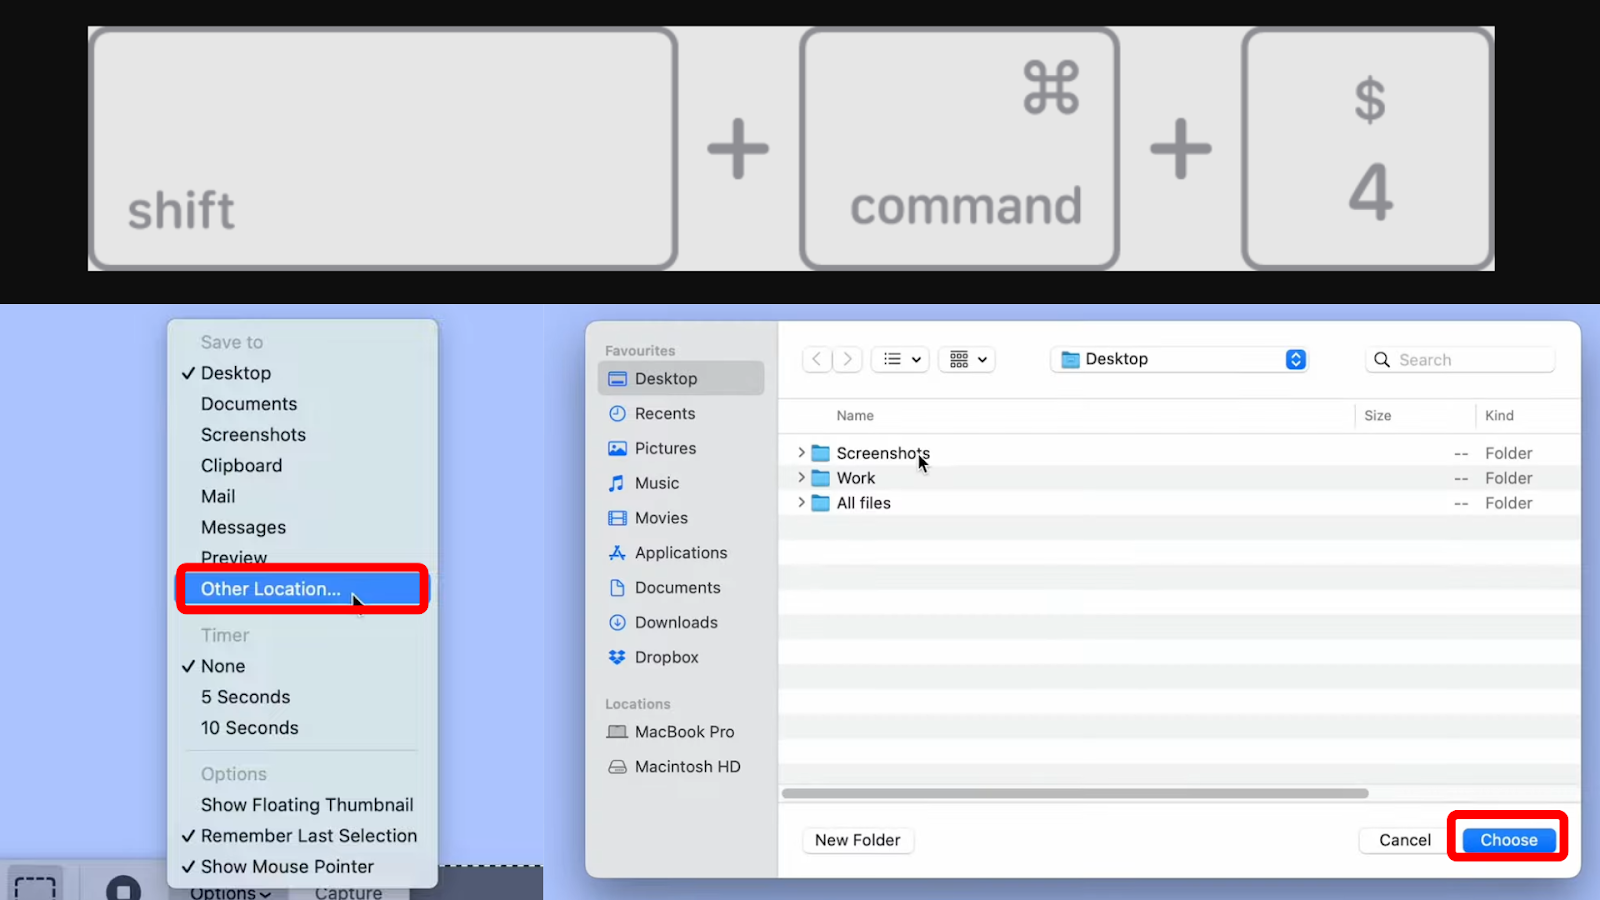
Any screenshots you take from now on will be saved in your new folder.
Learn more about keyboard shortcuts for taking screenshots on Mac on the Apple website.
2. Through Terminal
If you’re using older macOS versions (before macOS Mojave), the easiest way to change where screenshots are saved is to use Terminal commands.
Below are steps to changing the location of your screenshots through Terminal:
- Step 1. Create a new folder on your Mac and label it.
- Step 2. Press “Command + Space” to access the spotlight window.
- Step 3. Type “Terminal” and select the first option.
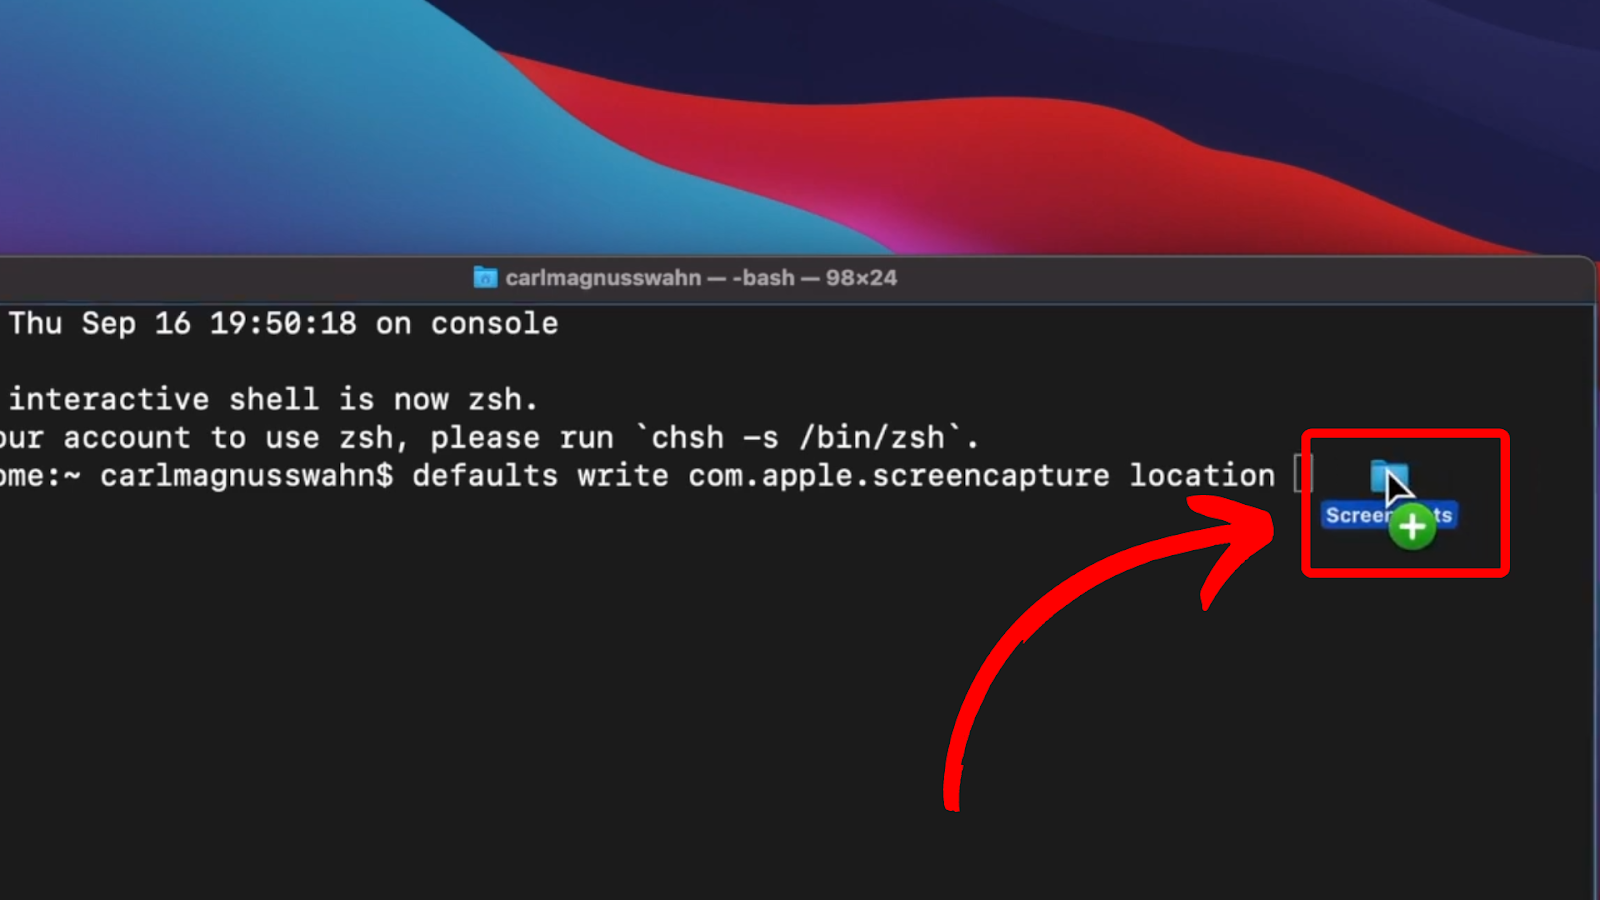
- Step 4. Paste this command in the terminal window that appears:
defaults write com.apple.screencapture location
Important! Leave a space after the “n” in the location. - Step 5. Drag and drop your screenshot folder next to the command.
-
Step 6. Click “Enter”.
Note: If the change doesn’t work immediately, paste the command `killall SystemUIServer` in the terminal to reset the user interface and press “Enter”.
Saving the Screenshots to iCloud
Saving screenshots to iCloud is a great option, especially if you find yourself constantly deleting images that end up being necessary later.
Here are steps to save screenshots to iCloud:
Step 1. Open “Apple Menu > System Settings”
Step 2. Choose “Apple ID > iCloud > iCloud Drive”
Step 3. Toggle “iCloud Drive” and “Desktop & Documents Folders”
Step 4. Click “Done.”
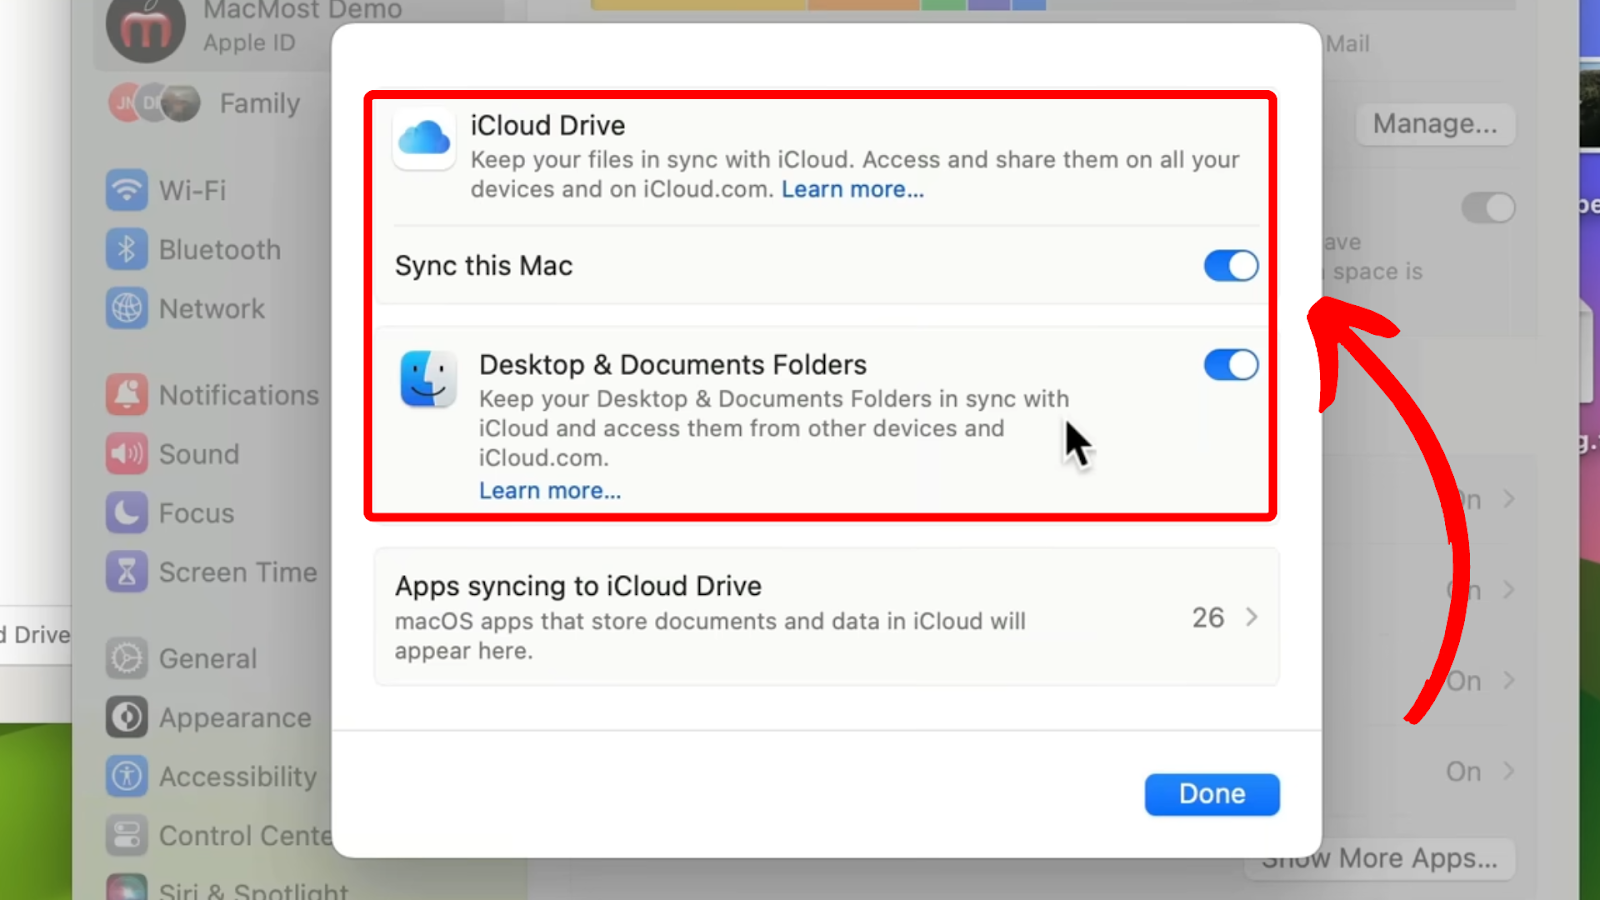
Anything saved under the Desktop and “Documents” folder will be backed up on iCloud. Additionally, screenshots backed up on iCloud are available across all your Apple devices, from iPad to iPhone.
Read more on setting up iCloud on all your devices from Apple.
Can’t Find Screenshots on Mac Problem Fixed!
If you’re having issues accessing screenshots on your laptop, chances are they aren’t getting saved in the default location, the desktop. You can find screenshots on Mac through Spotlight or Finder.
To permanently resolve this problem, change where screenshots go through the Terminal or Screenshot App options. Alternatively, back up your screenshots to iCloud to prevent them from being lost.


