Documentation
fullPage.js for Gutenberg Builder for WordPress
Create beautiful full screen scrolling web sites with WordPress and Gutenberg, fast and simple.

RequirementsRequirements
Requirements- WordPress version should be at least v6.8.
- PHP version should be at least v7.4.
- Gutenberg editor should be active on the WordPress site.
Tutorial VideoTutorial Video
Tutorial Video
How To InstallHow To Install
How To Install- Login to your WordPress Dashboard.
- In your WordPress Admin Menu, go to Plugins > Add Plugin.
- Click on Upload Plugin button found on top left corner of page.
- Click on Browse button. Select the
mcw-fullpage-gutenberg.zipfile of your plugin in your computer, and click Install Now button. - Active the plugin by clicking on Activate Plugin link to work with the plugin.
License KeyLicense Key
License KeyThe license key you obtained by buying the plugin can be entered at WordPress admin panel FullPage settings page.
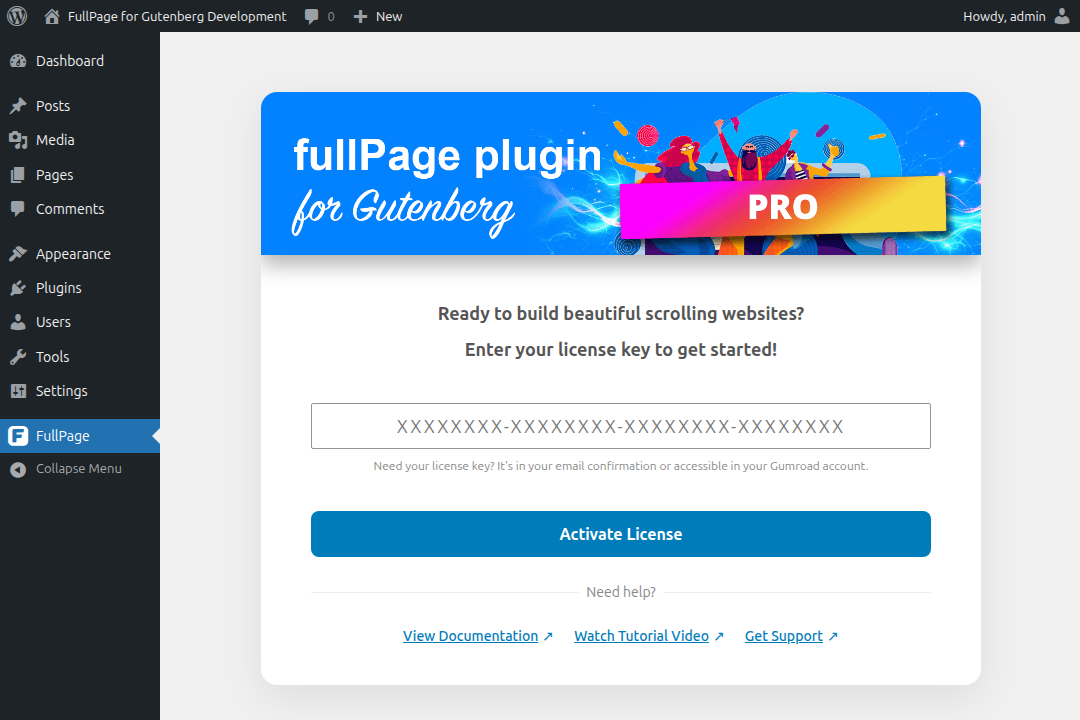
After entering the license, press on Activate License button. This will activate the license.
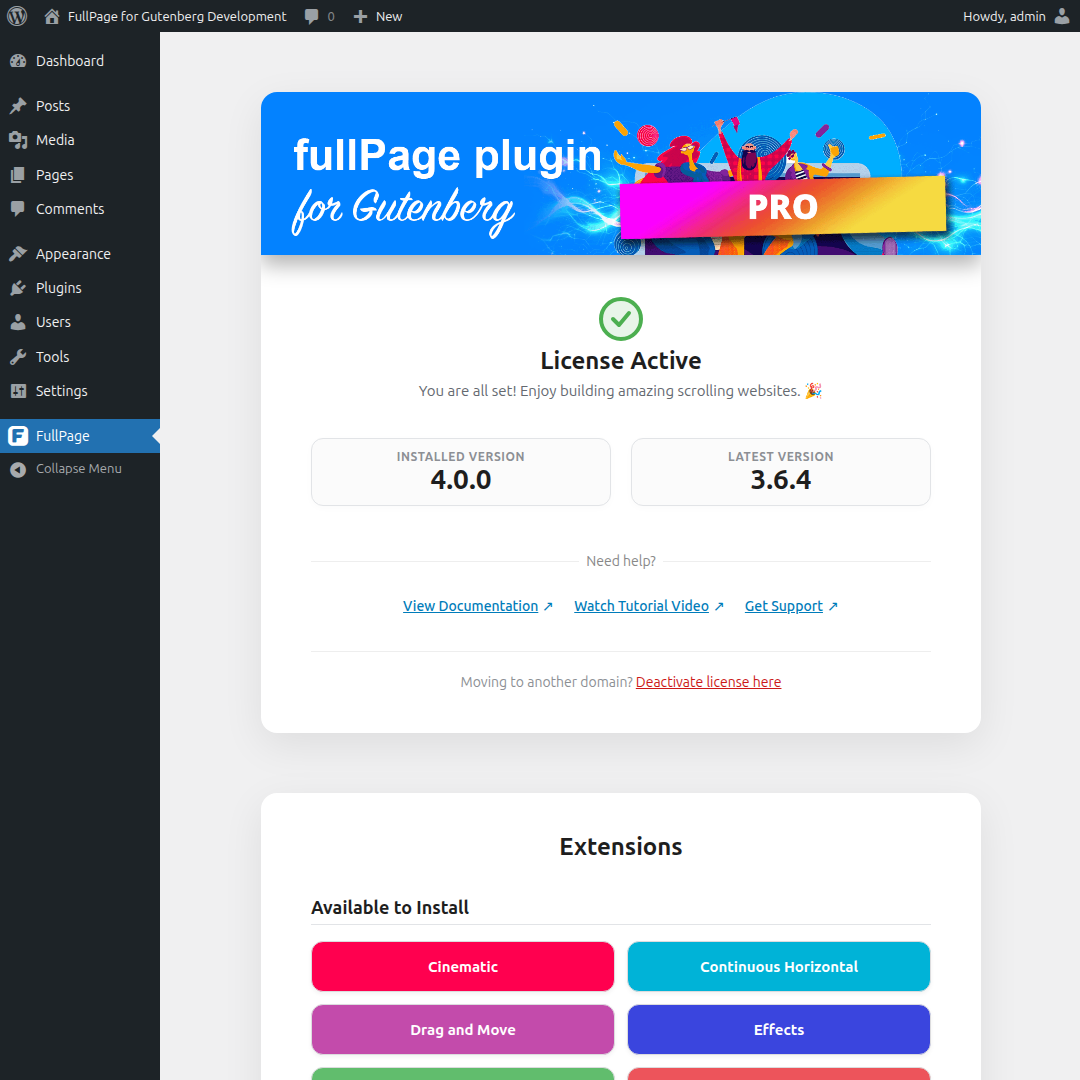
You can use the plugin without any limitations once your license is activated.
License DeactivationLicense Deactivation
License DeactivationIf you want to move your license to another domain, you will need to deactivate your license if activated. You can click the Deactivate link to deactivate your license.
If you don't have access to your site, you can deactivate your license on the deactivation page.
License DashboardLicense Dashboard
License DashboardIf you want to see all your licenses, please visit the dashboard.
Add FullPage Block With GutenbergAdd FullPage Block With Gutenberg
Add FullPage Block With Gutenberg- Create a new post/page or go to the post/page you would like to add the block.
- Find FullPage block on the Gutenberg blocks and add it to the page.
Note: You can add only one FullPage block. You should not add any other blocks to the page (unless you know what you are doing) since only the contents inside FullPage block will be rendered and other content may break the page.
FullPage Setup WizardFullPage Setup Wizard
FullPage Setup WizardThe Setup Wizard walks you through initial options. It appears automatically when you first add a FullPage block, but you can also access it later to adjust your settings.
If you are starting with an empty FullPage Wrapper, the wizard helps you build your page structure:
-
Sections: Choose how many vertical sections (pages) you want to start with.
-
Horizontal Slides: Toggle this on to automatically include a section that contains horizontal slides.
-
Theme Template:
-
Yes: Keeps your theme's header and footer visible. You can provide the "CSS Selector" (like
headeror.site-header) so FullPage knows which parts of your theme to keep fixed or move. -
No: Replaces everything with a clean, empty page dedicated to your FullPage content.
-
-
Navigation Bullets: Enable this to show clickable dots on the side of the screen, helping users see which section they are currently on.
-
Slide Navigation: If you have horizontal slides, you can choose to navigate them using Bullets, Arrows, or Both.
-
Vertical Alignment: Decide if the content inside your sections should be at the Top, Center, or Bottom.
-
Scrollbar & Responsive Mode:
-
Visible Scrollbar: Shows the browser's default scrollbar while keeping the snapping effect.
-
Responsive Mode: If the scrollbar is hidden, you can set a "Breakpoint" (in pixels). Below this screen width, FullPage will turn off and the page will scroll like a normal website.
-
Enable FullPageEnable FullPage
Enable FullPage- Click on FullPage block. You will see its settings in the Gutenberg editor sidebar.
- Toggle Enable FullPage option.
SectionsSections
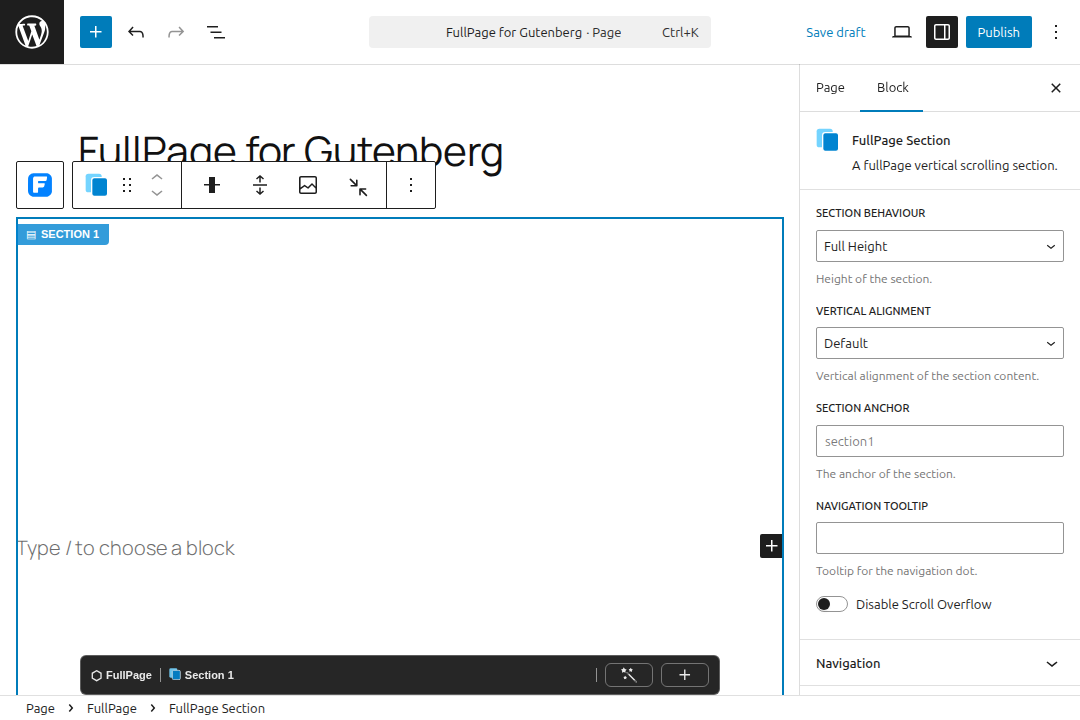
SectionsWhen FullPage block is added to the page, two sections are added by default.
Add SectionsAdd Sections
Add SectionsClick the + icon and select FullPage Section at the bottom of FullPage block.
Remove SectionsRemove Sections
Remove SectionsSelect the section you want to remove and click the More Options menu dots in the block toolbar and click Delete.
Add Section ContentAdd Section Content
Add Section ContentClick inside the FullPage Section block and add blocks inside.
Section OptionsSection Options
Section Options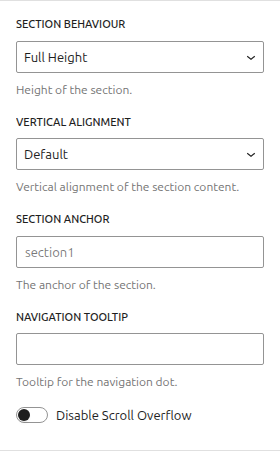
Section BehaviourSection Behaviour
Section BehaviourControls the height behavior of the section.
When Full Height is selected (default), the height of the sections will be full screen.
When Auto Height is selected, the height of the section will take the height defined by your section/slide content.
When Responsive Auto Height is selected, sections will be full screen until the responsive mode gets fired. Then they'll take the size required by their content, which could be bigger or smaller than the viewport. Responsive mode is only enabled when Responsive Width and Responsive Height options are set.
Vertical AlignmentVertical Alignment
Vertical AlignmentSets the vertical alignment of the content per section. Available options are
-
Default (default)
When selected, the value from Vertical Alignment from FullPage block is used.
-
Top
When selected, the content will be aligned to the top of the section.
-
Center
When selected, the content will be aligned to the center of the section.
-
Bottom
When selected, the content will be aligned to the bottom of the section.
Section AnchorSection Anchor
Section AnchorIf you are using FullPage with anchor links for the sections, then you will be able to use anchor links also to navigate directly to a certain slide inside a section.
This would be an example of a link with an anchor: http://yoursite.com/#secondPage (which is the URL you will see once you access to that section manually) Notice the last part of the URL ends in #secondPage, if FullPage Anchor option for that section is set to secondPage.
Note: FullPage Anchor should be a unique ID and should NOT be the same with any anchor ID on the page.
Navigation TooltipNavigation Tooltip
Navigation TooltipSets the tooltip text shown next to the navigation bullet for this section.
Disable Scroll OverflowDisable Scroll Overflow
Disable Scroll OverflowPrevents the in-section scrollbar from being created on this specific section or slide. Use this when Scroll Overflow is enabled globally but you want to opt out here.
Section Background OptionsSection Background Options
Section Background OptionsThese group of options define the background color, background image and background video options for the selected section.
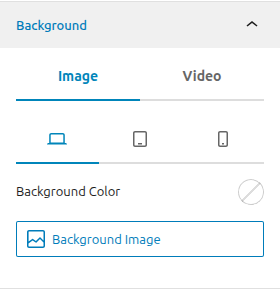
Section Background ColorSection Background Color
Section Background ColorTo choose the background color, click the color circle and choose the desired section background color. To clear the color, click the revert arrow icon next to the color circle. You can adjust the background color of the section for different devices.
Section Background ImageSection Background Image
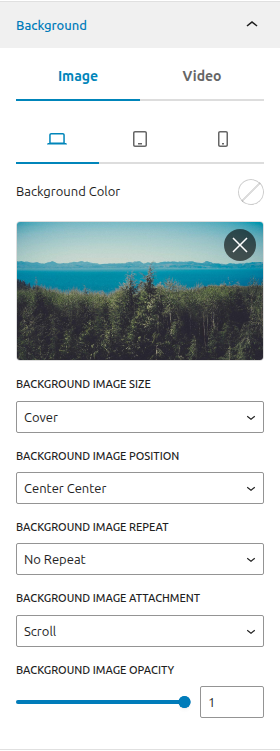
Section Background ImageTo choose the background image, click the Background Image button and select the image from media library. You can adjust the background image of the section for different devices.
Click the options button to choose the background image options.
Section Background VideoSection Background Video
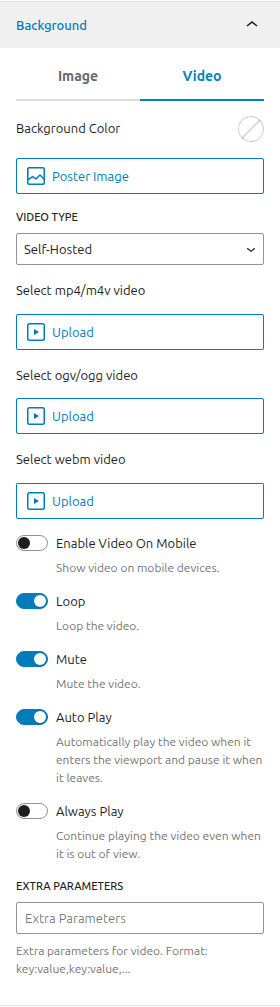
Section Background VideoTo choose the background video, click the Video tab to see the video parameters. The background color indicates the video overlay color. Poster image is the image that is shown while the video is downloaded until playing the video.
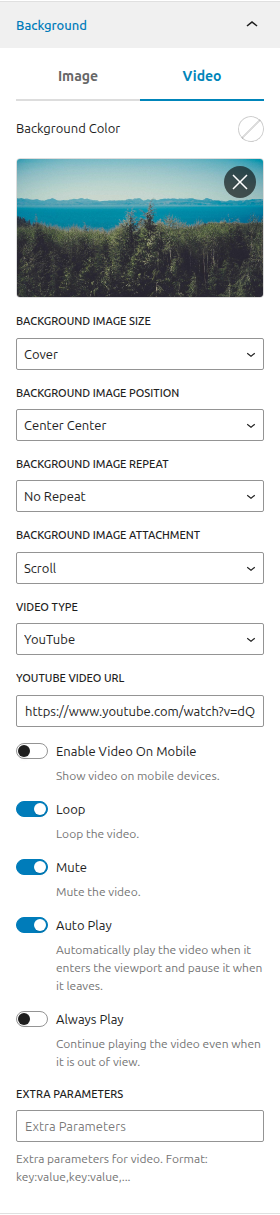
Enable Enable Video On Mobile option to play the video on mobile devices. If this option is disabled, the video will NOT be loaded on mobile devices. Only poster image will be displayed. Disabling this option is the best practice.
To loop the video, enable Loop option.
To mute the video sound, enable Mute option.
When Auto Play option is enabled, the video will be played as soon as it's playable.
When Always Play option is enabled, the video plays even if the section is not active. When disabled, the video only plays if the section is active, otherwise the video is paused.
To use a YouTube video, paste the video link into the YouTube Video URL option.
To use self-hosted videos, select Self-Hosted from the Video Type option and pick the mp4, ogv/ogg (optional), and webm (optional) videos from the media library.
Section Navigation OptionsSection Navigation Options
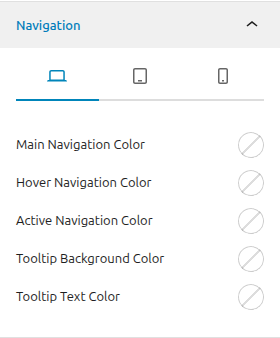
Section Navigation OptionsYou can change the (left/right) navigation bullet colors for the active using these options. This will override the navigation colors only on the selected section.
SlidesSlides
SlidesSlides are the horizontal FullPage elements inside sections.
Add SlidesAdd Slides
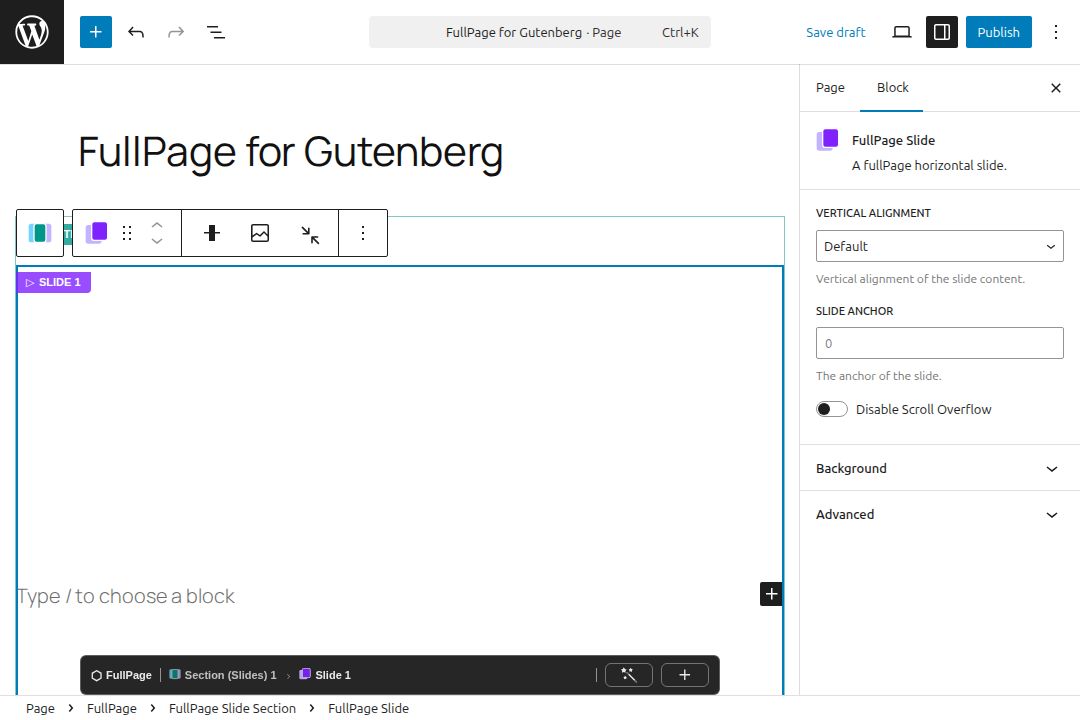
Add SlidesClick the + icon and select FullPage Slide Section at the bottom of FullPage block.
Remove SlidesRemove Slides
Remove SlidesSelect the slide you want to remove and click the More Options menu dots in the block toolbar and click Delete.
Add Slide ContentAdd Slide Content
Add Slide ContentClick inside the FullPage Slide Section block and add blocks inside.
Slide OptionsSlide Options
Slide Options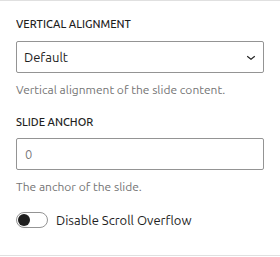
Vertical AlignmentVertical Alignment
Vertical AlignmentSets the vertical alignment of the content per slide. Available options are
-
Default (default)
When selected, the value from Vertical Alignment from FullPage block is used.
-
Top
When selected, the content will be aligned to the top of the slide.
-
Center
When selected, the content will be aligned to the center of the slide.
-
Bottom
When selected, the content will be aligned to the bottom of the slide.
Slide AnchorSlide Anchor
Slide AnchorIf a custom anchor is needed for a slide instead of its index, you can enter the new slide anchor to Slide Anchor option. If set, the anchor of the slide will be #section_anchor/slide_anchor. If this option is left empty, the anchor of the slide will be #section_anchor/2 where 2 is the slide number.
Slide Background OptionsSlide Background Options
Slide Background OptionsFor Slide Background options, see this section.
Slide Navigation OptionsSlide Navigation Options
Slide Navigation OptionsFor Slide Navigation options, see this section.
NavigationNavigation
NavigationNavigation section includes the options about section and slide navigation.
Section NavigationSection Navigation
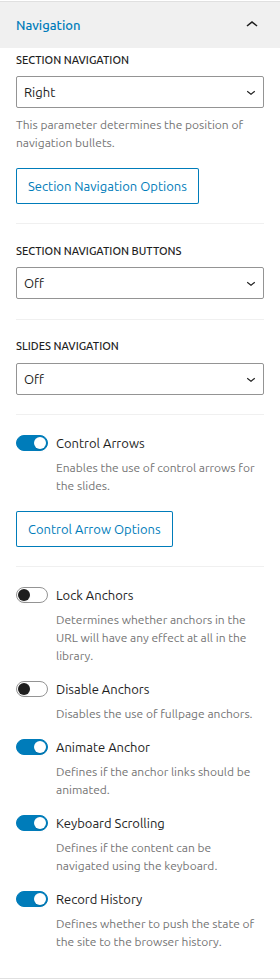
Section NavigationSection navigation includes the options of the navigation bar made up of small circles (bullets).
-
Off: The navigation bullets for the section navigation will be hidden.
-
Left: The navigation bullets for the section navigation will be shown at the left side of the page.
-
Right: The navigation bullets for the section navigation will be shown at the right side of the page.
When navigation bullets are active, Section Navigation Options button will be activated. You can access the navigation options by clicking this button.
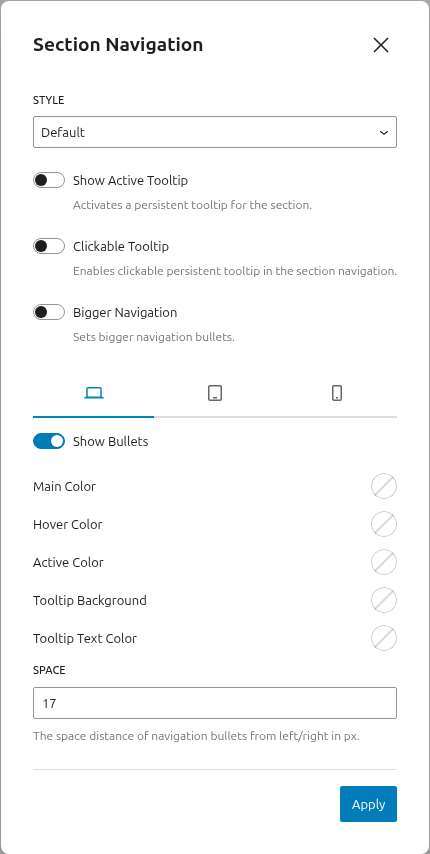
- Style: You can select the navigation bullet style with this option.
- Show Active Tooltip: When this option is enabled, the tooltip for the active section will be visible next to the navigation bullet.
- Clickable Tooltip: When this option is enabled, the tooltip clicks also go to the corresponding section.
- Bigger Navigation: You can enable this option to see bigger navigation bullets.
Responsive options can be configured for the selected device (desktop, tablet and mobile devices).
- Show Bullets: You can show or hide the navigation bullets with this option responsively.
- Main Color: You can choose the primary color of the bullets.
- Hover Color: You can choose the primary color of the bullets when mouse is on the bullets.
- Active Color: You can choose the primary color when the section bullet is active.
- Tooltip Background Color: You can choose the background of the tooltips.
- Tooltip Text Color: You can choose the text color of the tooltips.
- Space: You can specify the distance from left/right of navigation bullets using this option.
Section Navigation ButtonsSection Navigation Buttons
Section Navigation ButtonsSection navigation buttons option adds previous/next buttons to the page.
When Left or Right is selected for Section Navigation Buttons, Section Navigation Buttons Options will be activated.
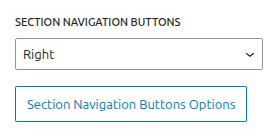
You can access the navigation buttons options when you click on Section Navigation Buttons Options.
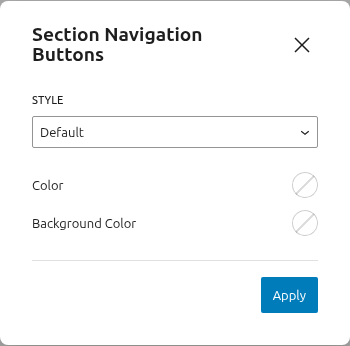
- Color: You can choose the color of the buttons.
- Background Color: You can choose the background color of the buttons.
Slide NavigationSlide Navigation
Slide NavigationSlide navigation includes the options of the navigation bar made up of small circles (bullets) for slides.
- Off: The navigation bullets for the slide navigation will be hidden.
- Top: The navigation bullets for the slide navigation will be shown at the top side of the section.
- Bottom: The navigation bullets for the slide navigation will be shown at the bottom side of the section.
When bullets are active, Slide Navigation Options button will be activated.
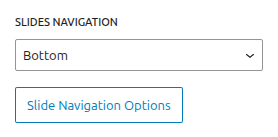
You can access the bullet options when you click on Slide Navigation Options button.
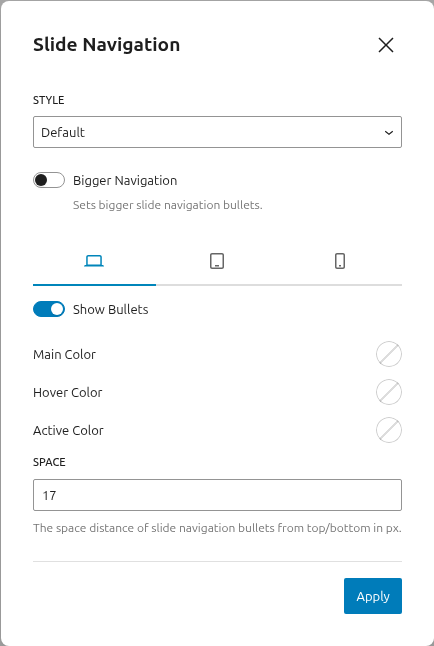
- Style: You can select the navigation bullet style with this option.
- Bigger Navigation: You can enable this option to see bigger navigation bullets.
Responsive options can be configured for the selected device (desktop, tablet and mobile).
- Show Bullets: You can show or hide the slide navigation bullets with this option responsively.
- Main Color: You can choose the primary color of the bullets.
- Hover Color: You can choose the primary color of the bullets when mouse is on the bullets.
- Active Color: You can choose the primary color when the slide bullet is active.
- Space: You can specify the distance from top/bottom of slide navigation bullets using this option.
Control ArrowsControl Arrows
Control ArrowsEnables the left/right control arrows so users can move between slides.
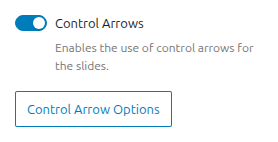
You can access the bullet options when you click on Control Arrow Settings button.
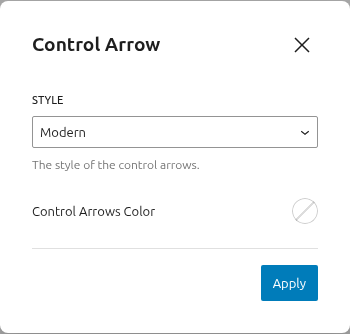
- Style: The style of the control arrows.
- Color: The color of the control arrows.
Lock AnchorsLock Anchors
Lock AnchorsControls whether URL anchors have any effect on fullPage navigation.
Disable AnchorsDisable Anchors
Disable AnchorsTurns off all section anchors so URLs no longer update as the user scrolls.
Animate AnchorAnimate Anchor
Animate AnchorControls the initial load behavior when the URL contains an anchor (#). When enabled, the page animates to the target section; when disabled, it loads directly there.
Keyboard ScrollingKeyboard Scrolling
Keyboard ScrollingEnables keyboard navigation between sections and slides.
Record HistoryRecord History
Record HistoryPushes each section/slide to the browser history, so the back and forward buttons move the user between them. When disabled, the URL still updates but the browser history stays put. Automatically disabled when Auto Scrolling is off.
ScrollingScrolling
ScrollingScrolling section includes the options about scrolling mechanism.

Auto ScrollingAuto Scrolling
Auto ScrollingSwitches between automatic scrolling and the browser's native scrolling. It also affects how sections fit in the viewport on tablets and mobile phones.
Fit To SectionFit To Section
Fit To SectionControls whether sections snap to fill the viewport. When enabled, the active section always takes the full screen. When disabled, users can stop halfway between sections.
Scroll BarScroll Bar
Scroll BarEnables a visible scrollbar alongside fullPage. Auto Scrolling still works, users can also drag the scrollbar, and fullPage snaps to the nearest section when scrolling stops.
Scroll OverflowScroll Overflow
Scroll OverflowAdds an in-section scrollbar when a section or slide's content is taller than the viewport.
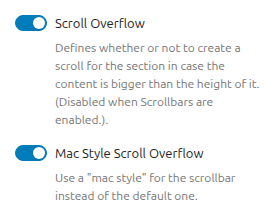
Mac Style Scroll Overflow option enables a "mac style" for the scrollbar instead of the default one.
Skip Intermediate ItemsSkip Intermediate Items
Skip Intermediate ItemsSkips the scroll animation when navigating between non-consecutive vertical sections or horizontal slides.
Big Sections DestinationBig Sections Destination
Big Sections DestinationControls how fullPage scrolls to a section that's taller than the viewport. By default, it scrolls to the top when coming from above, and to the bottom when coming from below. Possible values are Default, Top and Bottom.
Continuous VerticalContinuous Vertical
Continuous VerticalWraps vertical scrolling so the last section continues into the first, and scrolling up from the first section jumps to the last.
Loop BottomLoop Bottom
Loop BottomWraps scrolling down from the last section back to the first.
Loop TopLoop Top
Loop TopWraps scrolling up from the first section back to the last.
Loop SlidesLoop Slides
Loop SlidesWraps horizontal slide navigation so the last slide continues to the first and vice versa.
EasingEasing
EasingSets the transition effect used for vertical and horizontal scrolling, as either a CSS3 or a JS transition.
When CSS Easing option is enabled, CSS3 transition animations are used. It is highly recommended to use CSS3 easing options.
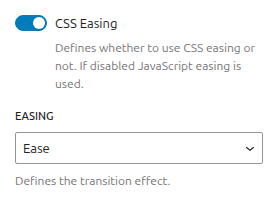
When CSS Easing option is disabled, JavaScript transition animations are used.
Scrolling SpeedScrolling Speed
Scrolling SpeedSpeed in milliseconds for the scrolling transitions.
DesignDesign
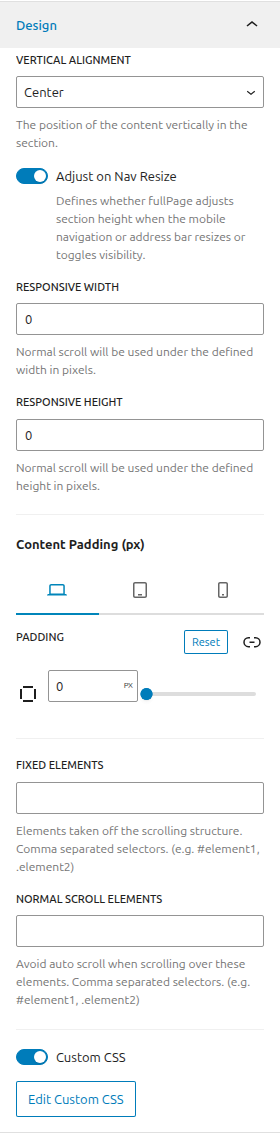
DesignDesign section includes options about the elements of fullpage.
Vertical AlignmentVertical Alignment
Vertical AlignmentSets the vertical position of the content within sections and slides.
Adjust on Nav ResizeAdjust on Nav Resize
Adjust on Nav ResizeDefines whether to adjust section height when the mobile navigation or address bar resizes or toggles visibility. If disabled, sections may not remain full-height when the bar shrinks or hides.
Responsive WidthResponsive Width
Responsive WidthA normal scroll will be used under the defined width in pixels. A class fp-responsive is added to the body tag in case the user wants to use it for their own responsive CSS. For example, if set to 900, whenever the browser's width is less than 900 the plugin will scroll like a normal site.
Responsive HeightResponsive Height
Responsive HeightA normal scroll will be used under the defined height in pixels. A class fp-responsive is added to the body tag in case the user wants to use it for their own responsive CSS. For example, if set to 900, whenever the browser's height is less than 900 the plugin will scroll like a normal site.
Content PaddingContent Padding
Content PaddingSets the padding inside sections and slides.
Fixed ElementsFixed Elements
Fixed ElementsTakes elements off the scrolling structure so they can stay fixed when the CSS3 option is in use. Accepts a string of JavaScript selectors for those elements (for example, #element1, .element2).
Normal Scroll ElementsNormal Scroll Elements
Normal Scroll ElementsIf you want to avoid the auto scroll when scrolling over some elements, this is the option you need to use. (useful for maps, scrolling elements etc.) It requires a string with the JavaScript selectors for those elements. (For example: #element1, .element2). This option should not be applied to any section/slide element itself.
Custom CSSCustom CSS
Custom CSSYou can add your custom CSS.
EventsEvents
EventsEvents section includes JavaScript events for the plugin. Each event executes the provided code snippet when the event is fired.
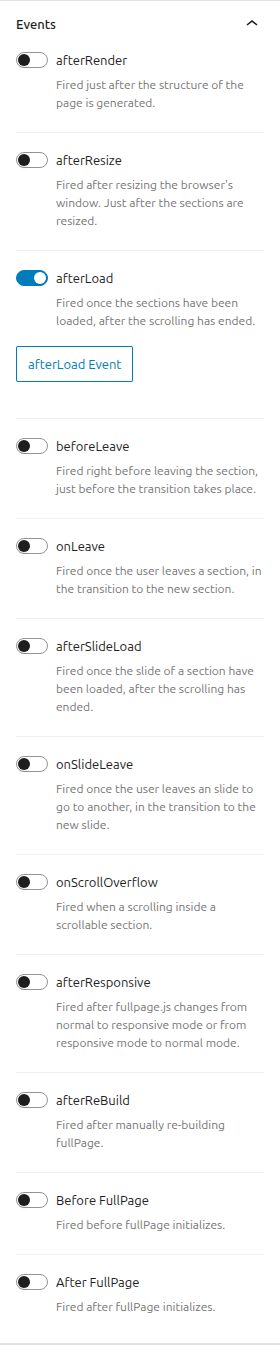
When a user clicks on the "Add Event" button, a modal will open to add and modify the selected event.
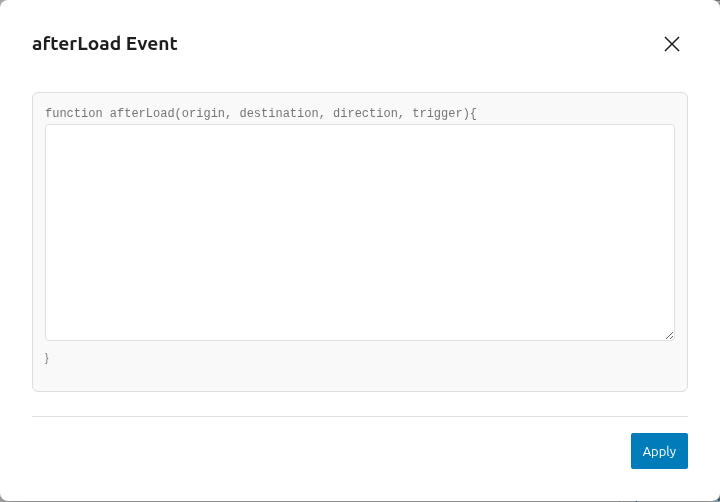
afterRenderafterRender
afterRenderFires right after the page structure is generated. Use this for initializing other plugins or any code that needs the DOM to be ready, since fullPage rewrites the DOM during setup.
afterResizeafterResize
afterResizeFires after the browser window is resized, right after the sections have been resized.
afterLoadafterLoad
afterLoadFires once the sections have finished loading and scrolling has ended.
beforeLeavebeforeLeave
beforeLeaveFires right before leaving a section, just before the transition takes place. Returning false cancels the move.
onLeaveonLeave
onLeaveFires as the user leaves a section, during the transition to the new one. Returning false cancels the move.
afterSlideLoadafterSlideLoad
afterSlideLoadFires once a slide inside a section has finished loading and scrolling has ended.
onSlideLeaveonSlideLeave
onSlideLeaveFires as the user leaves a slide, during the transition to the next one. Returning false cancels the move.
onScrollOverflowonScrollOverflow
onScrollOverflowFires while scrolling inside a scrollable section, when Scroll Overflow is enabled.
afterResponsiveafterResponsive
afterResponsiveFires whenever fullPage switches between normal and responsive mode.
afterReBuildafterReBuild
afterReBuildFires after fullPage is manually rebuilt via fullpage_api.reBuild().
Before FullPageBefore FullPage
Before FullPageFires right before fullpage.js initializes.
After FullPageAfter FullPage
After FullPageFires right after fullpage.js initializes.
ExtensionsExtensions
ExtensionsExtensions section includes FullPage Extension options. The extensions can be purchased on FullPage Extensions page.
Note: These options are only available if at least one extension is purchased. The plugin is not bundled with these extensions.
Note: After you purchase an extension, the extension can be installed using your extension license key and used without activation. Please note that, there is no deactivation or domain change for extensions.
Installing The ExtensionInstalling The Extension
Installing The Extension- Go to FullPage settings page. You will see extension list.
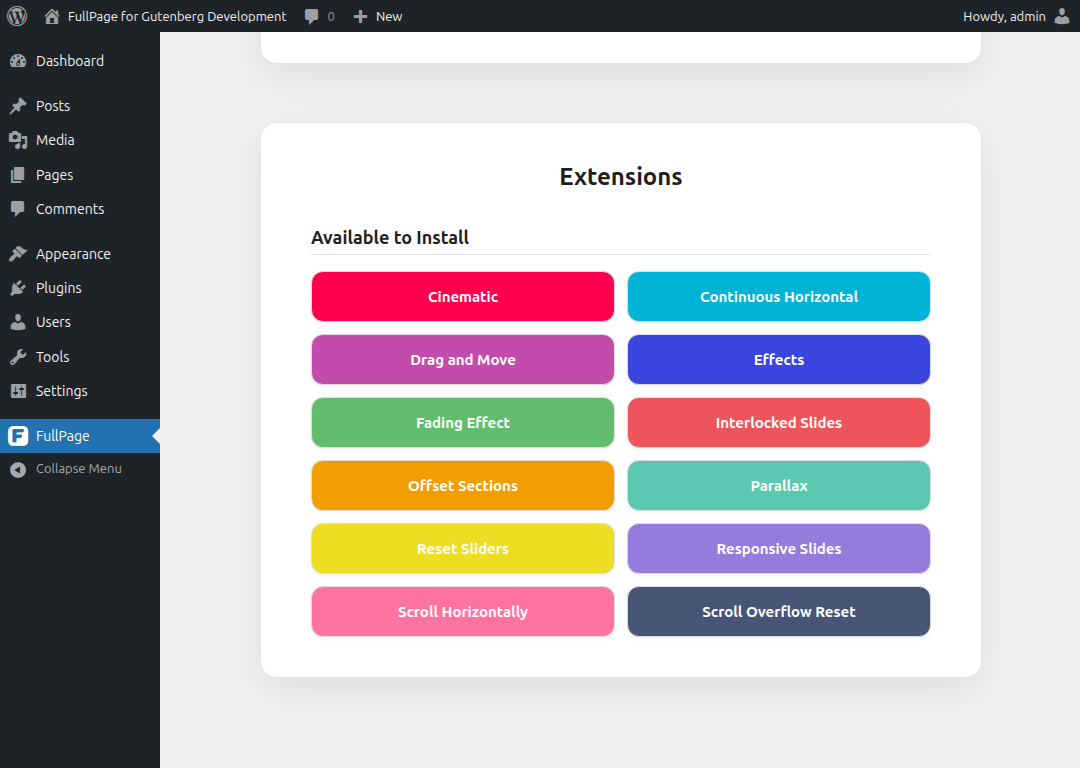
-
Select the extension you want to install.
-
Enter your License Key you've received via email upon the purchase for the corresponding extension.
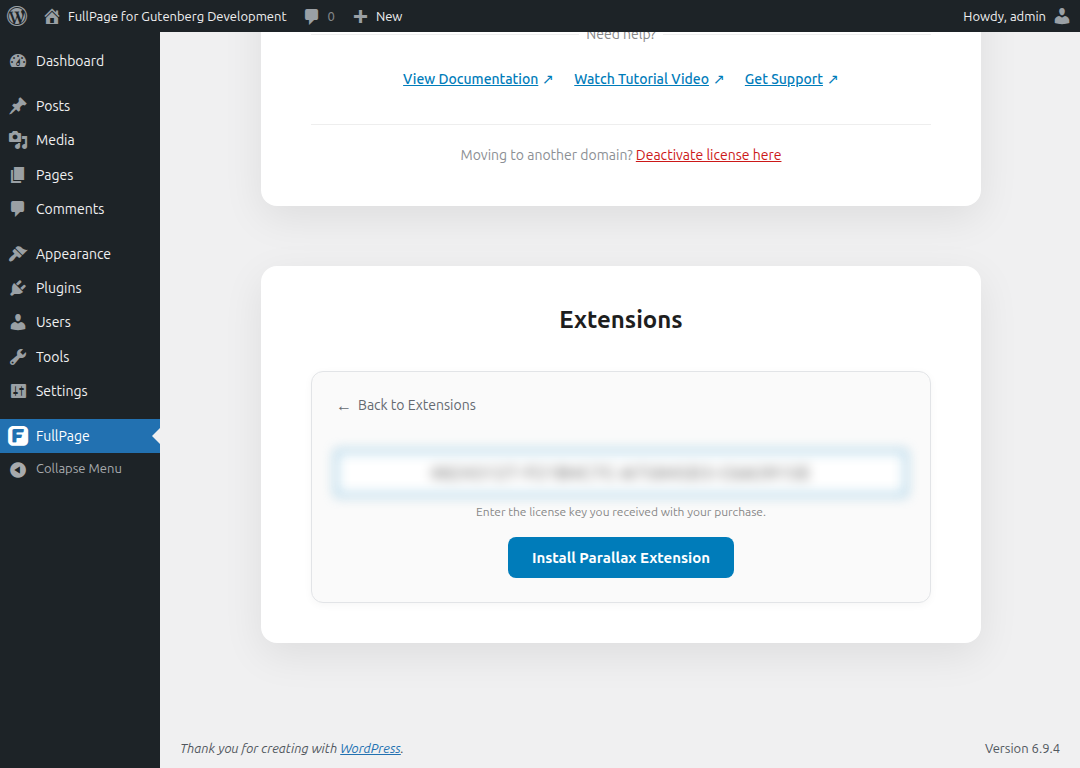
- Click on Install Extension button.
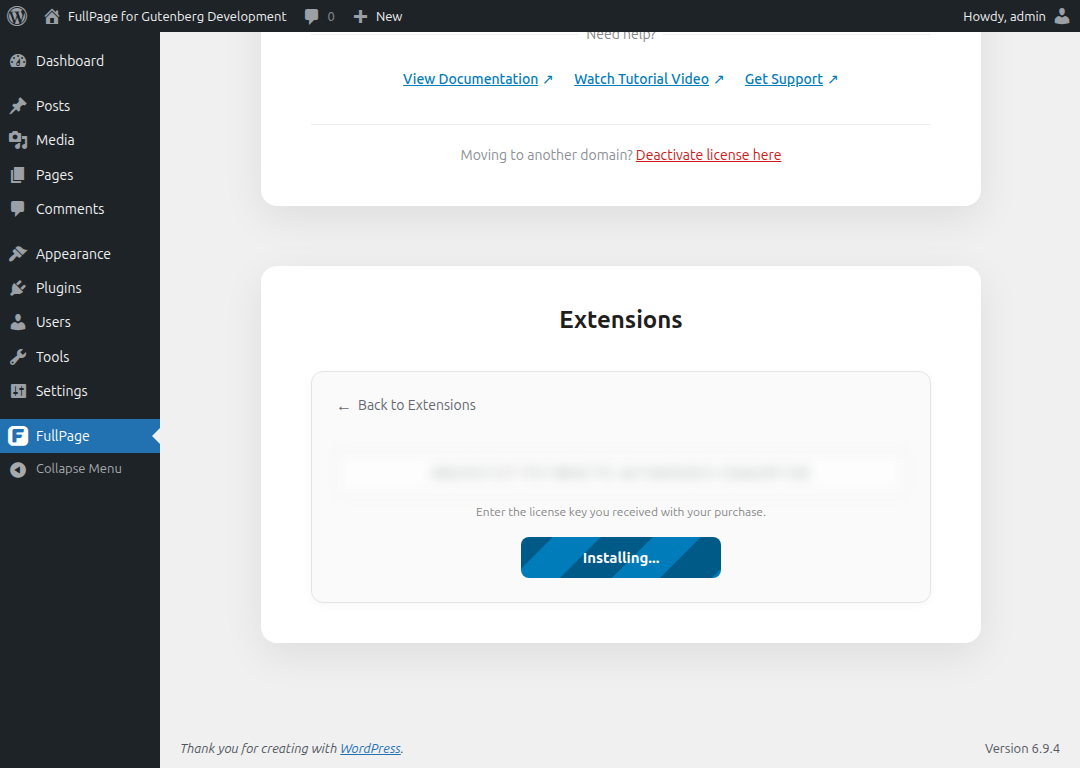
- After a successfull installation, the page will refresh and the extension plugin should be installed.
Activating The ExtensionActivating The Extension
Activating The ExtensionWhen you purchase an extension, you will need to activate your extension license for a domain. Please note that, there is no deactivation or domain change for extensions.
You can use the extension without activating it on a domain (for example, a staging/development domain). When a non-activated extension is used on a domain, a red box will appear but it will be removed upon activation.
If you are on a staging/development domain, please ignore that message and do not activate for the development domain. The extension domain cannot be changed (no deactivation) and once activated, refund for the extension would not be possible. Once moved to the production domain, you can activate it and the red box will be disappeared automatically.
If this is the first time you are using the extension (hence the extension license is not activated), you will see a yellow warning box about the activation process after installing the extension plugin.
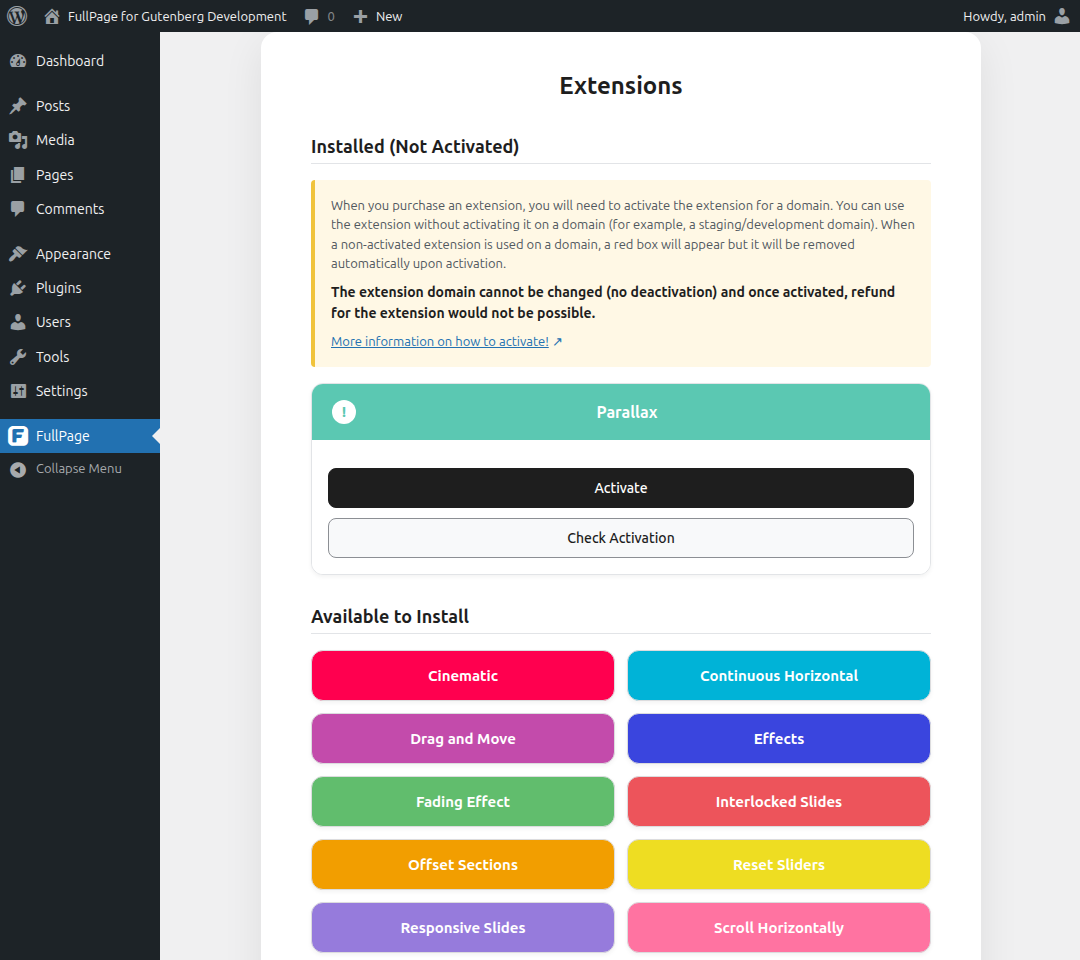
If you are on the production domain and you want to activate your license, click on Activate button and follow the steps on the activation page.
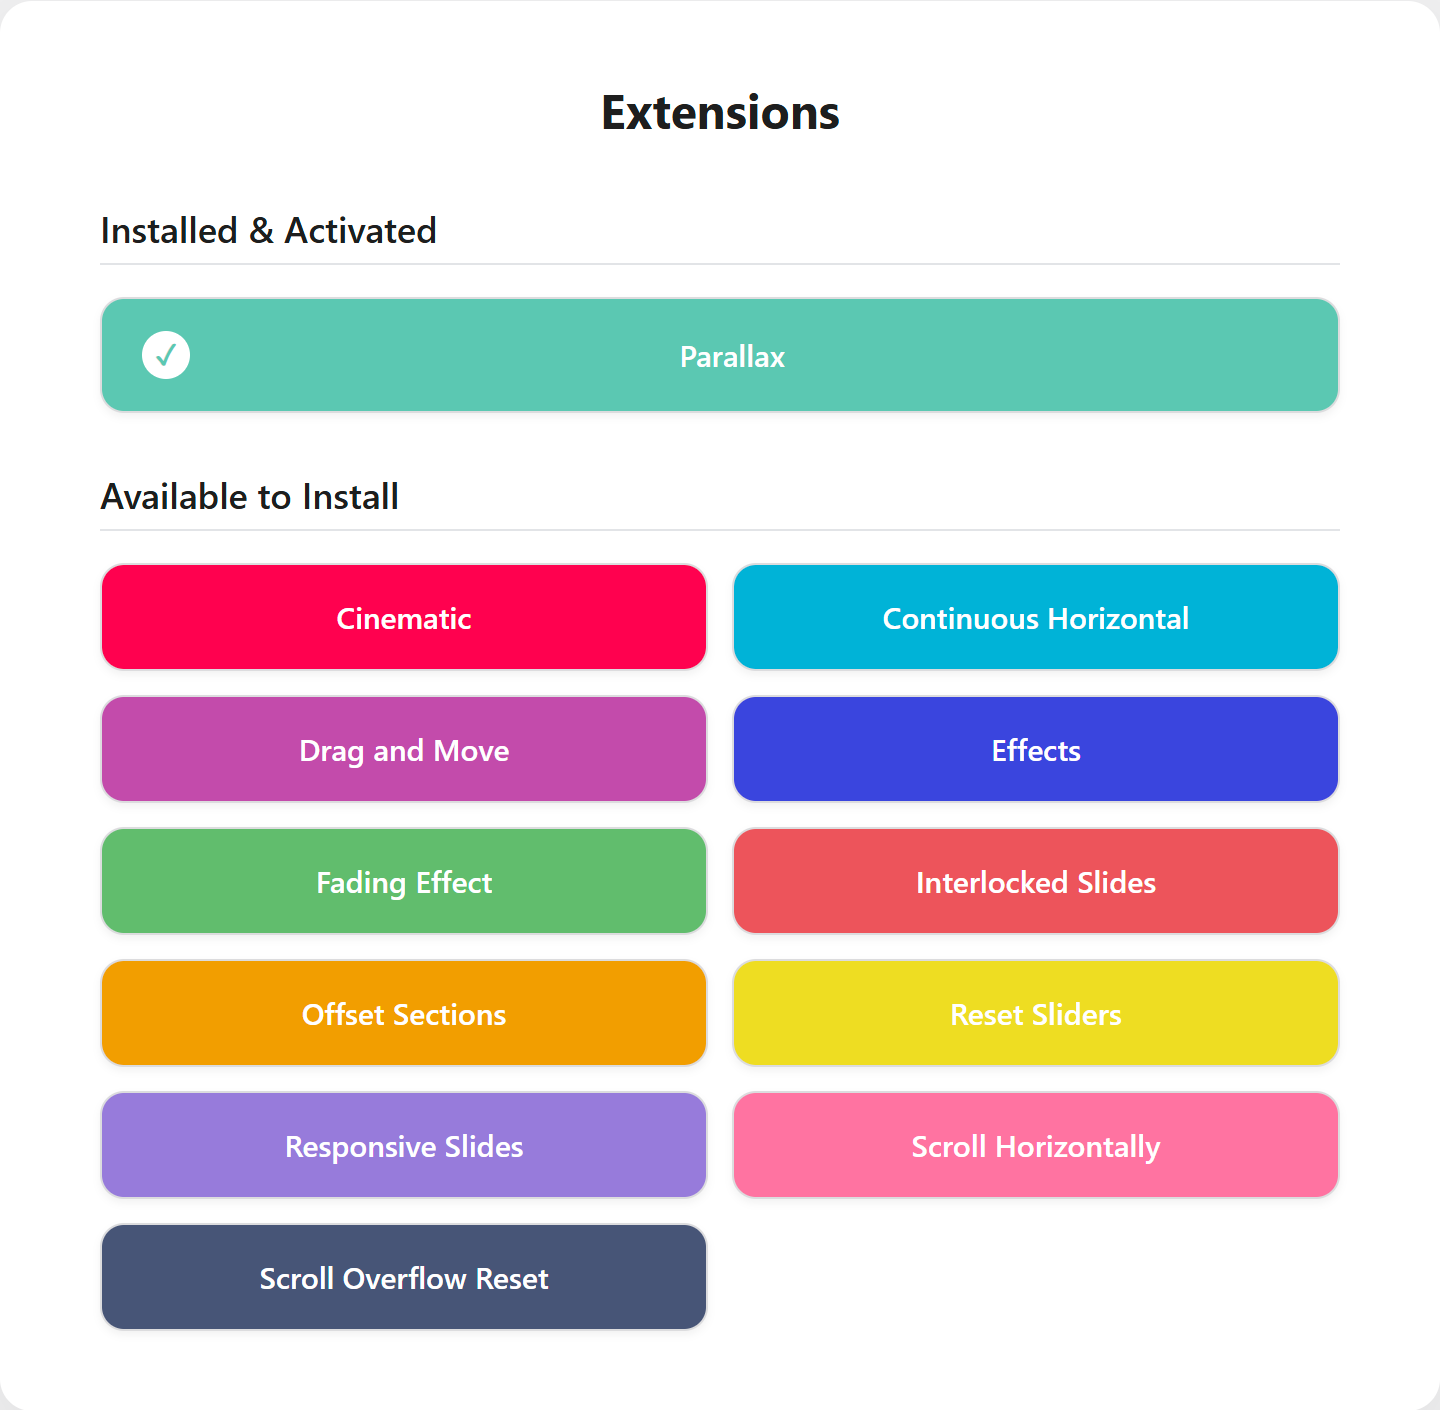
Once the activation process is completed, click on Check Activation button and the extension should be activated. The activation key is fetched automatically.
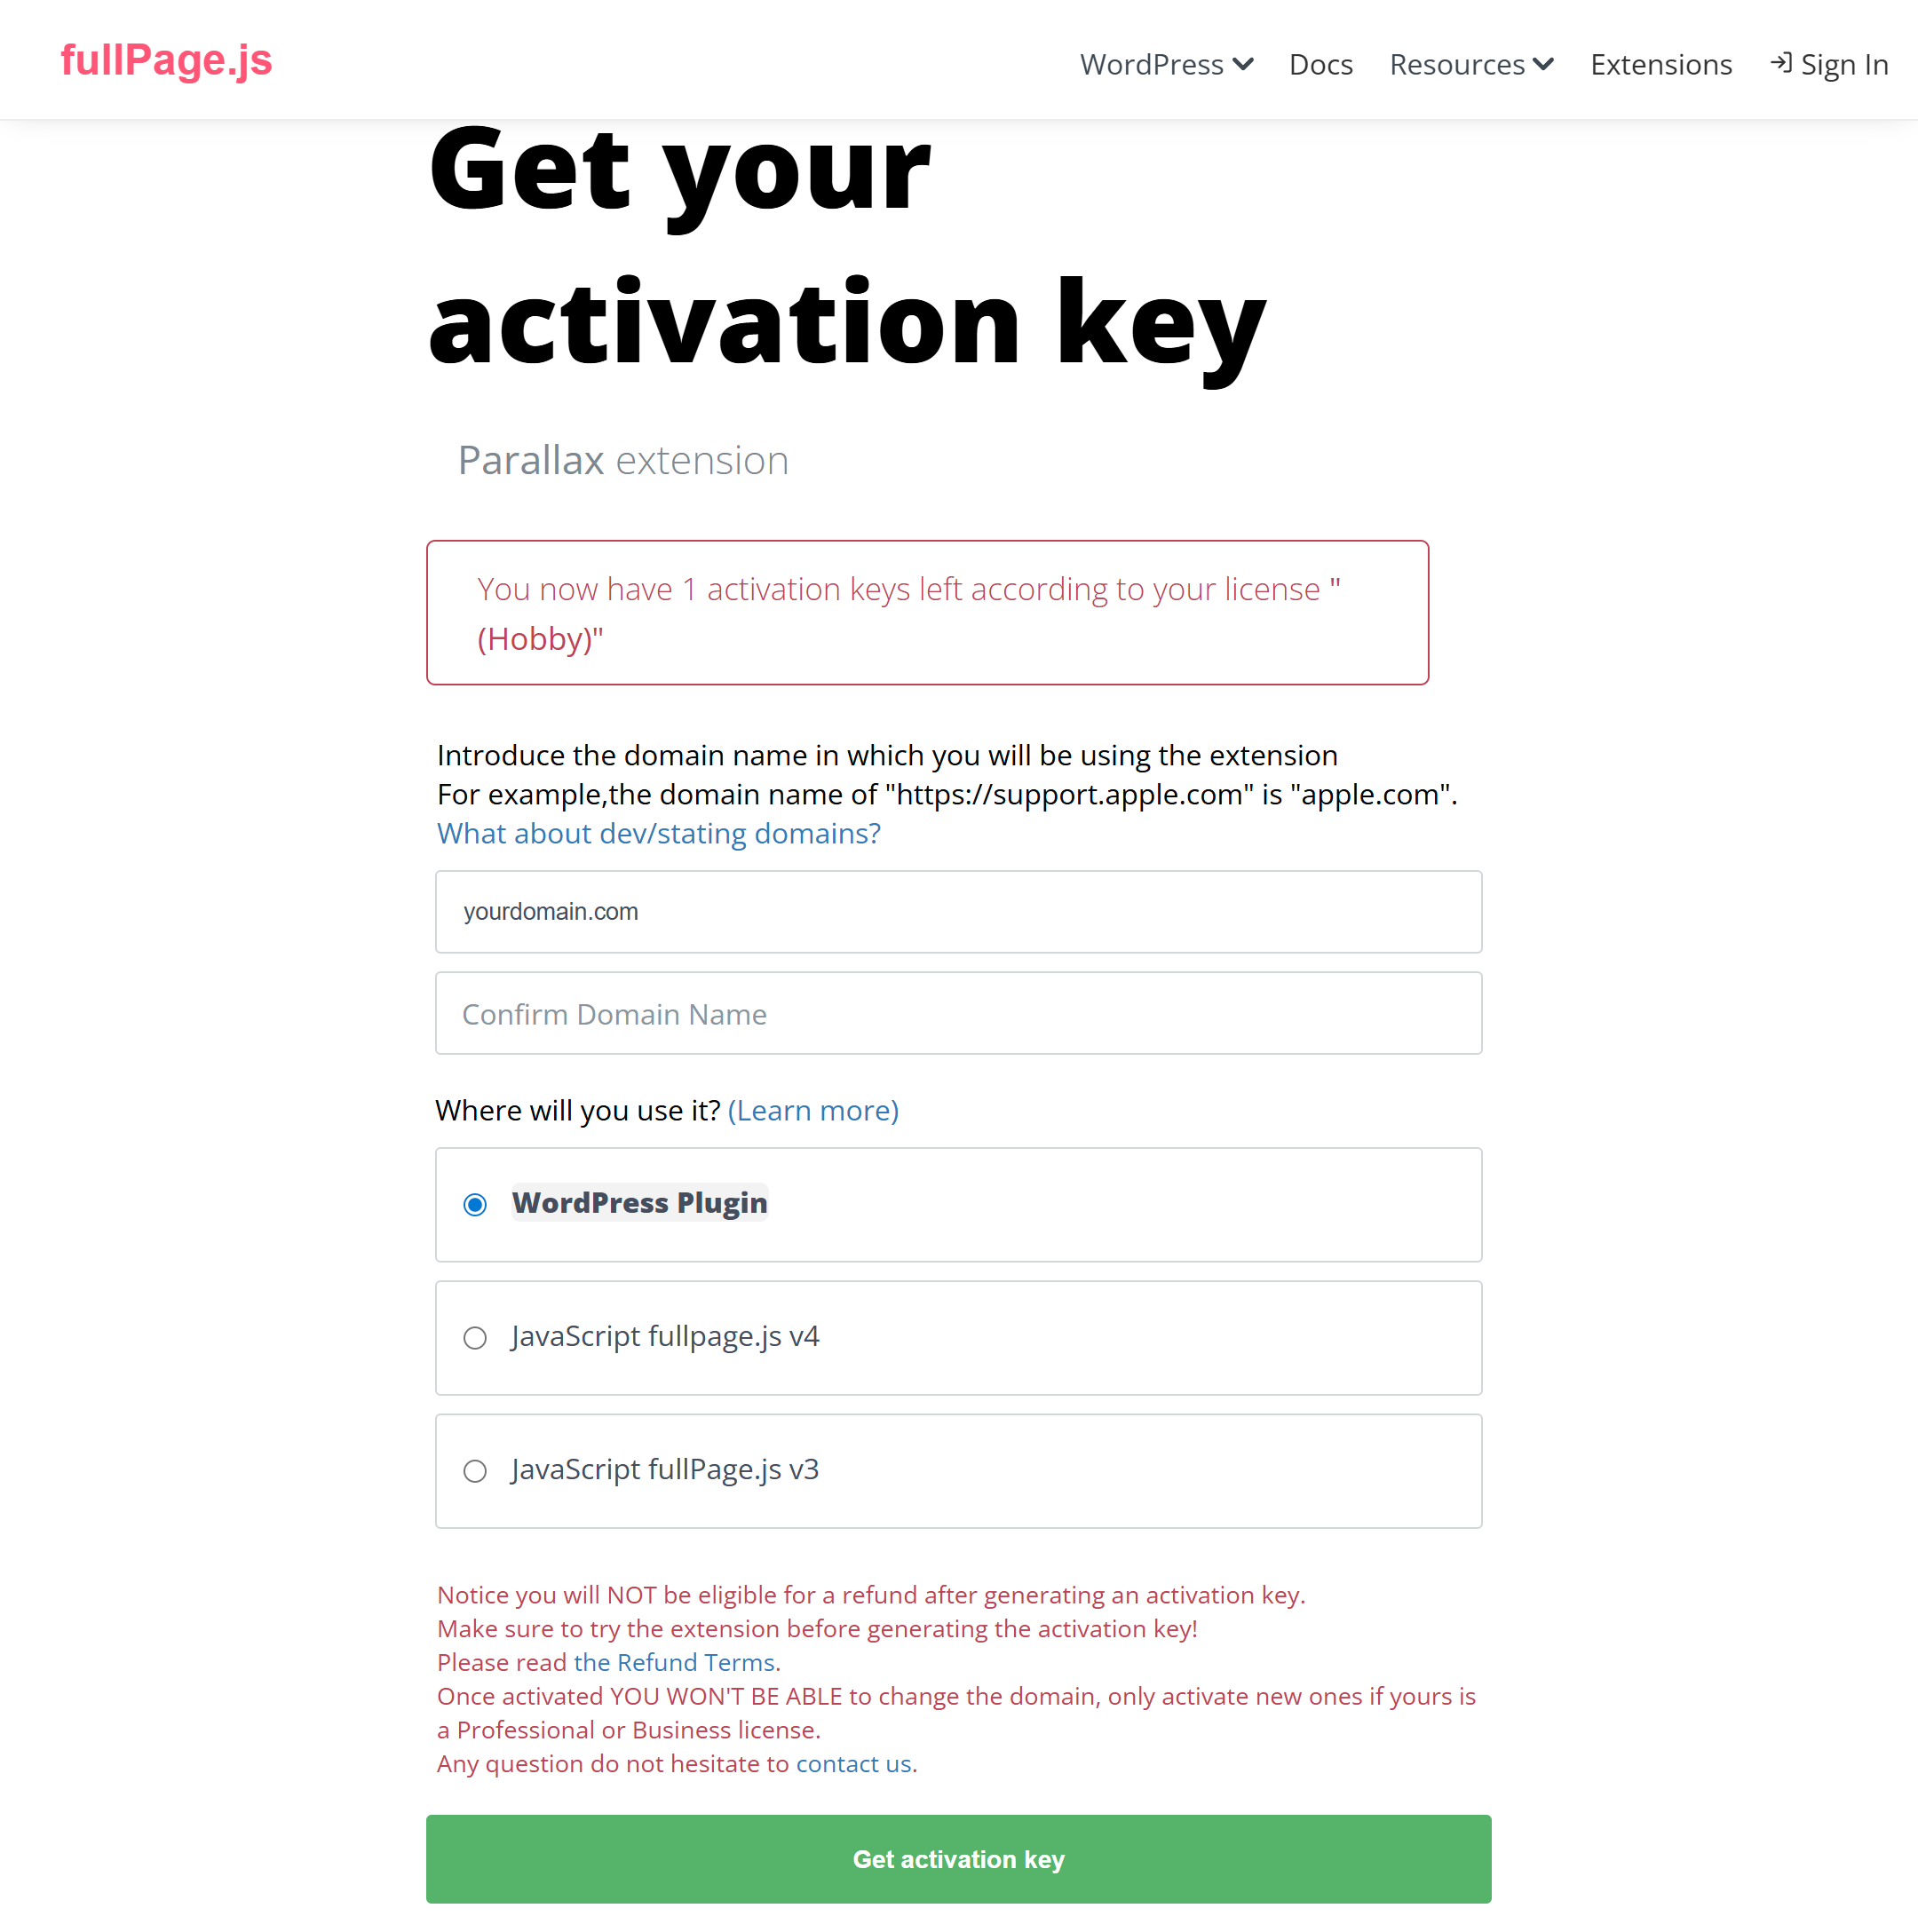
If you don't like the automatic activation process and you want to manually activate your license, go to the activation web site and follow the on-screen steps to choose your extension and enter your License Key you've received via email upon the purchase.
Using The ExtensionUsing The Extension
Using The ExtensionAfter the extension is installed,
-
Enable Enable Extensions option under Extensions tab of FullPage options.
-
You should see the extension. Enable the corresponding extension and adjust its option(s) as suitable.

Removing the ExtensionRemoving the Extension
Removing the ExtensionTo remove the extension, go to your Plugins page and Deactivate/Delete the extension plugin.
CustomizationsCustomizations
Customizations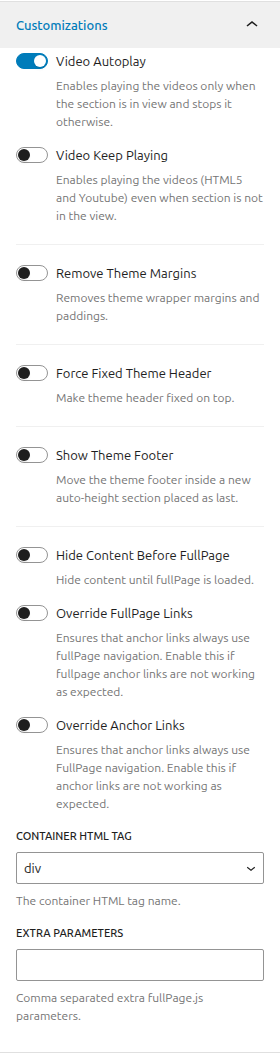
Video AutoplayVideo Autoplay
Video AutoplayPlays videos inside sections/slides only while the section is in view, and pauses them on leave.
Video Keep Playing option will make the videos play all the time, even if the section/slide is not in the view.
Remove Theme MarginsRemove Theme Margins
Remove Theme MarginsStrips the page wrapper margins so the FullPage block can fill the full viewport width.
Force Fixed Theme HeaderForce Fixed Theme Header
Force Fixed Theme Header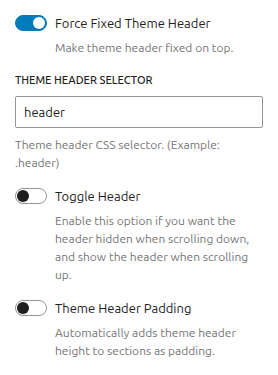
Pins the theme header to the top of the page and adjusts section content to account for it.
Theme Header Selector option is required as a JavaScript/CSS selector.
Toggle Header option enables header toggle, which the header is hidden when scrolling down, and the header is shown when scrolling up.
Theme Header Padding option sets the section header paddings with respect to header height.
Show Theme FooterShow Theme Footer
Show Theme Footer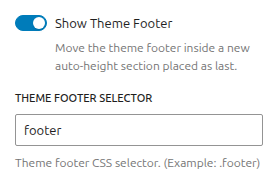
Moves the theme footer into a new auto-height section appended as the last section.
Theme Footer Selector option is required as a JavaScript selector.
Hide Content Before FullPageHide Content Before FullPage
Hide Content Before FullPageWhen this option is enabled, an empty content will be shown before FullPage is loaded. The content is shown after FullPage is loaded and enabled.
Override FullPage LinksOverride FullPage Links
Override FullPage LinksForces anchor links to use fullPage navigation. Enable this if fullpage anchor links aren't working as expected.
Override Anchor LinksOverride Anchor Links
Override Anchor LinksForces regular anchor links to use fullPage navigation. Enable this if anchor links aren't working as expected.
Container HTML tagContainer HTML tag
Container HTML tagChanges the container's HTML tag to the one you pick.
Extra ParametersExtra Parameters
Extra ParametersIf needed, any extra fullpage.js parameters can be used.
Extended SettingsExtended Settings
Extended Settings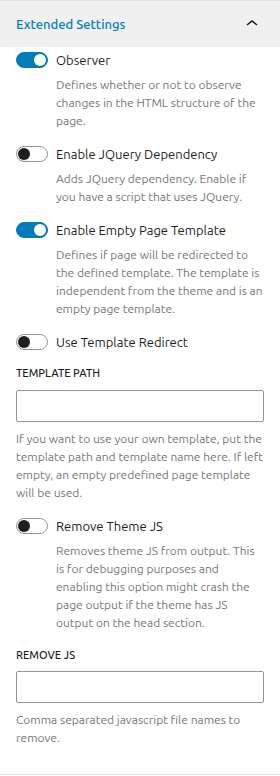
ObserverObserver
ObserverWatches for changes to the page's HTML structure and re-initializes fullPage when they happen.
Enable JQuery DependencyEnable JQuery Dependency
Enable JQuery DependencyFullPage does not depend on jQuery. But if you want to load jQuery on the page, such as for events, enable this option.
Enable Empty Page TemplateEnable Empty Page Template
Enable Empty Page Template
By default, FullPage for Gutenberg ships with an empty page template, and this option is enabled. When FullPage is enabled, an empty page with no theme dependency is loaded.
Disable it if you want to load your theme template instead, the theme's header and footer will load alongside FullPage. You might need some CSS and JavaScript knowledge to adjust how the page behaves.
Use Template RedirectUse Template Redirect
Use Template RedirectControls whether the template is redirected or included. When enabled, the template is redirected; when disabled, it is included. Try both to see which works best for your theme. Only available when Empty Page Template is used.
Template PathTemplate Path
Template PathYou can provide your own template, such as a modified version of the theme template. If you want to use your own template, put the template path here. If left empty, the empty predefined page template will be used.
Remove Theme JSRemove Theme JS
Remove Theme JSStrips theme JavaScript files from the output. Be aware, this can break the page if the theme outputs JS in the head.
Enable this option if you want to remove theme JavaScript files, on necessary cases such as conflicts between theme and FullPage. Enabling this option is not recommended on production environments, and is used for debugging purposes.
Remove JSRemove JS
Remove JSRemoves the specified JavaScript files from the output. Be aware, this can break the page. List the JavaScript file names separated by commas.
FAQFAQ
FAQCan I move my license to another server?Can I move my license to another server?
Can I move my license to another server?Yes, you can! You can deactivate your license on your old server and use the same license on your new server. Please see License Key section for more information.
How can I deactivate my license if I don't have access to my site?How can I deactivate my license if I don't have access to my site?
How can I deactivate my license if I don't have access to my site?You can manage your licenses on the dashboard.
Alternatively, you can deactivate your license on the deactivation page. You will need the domain of your site, your license key and your email you used to purchase the plugin.
How can I generate the invoice for the plugin?How can I generate the invoice for the plugin?
How can I generate the invoice for the plugin?You would have received an email from Gumroad that shows the plugin license key as well as an Invoice button. You can generate your invoice by clicking on that button.
I cannot see extensions even if I installed the Extensions plugin!I cannot see extensions even if I installed the Extensions plugin!
I cannot see extensions even if I installed the Extensions plugin!FullPage extensions can be purchased separately and is not available with the plugin out-of-the-box. If you haven't purchased any extension, you don't need to use/activate the extensions plugin.
If you have purchased one or more extensions, please take a look at the Extensions section for the tutorial video that shows how to install them.
I see a red box about extension not activated!I see a red box about extension not activated!
I see a red box about extension not activated!Please find more information at Extensions part of the documentation. As specified there, you could see the red box when the extension is not activated. However, if you are on a development domain, please ignore that message and do not activate for the development domain. The extension domain cannot be changed and once activated, refund for the extension would not be possible. Once moved to the production domain, you can activate it and the red box will be disappeared automatically.
How can I show a normal web site on mobile and fullpage scrolling web site on desktop?How can I show a normal web site on mobile and fullpage scrolling web site on desktop?
How can I show a normal web site on mobile and fullpage scrolling web site on desktop?You can activate Responsive Mode. To activate Responsive Mode, please set Responsive Width option to 767 (or any screen width you want). That's it! For the screens that has width less than 767px, a normal scrolling web site will be shown.
You can also try setting Responsive Auto-Height option for the sections.
I cannot see my header and footer!I cannot see my header and footer!
I cannot see my header and footer!By default, the plugin comes with an empty page template. This means that, while fullPage is enabled on your WordPress site, an empty page with no theme dependency will be loaded. That's why your header or footer does not appear on your site. To disable it, please take a look at the tutorial video.
I cannot scroll to my footer!I cannot scroll to my footer!
I cannot scroll to my footer!If scrollbars are disabled, only the content inside the sections are visible. To be able to show the footer, it needs to be moved inside a section. You can use the Show Theme Footer customization.
Sections are getting cut off! I cannot see the rest of my content!Sections are getting cut off! I cannot see the rest of my content!
Sections are getting cut off! I cannot see the rest of my content!When the scrollbars are disabled and your content is greater than the screen height, some of your content might be left outside of the viewport. To display these, you can enable Scroll Overflow option. This will create an in-section scrollbar.
The Block Generates Error / FullPage Block Contains Unexpected or Invalid ContentThe Block Generates Error / FullPage Block Contains Unexpected or Invalid Content
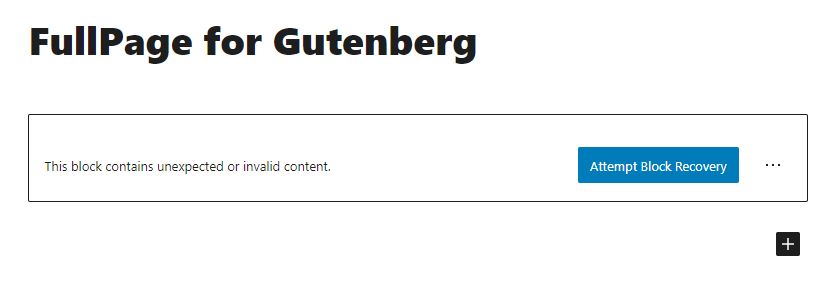
The Block Generates Error / FullPage Block Contains Unexpected or Invalid ContentSometimes with the update of Gutenberg, WordPress or other third party plugins, FullPage block might generate an error. If you see This block contains unexpected or invalid content. instead of the FullPage block, please first take a database backup, just in case, and use Attempt Block Recovery button. Do NOT use Convert to Classic Block option.
How do I remove anchors from URL?How do I remove anchors from URL?
How do I remove anchors from URL?If you want to remove the anchors (your-domaion.com/#anchor), you can enable Lock Anchors or Disable Anchors option. Enabling one of these two options will remove the anchor part from the URL.
Why my scroll based animations or events don't work?Why my scroll based animations or events don't work?
Why my scroll based animations or events don't work?Some of the WordPress plugins or Javascript libraries that depend on scrolling mechanism such as sticky menus, animations etc. might not work if scroll bar is disabled using the plugin. Please enable the Scroll Bar option to enable scroll based animations.
Updating From v3.X to v4.0Updating From v3.X to v4.0
Updating From v3.X to v4.0FullPage for Gutenberg plugin has a major update that changes a lot of things under the hood! To update the plugin from v3.X to v4.0, please follow the instructions below:
-
Before updating, please take a database backup as a precaution.
-
Update FullPage for Gutenberg plugin to the latest version.
-
For each page/post designed with FullPage for Gutenberg (FullPage is enabled):
-
Edit the page/post.
-
If you see
Attempt Block Recoverybutton, click it. Do NOT useConvert to Classic Blockoption. This may be needed for FullPage block and each Section and Slide block. -
For users that have custom CSS or JavaScript options, please check your site after the update. You can use support for your customized scripts and styles.
-
Save the page and refresh. After saving, you should not see any error.
-
Check your page to test if everything works as expected.
-
-
That should be it :) For any issues, please use support and we will try our best to help you…
Updating From v2.X to v3.0Updating From v2.X to v3.0
Updating From v2.X to v3.0FullPage for Gutenberg plugin has a major update that changes a lot of things under the hood! To update the plugin from v2.X to v3.X, please follow the instructions below:
-
Before updating, please take a database backup as a precaution.
-
Update FullPage for Gutenberg plugin to the latest version.
-
For each page/post designed with FullPage for Gutenberg (FullPage is enabled):
-
Edit the page/post.
-
Check Easing option under Scrolling tab of FullPage options. If you used a different CSS easing before, please check the option if it’s the correct one. If you used a JS easing on your site (for fixed background images as an example), please disable CSS Easing option and select the correct option from Easing option.
-
For Offset Section extension users, if you have changed the default option of Data Centered option for any section, please update it again to the correct value. This option can be found under FullPage option for each section.
-
For users that have custom CSS or JavaScript options, please check your site after the update. You can use support for your customized scripts and styles.
-
Save the page and refresh. After saving, you should not see any error.
-
Check your page to test if everything works as expected.
-
-
That should be it :) For any issues, please use support and we will try our best to help you…