If you have been playing Minecraft for quite some time, you might be familiar with light blocks and light sources.
The game’s mechanism allows you to create various light sources, an easy thing to do if you are a pro gamer. However, creating light sources and blocks and adjusting the lighting for these blocks is too techie for new users.
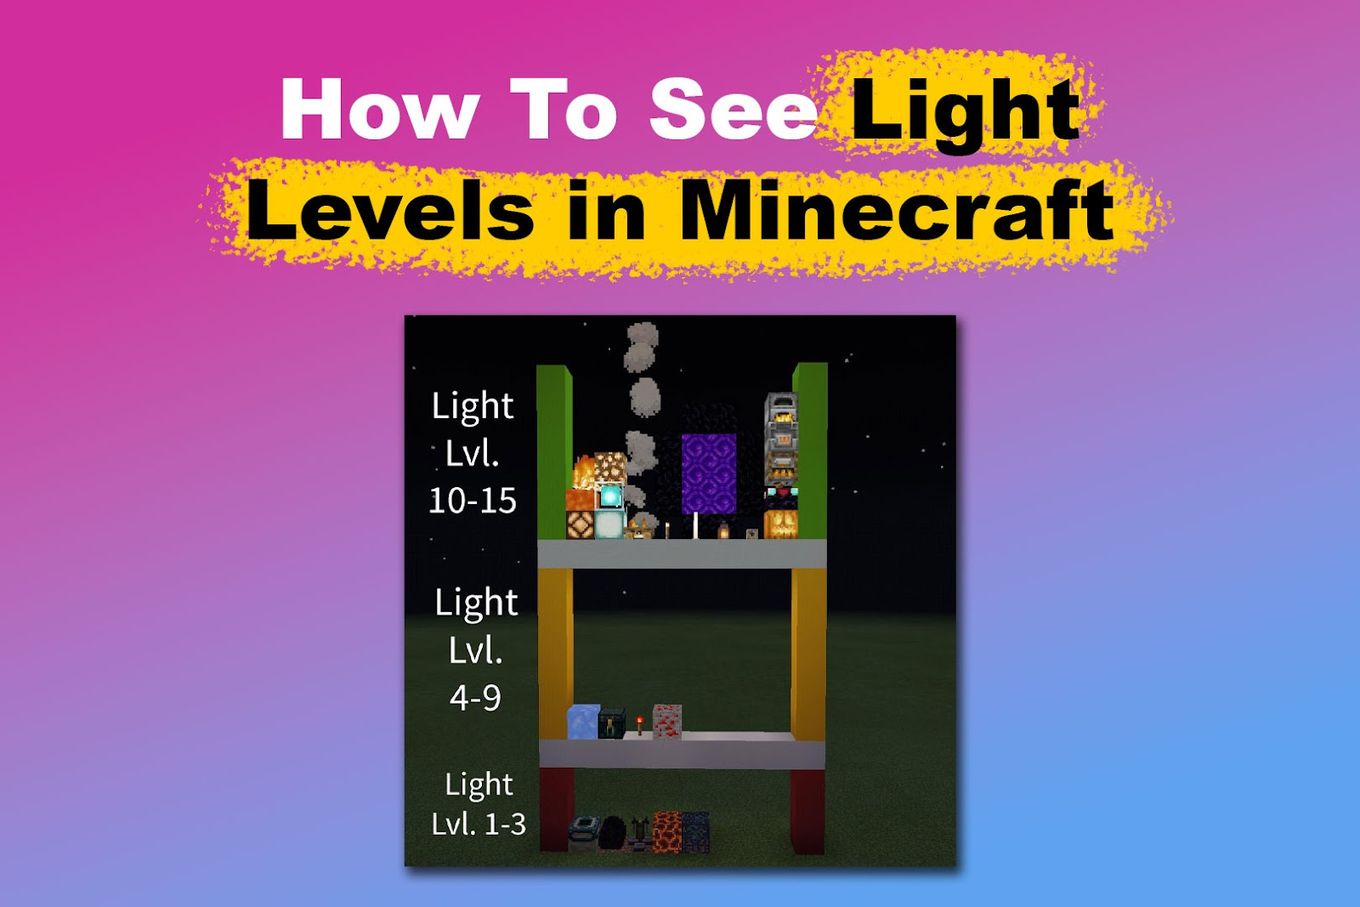
In this article, we explore how to see light levels in Minecraft and how to make them as well as sharing some advance knowledge on Minecraft lighting in general.
What Is Light Level in Minecraft?
In Minecraft, light levels refer to how bright a light source is. Light levels range from 0 to 15, with 0 being the darkest and 15 being the brightest. The light sources that emit different light levels are torches, blocks, and the sun.
Each Minecraft light source emits a certain level of light. Light level is a core aspect of Minecraft that players can use to create specific structures and build farms. Minecraft features will not work properly without light levels.
Another reason why light sources and levels are essential for Minecraft is because they affect various aspects of the game. For instance, you need light for plant growing, mob spawning, and preventing hostile mobs from entering your area.
Minecraft details its Lighting Features for your reference.
Why Should You Check Light Levels in Minecraft?
You should check your light levels in Minecraft to prevent monsters from spawning in low-lit areas. Each light block has specific light levels that will increase your defense. By checking and maintaining light levels, you can prevent these dangerous mobs from appearing near your base, farms, or other vital areas.
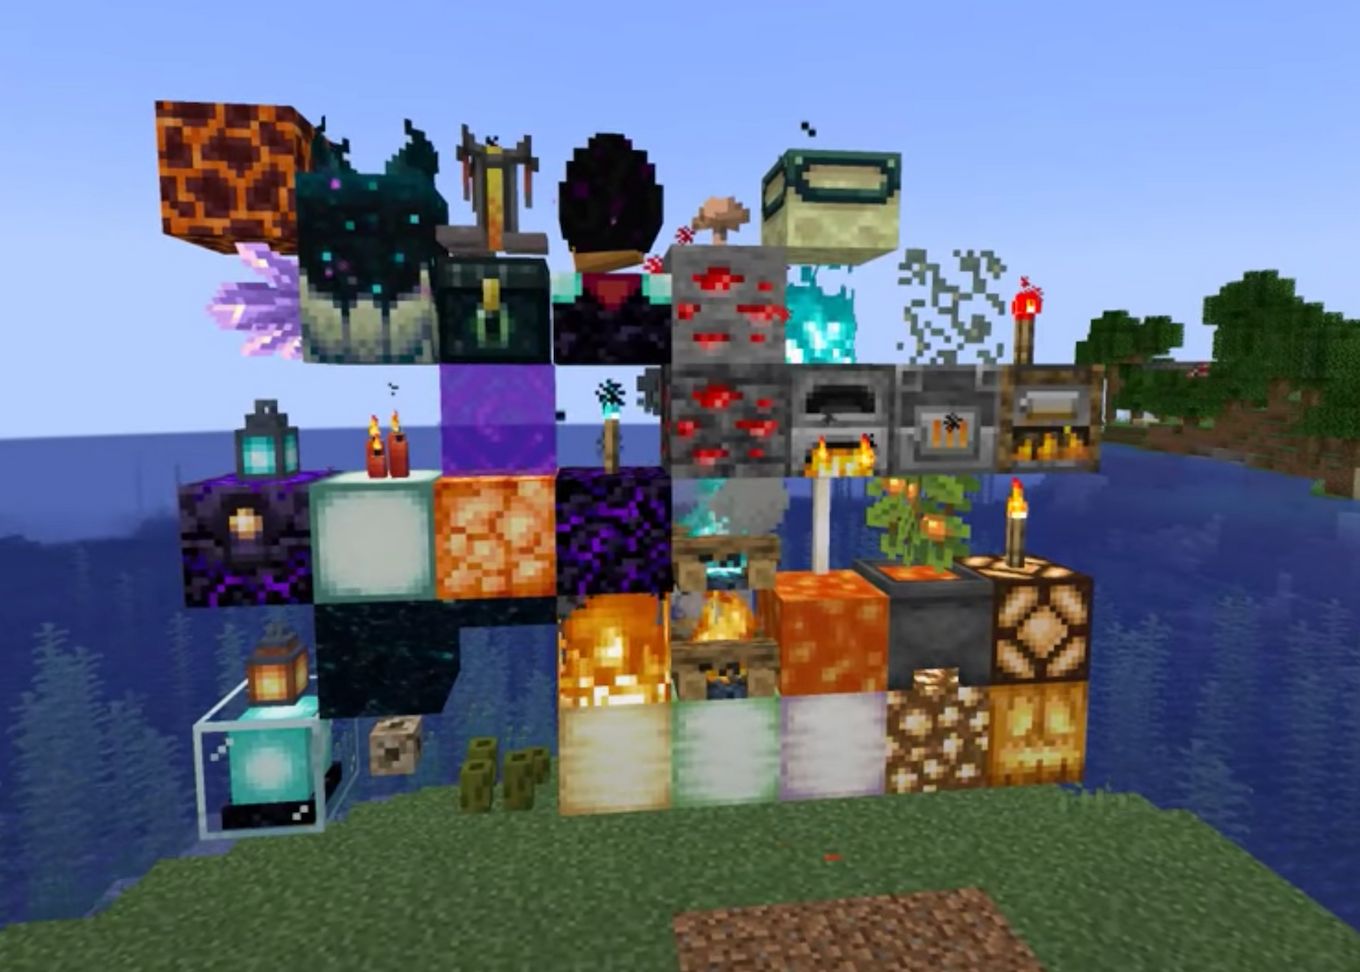
Have you ever wondered why creepers get in even if you put light blocks on a specific area? This is because monsters still spawn if the light level is seven and below. So, no matter how many light sources you put there, you’ll still get attacked if there’s not enough light level.
Aside from killing mobs or mining ores to earn points and level up, it would help if you also increase your defense. Most players turn to torches to build their defense, but some may not know there’s more to these light sources, such as light levels.
Other items that emit lights are Campfires, Lava, Froglight, Beacons, Shroomlight, Fire, and many more. You can check the light levels of these light sources to be 100% sure that no creepers will enter your area while you’re not in your base.
Find out how to build a beacon here!
How to See Light Levels in Minecraft?
There are several ways to see light levels in Minecraft, such as opening the debug menu and installing specific mods. In this section, we’ll tackle an easy and slightly complex method. Read on if you’re ready to increase your defense with light levels.
These are the methods to see light levels in Minecraft:
Method 1. Debug Menu (Easy)
This is the easiest method to see the light levels in Minecraft, as you’ll only need to press a few keys.
Here are the steps to see the light levels through the debug menu:
-
Step 1. Press
F3on your keyboardIf this doesn’t work, press ‘Fn’ + ‘F3.’ If successful, the debug menu should appear.
-
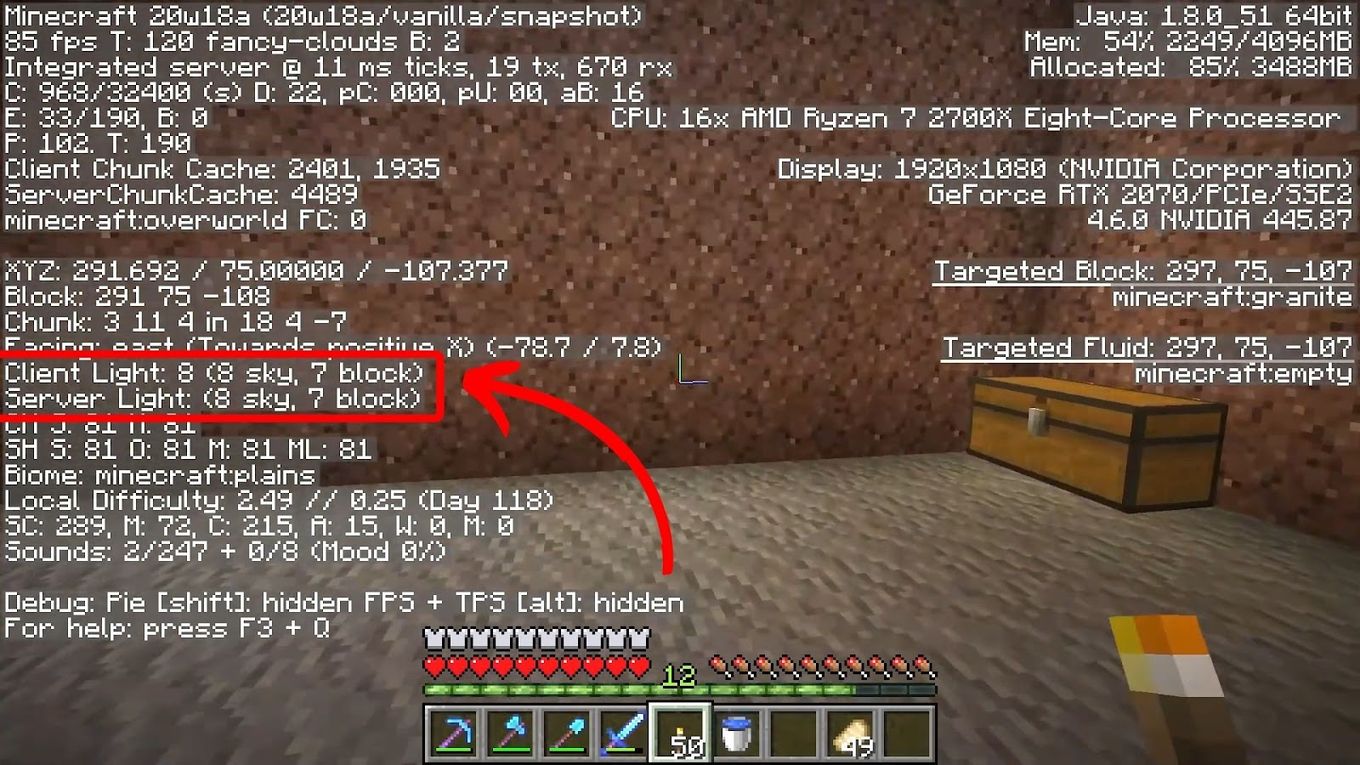
Step 2. Look for the “Client Light” & “Server Light.”

-
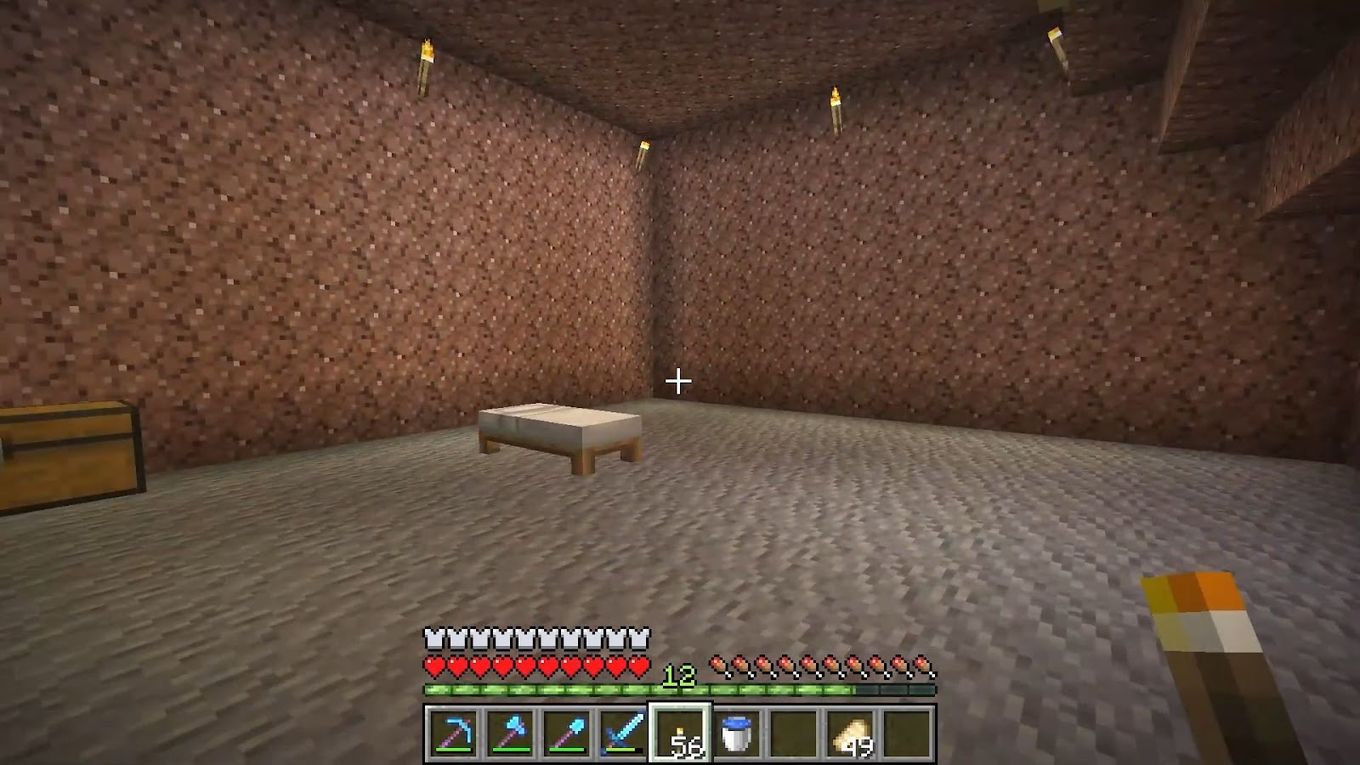
Step 3. “Move around” to check light levels in different areas.
If the light levels drop below 7, monsters will spawn in that area. You must place additional light blocks to achieve the optimum light level to prevent mobs from spawning.

Method 2. OptiFine + Danger Zone Texture Packs (Slightly Complex)
OptiFine is a specific mod or modification in Minecraft. It helps players customize settings in the Java-based version of the game. The Danger Zone Texture Pack provides players with a lights map that shows danger zones or areas where monsters might spawn.
Make sure you have downloaded and installed the OptiFine and Danger Zone texture packs before proceeding.
Here are the steps to see light levels in Minecraft with OptiFine and Danger Zone:
-
Step 1. Download the “DangerZone Textures Pack”.
Check if the resource pack is compatible with your device’s Java version to ensure it works.
-
Step 2. Download & install “OptiFine”.
You just have to follow the on-screen instructions that will pop up once you open the file folder to install OptiFine.
-
Step 3. Open “Minecraft > Options”
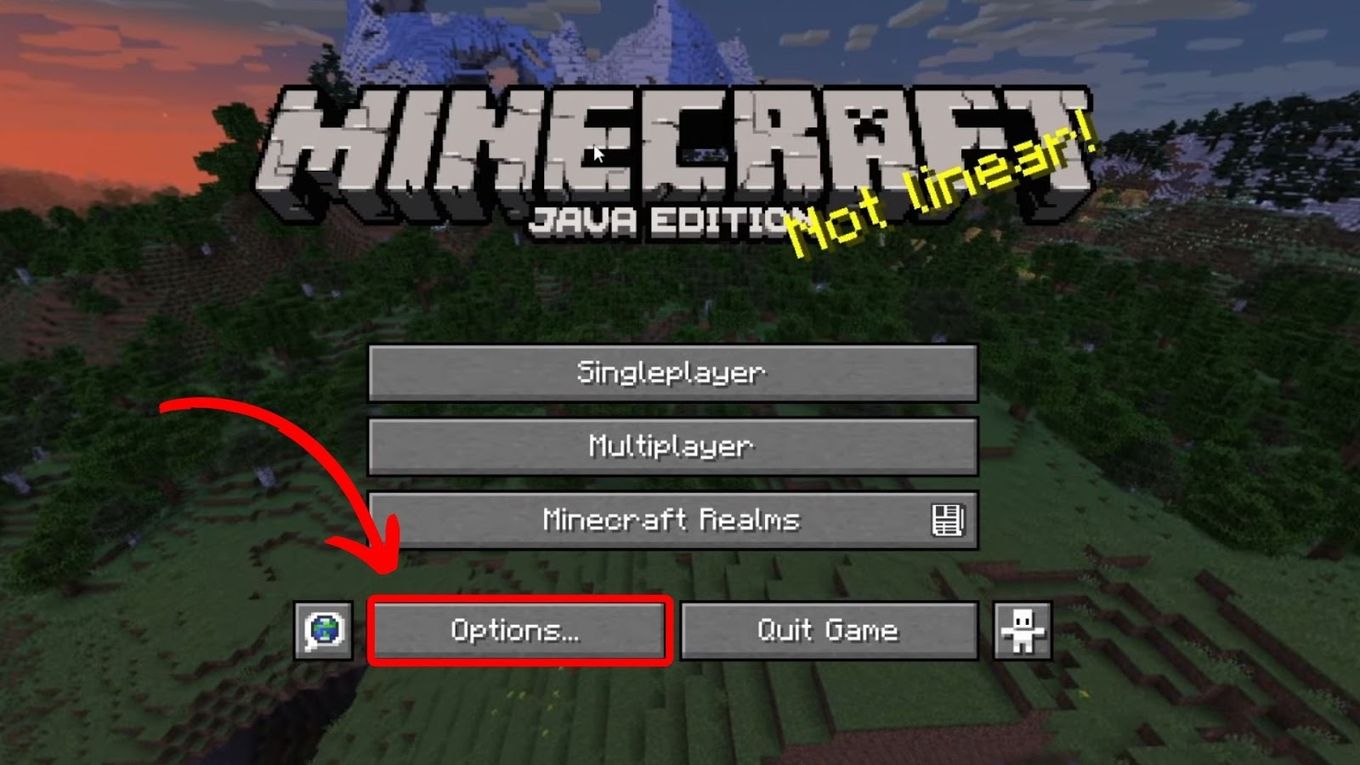
You can accomplish this by either clicking the “Options” button on the main menu of Minecraft or by pressing the
Esckey.
-
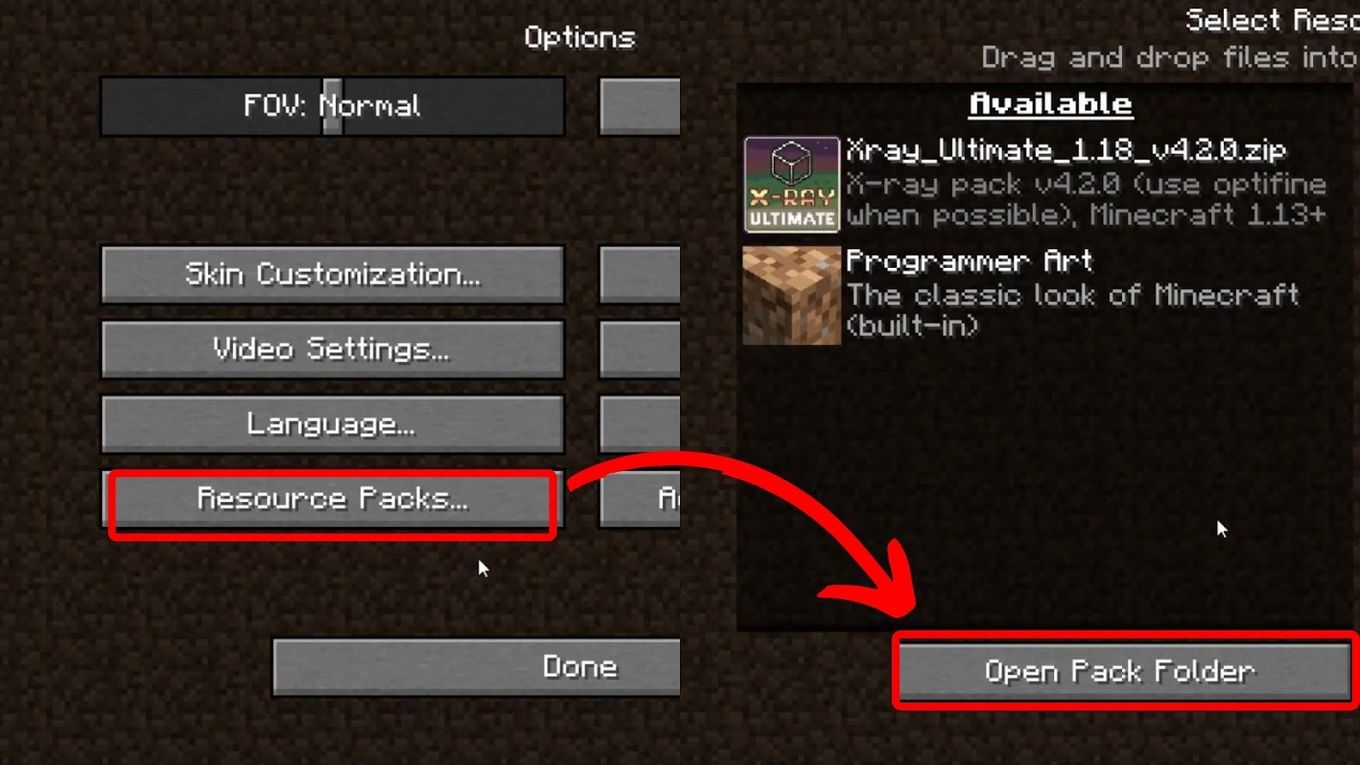
Step 4. Open “Resource Packs > Open Pack Folder.”

-
Step 5. Move the “DangerZone .zip file” to the folder that will pop up.
After moving the DangerZone Texture Pack to the folder, you can find it in the “Resource Packs” list.
-
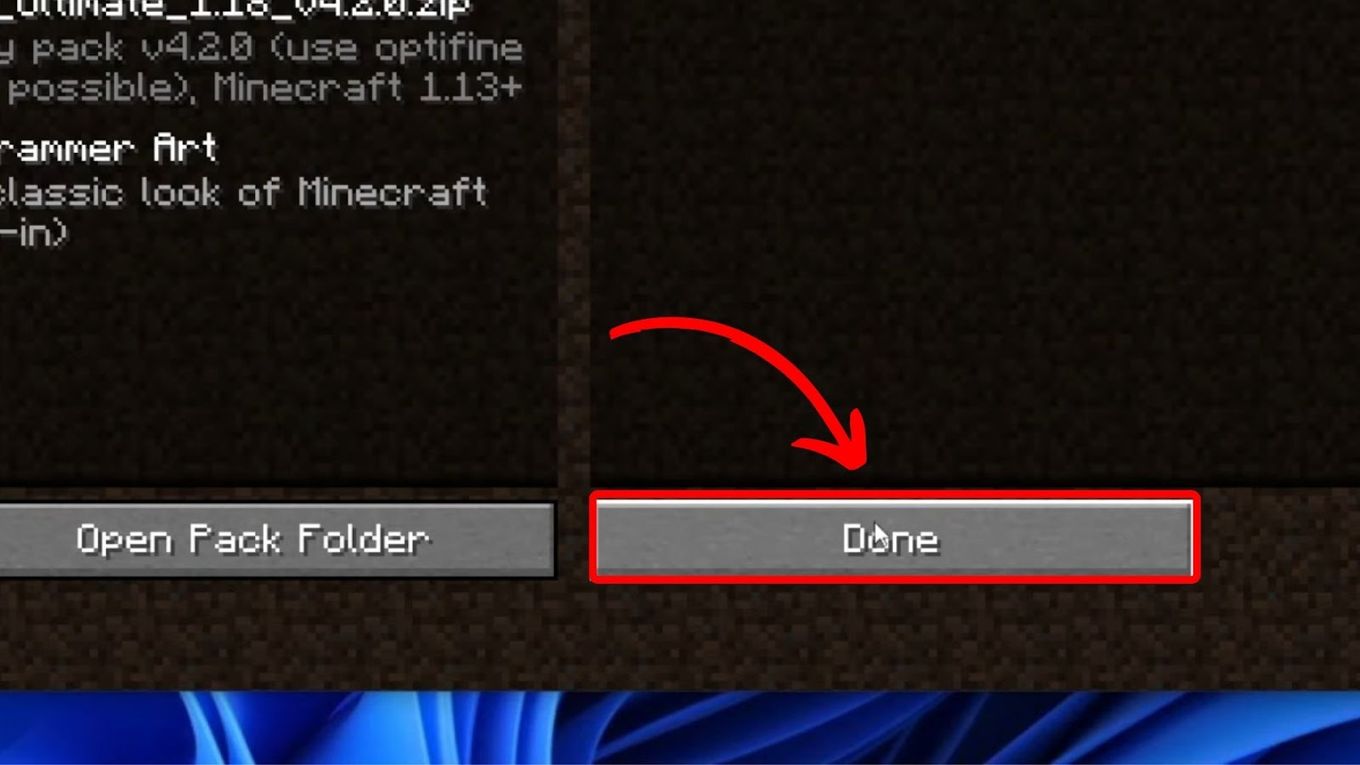
Step 6. Choose the “DangerZone Texture Pack > Done.”

-
Step 7. View the light levels on Minecraft.
A colored map will appear. The red ones indicate danger zones where monsters will most likely spawn.
Both the easy and slightly complex methods will help you increase your defence. When you can view the light levels, you’ll know which areas are safe and which aren’t.
Related article: Top Boots Enchantments in Minecraft
What Is the Best Light Level in Minecraft?
The best light level in Minecraft is 15. With this level, you can avoid monster spawning. The most straightforward light block to make with this light level is the Lantern, which has two types: “Standard Lantern” and “Soul Lantern”.
Here’s a list of all light sources in Minecraft and their light levels:
| Light Block | Light Level |
|---|---|
| Campfire | 15 |
| Jack O’Lantern | 15 |
| Glowstone | 15 |
| Shroomlight | 15 |
| Redstone Lamp | 15 |
| Sea Lantern | 15 |
| Conduit | 15 |
| Beacon | 15 |
| End Rod | 14 |
| Glow Berries | 14 |
| Torch | 14 |
| Glow Lichen | 7 |
| Four Sea Pickles | 6 – 15 |
| Candles | 3 – 12 |
If you’re curious, there are also level 1 light levels in Minecraft, but they won’t be helpful for defense.
These are the Magma Block, Brewing Stand, Brown Mushroom, Dragon Egg, and End Portal Flame.
How to Put Light Sources in Minecraft?
Depending on the light block you choose, there are different ways of putting light sources in Minecraft. Here, we’ll discuss how to put the light source Torch, as it’s one of the most common blocks players use in Minecraft.
Here are the steps to put the “Torch” light source in Minecraft:
Step 1: Gather Wood by Chopping Trees
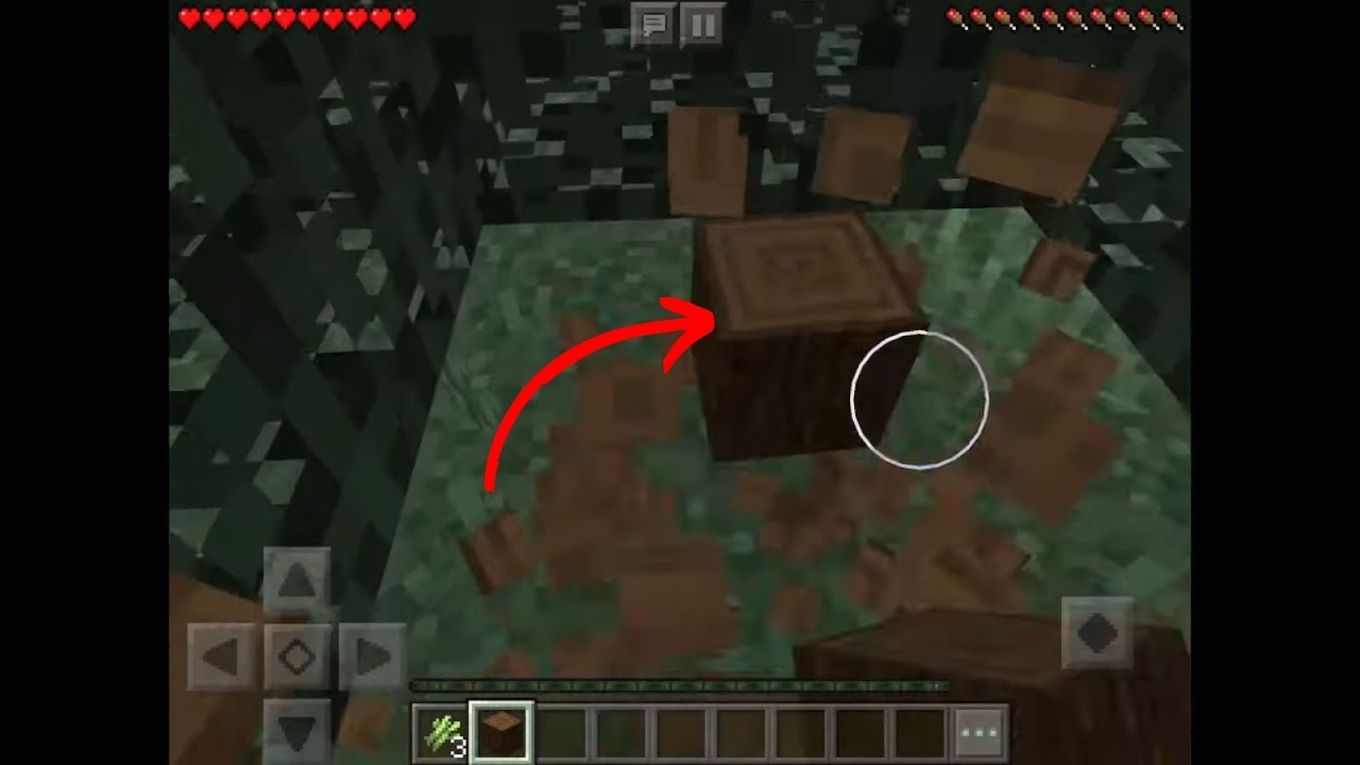
Step 2: Make a Crafting Table
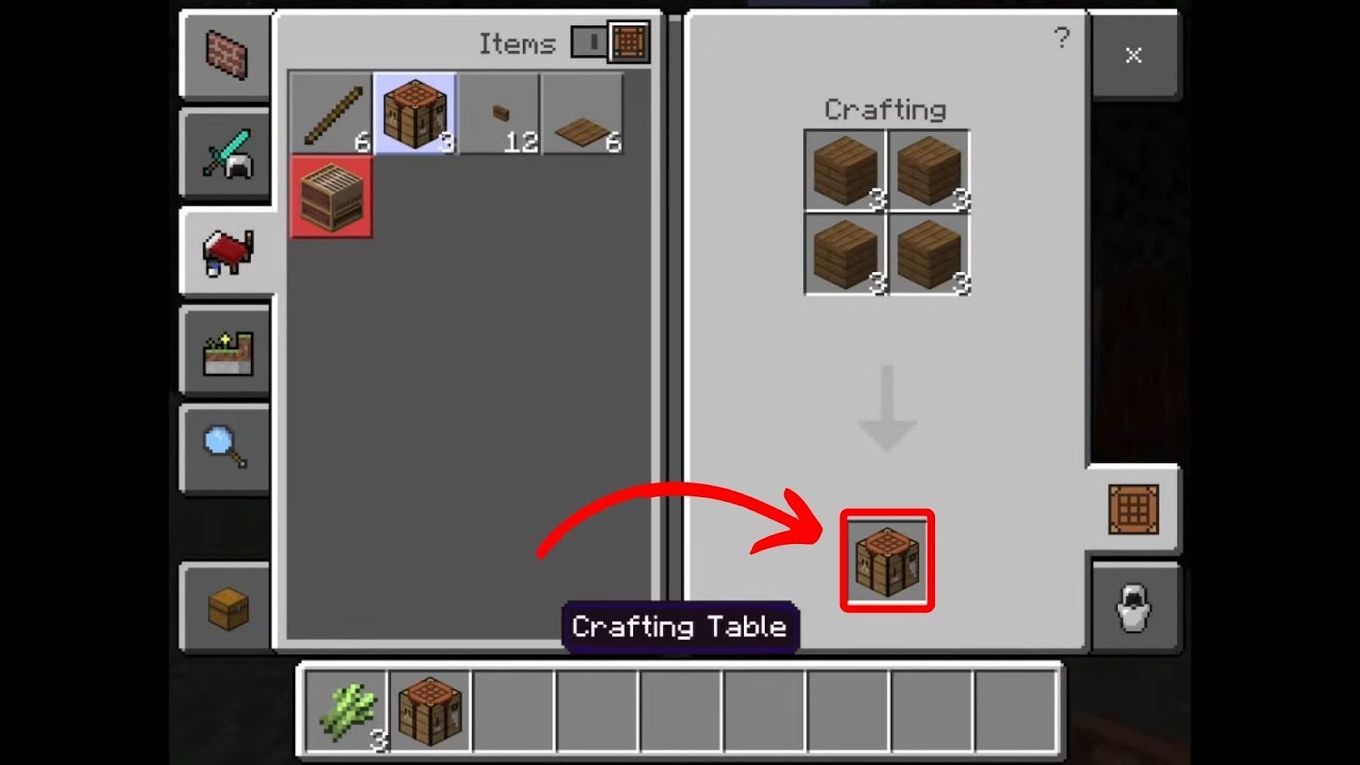
Step 3: Make Sticks Using the Crafting Table
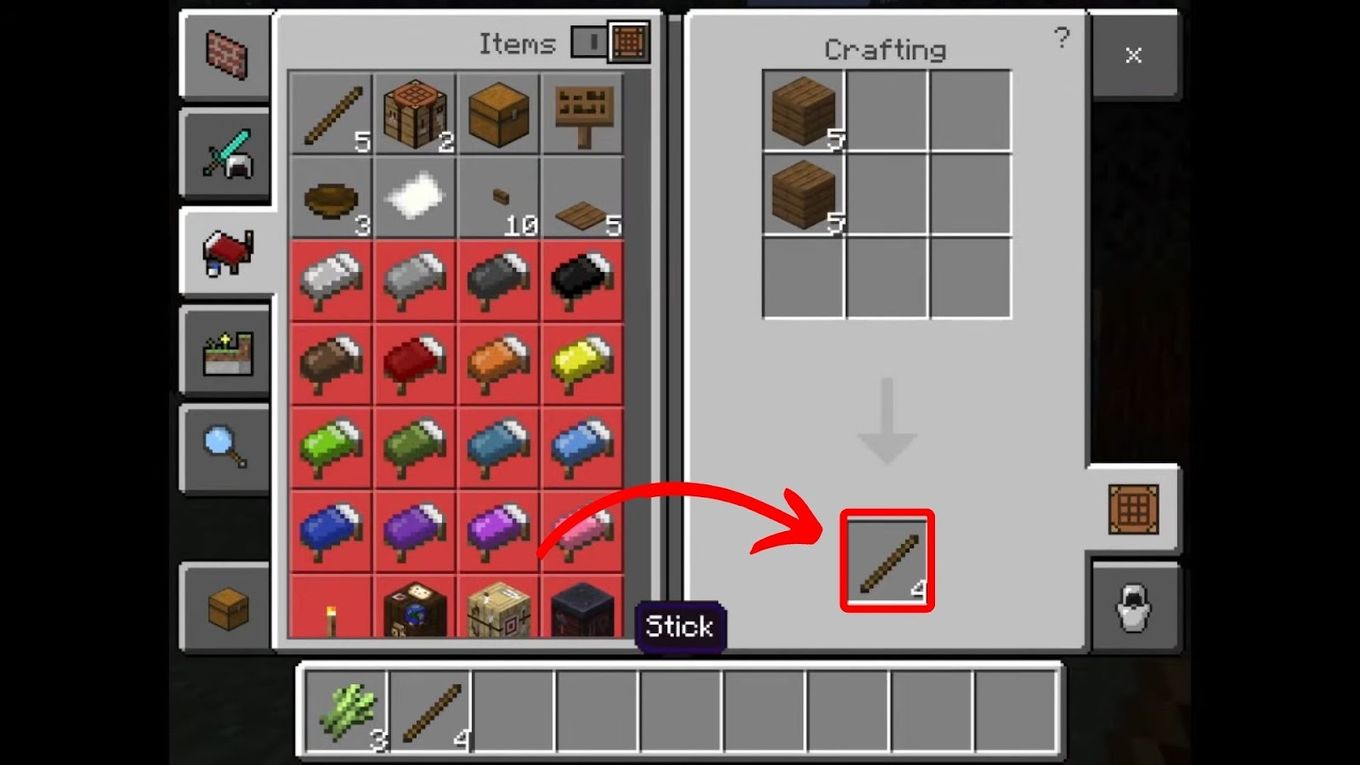
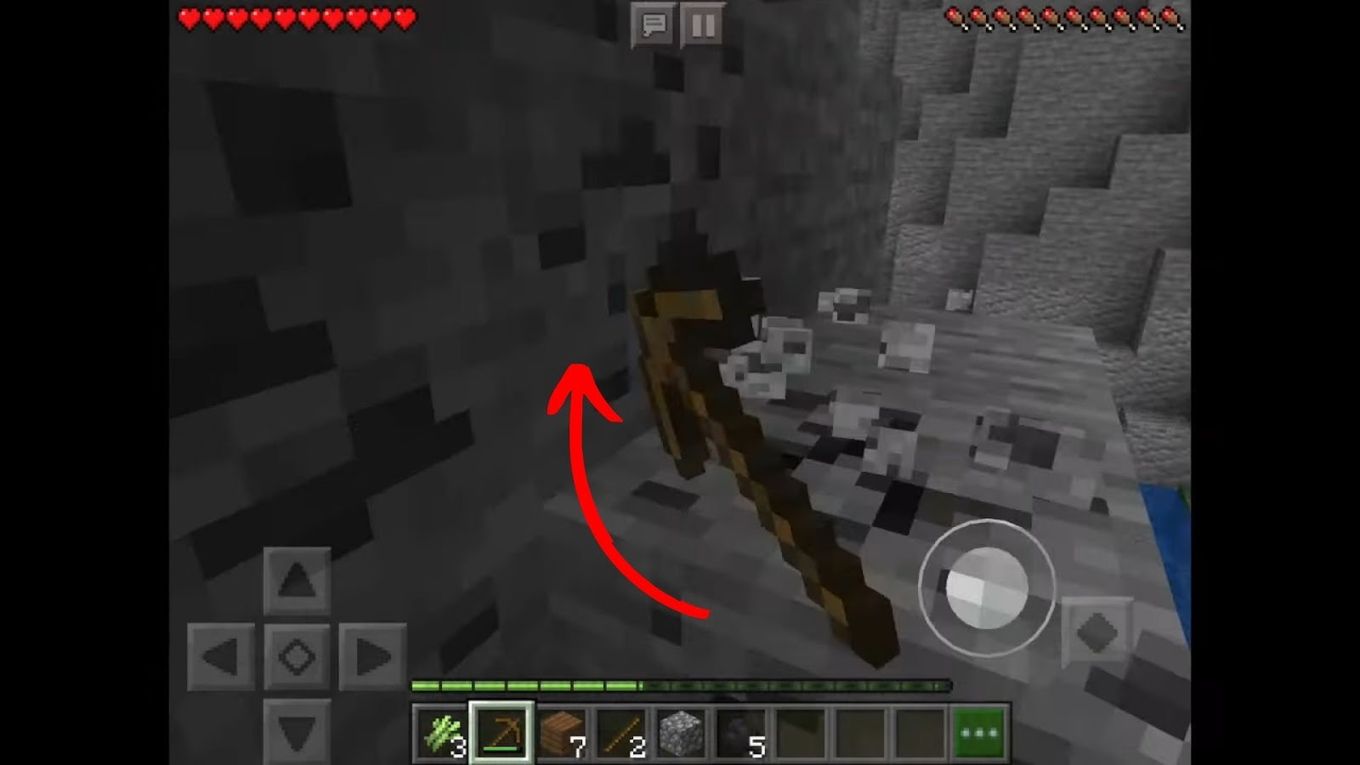
Step 4: Mine Some Coal in the Mountains
You can do this by using a non-Silk Touch pickaxe. If you have no pickaxe yet, you need to craft one.
Step 5: Go Back to Your Crafting Table
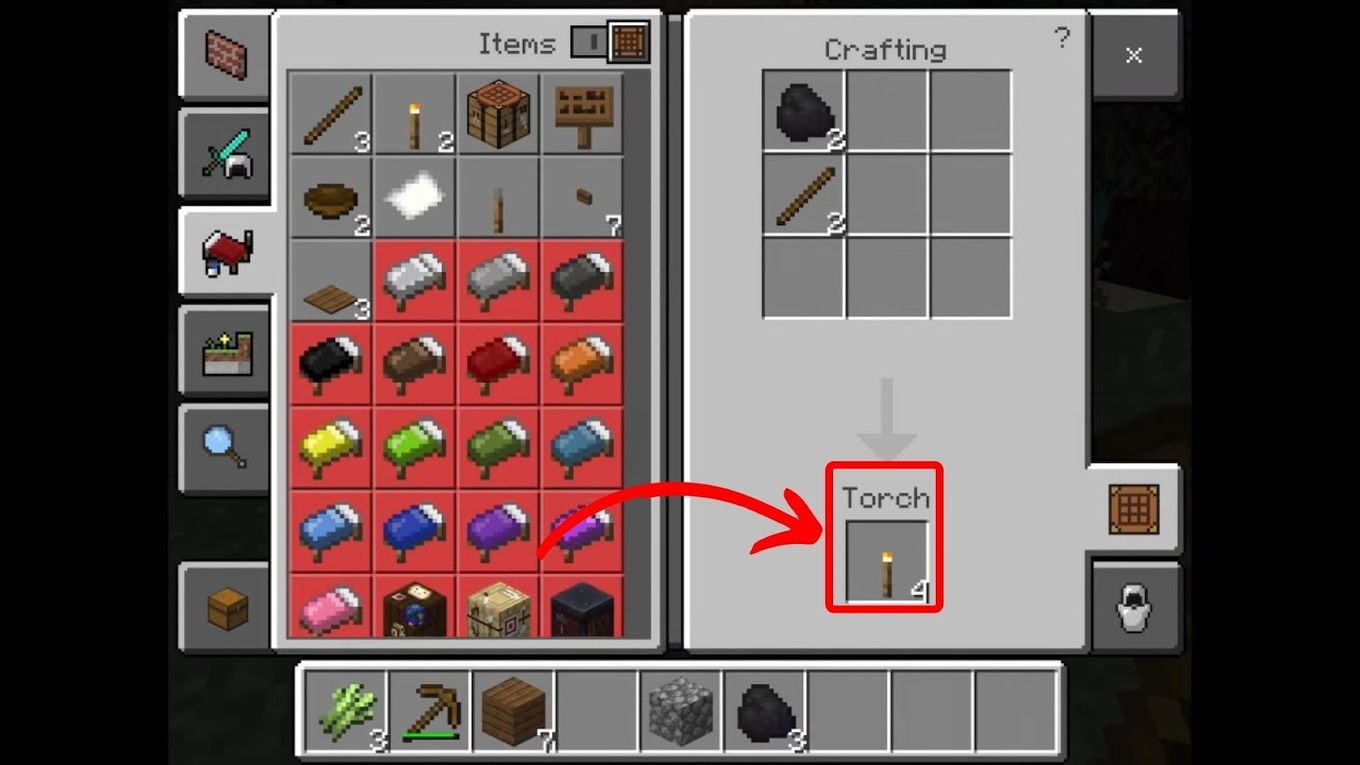
Step 6: Craft Your Torch
You need your coal and stick to do this. To access your inventory, press E. Next, create four torches by placing a stick directly below the coal.
Step 7: Put Your Torch in Your Desired Area
Open your inventory and drag the torches to the hot bar.
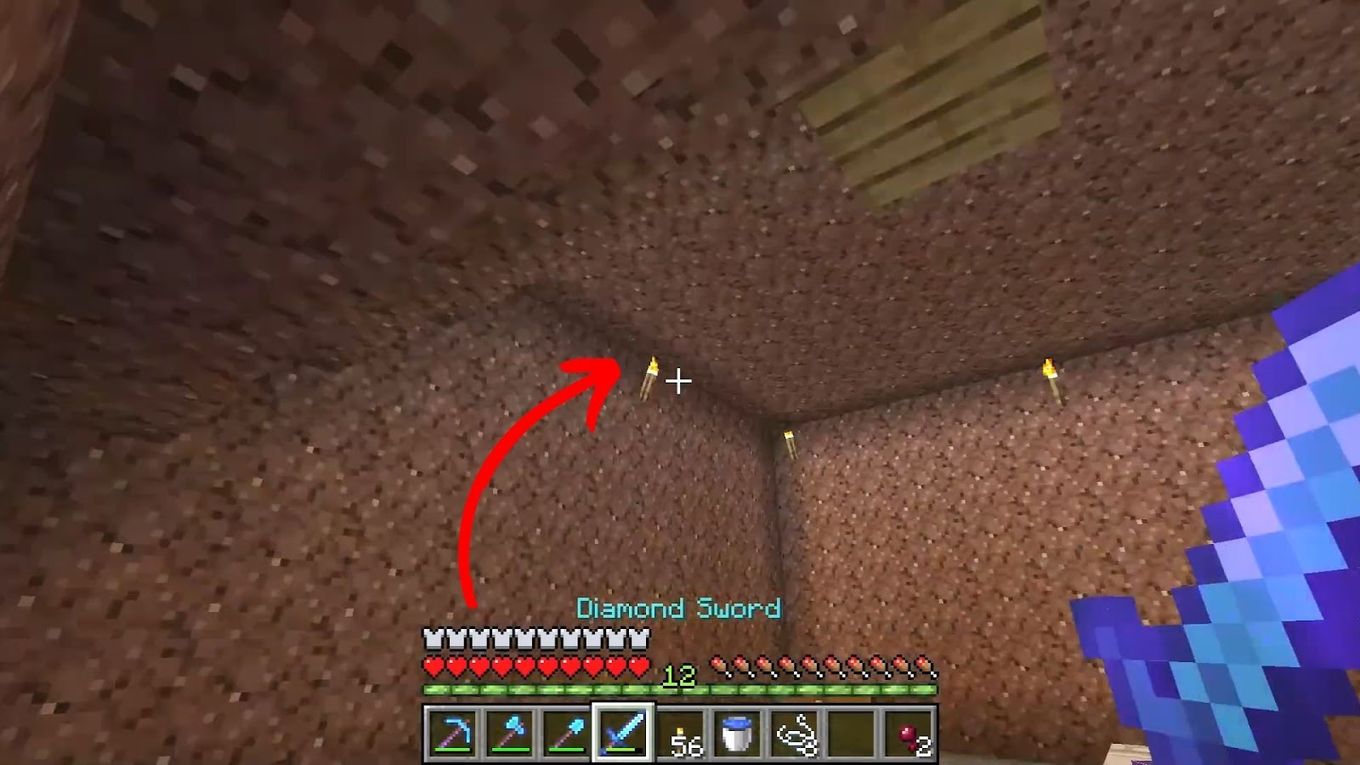
Aside from this light source, you can make other Minecraft lights. This will make your Minecraft world better than just populating it with one light source.
Combining your skill of making and putting light blocks with seeing light levels in Minecraft, you can create a world with minimal danger zones. This will help you save time in recreating damaged structures.
Related Article: How to Get Off a Hore in Minecraft
What Block Glows in Minecraft? [PAA]
The block that glows in Minecraft is called Glowstone. Its light level is 15, making it one of the brightest light blocks in the game. To make one, you’ll need some Glowstone dust, which you can get from the nether.
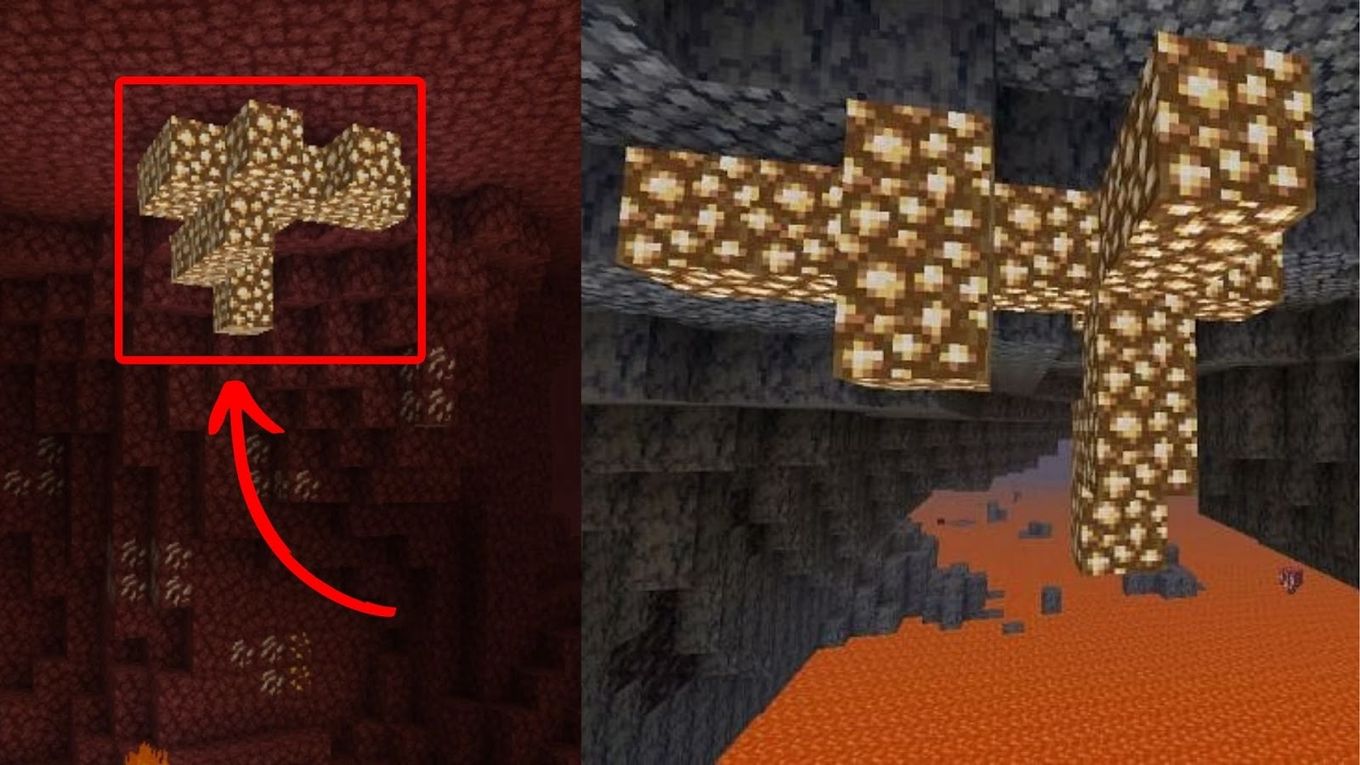
Glowstone was added to Minecraft in October 2010 along with Jack O’Lanterns. It transmits redstone power upwards, enabling the construction of some extremely space-efficient circuitry.
Learn more about The Glowstone.
Time to See Light Levels in Minecraft!
Now that you know enough about seeing light levels in Minecraft, it’s time to up your game even more! Light sources in Minecraft maximize your defense if studied and placed correctly.
Who knows, maybe you’ll reach the highest level in Minecraft with this trick!

![Can You Play Minecraft on a Macbook? [Java & Bedrock] play-minecraft-macbook](https://alvarotrigo.com/blog/wp-content/uploads/2023/10/play-minecraft-macbook-300x200.jpg)
![21 Free Mac Steam Games [You'll Love To Play] free mac steam games share](https://alvarotrigo.com/blog/wp-content/uploads/2023/08/free-mac-steam-games-share-300x150.png)
![33 Two Player Xbox Games [Couch Co-op] two-player-xbox-games](https://alvarotrigo.com/blog/wp-content/uploads/2025/04/two-player-xbox-games-300x200.jpg)
![Is Minecraft Free on PS4? [Here’s the Truth] minecraft free ps4 share](https://alvarotrigo.com/blog/wp-content/uploads/2023/08/minecraft-free-ps4-share-300x150.png)