For Chromebook users, a stable internet connection is crucial for online activities. But occasionally, they may encounter an error saying “network not available” on their Chromebooks, interrupting their online activities.
Let’s explore the common causes and fixes for the error about the unavailable network on Chromebook.
Why Does Your Chromebook Say Network Not Available?
This is why your Chromebook says the network is not available.
- Outdated Software.
Your Chromebook won’t connect to Wi-Fi if the operating system is outdated, as it can cause compatibility issues between the device and the network. - Wi-Fi Connection Problems.
If you have a weak Wi-Fi network, your Chromebook may have difficulty connecting to it. The same issue can happen if your Wi-Fi is out of your device’s range. - Router Issues.
Issues with the router, such as incorrect configurations or hardware malfunctions, can disrupt your Wi-Fi network. This can lead to the network not available error on your Chromebook. - Incorrect Wi-Fi Settings.
Misconfigured Wi-Fi settings will prevent your Chromebook from connecting. Similarly, typing the wrong password when setting up your device’s Wi-Fi can cause a network unavailable issue.
How to Enable Network on Your Chromebook
Here is how to connect your Chromebook to Wi-Fi:
Step 1: Open Your Chromebook “Settings”
To locate your Chromebook settings, click on the time icon in the bottom-right corner of your screen.
Step 2: Turn the “Wi-Fi” On
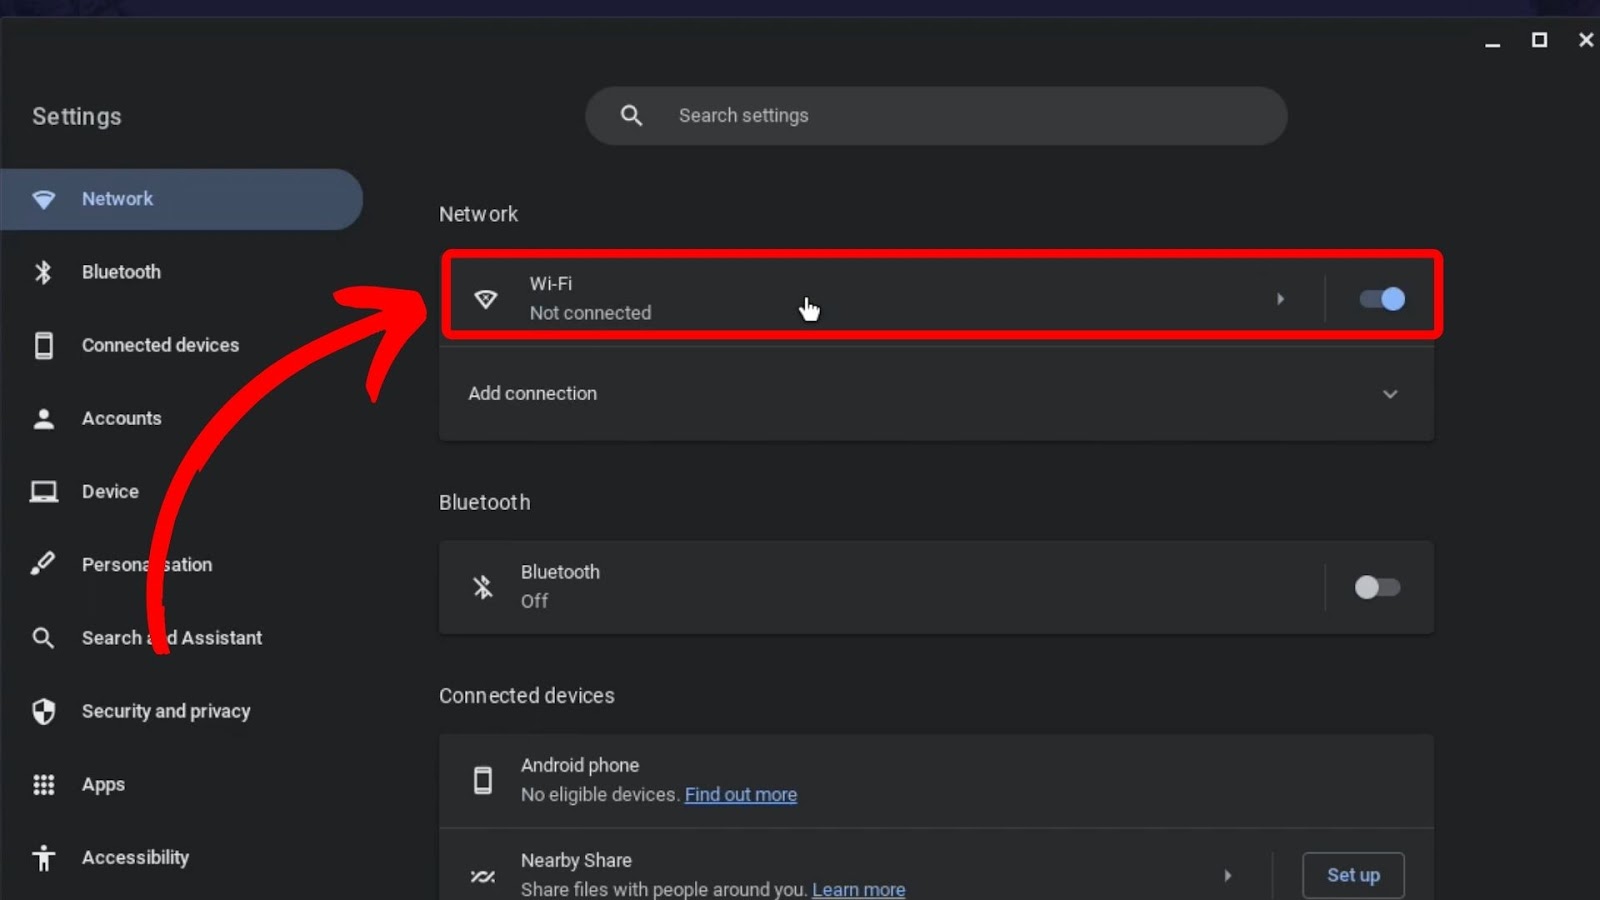
Step 3: Tap the “Wi-Fi” Options to See the Available Networks.
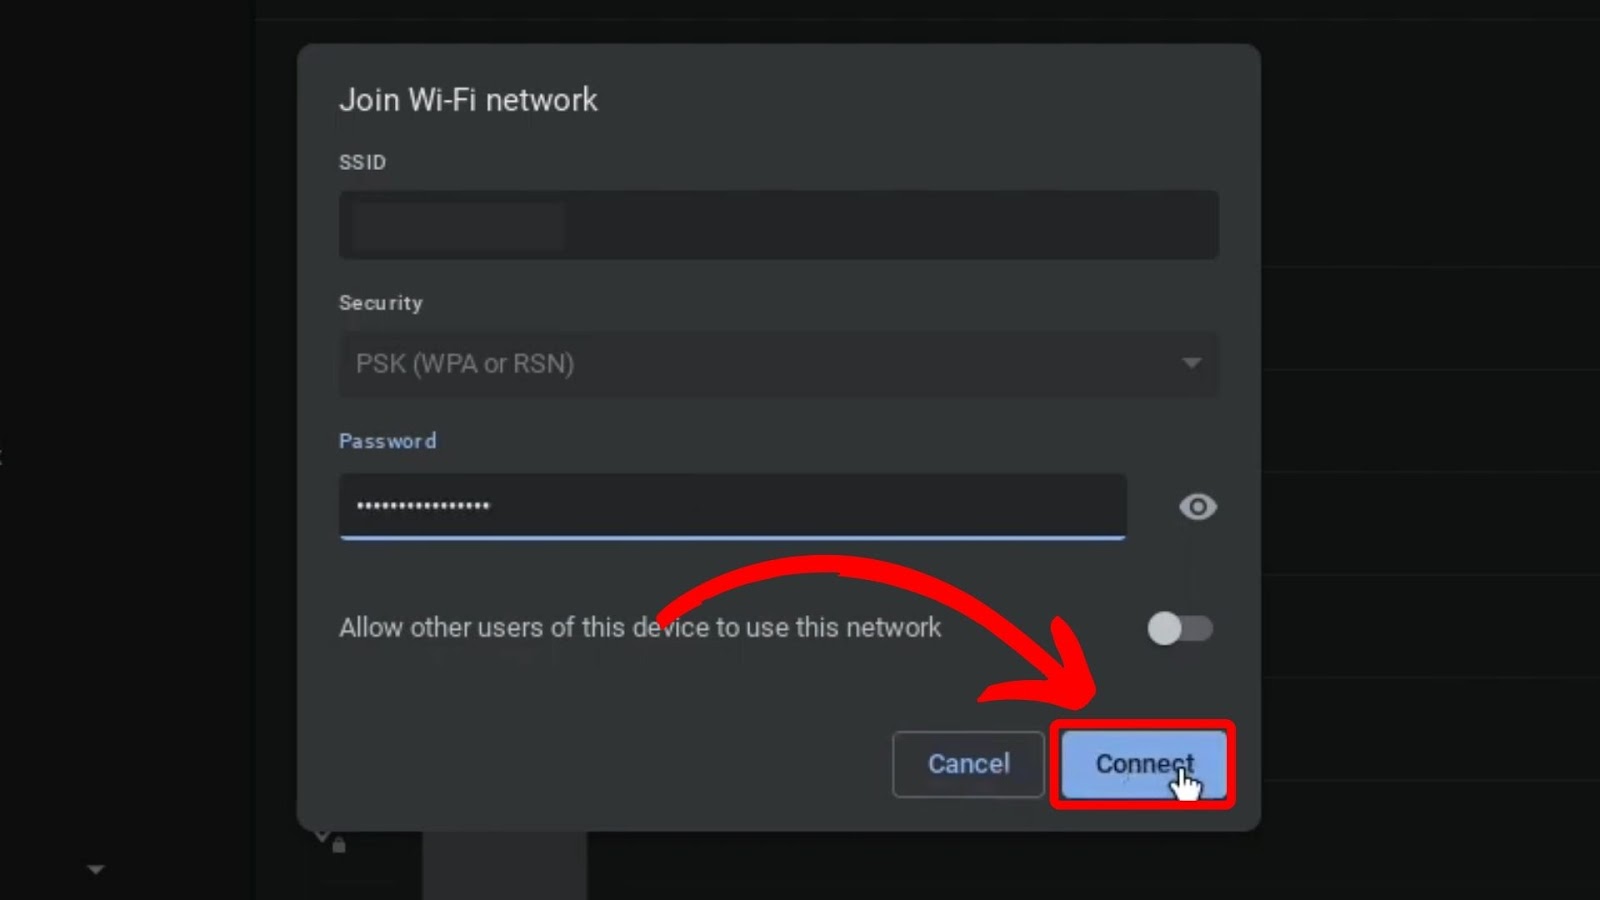
Step 4: Choose the “Network” and “Connect”
Read more about how to enable network on your Chromebook.
7 Ways to Fix Network Not Available on Chromebook
These are the seven ways to fix a network not available on a Chromebook issue.
Method 1. Examine Your Wi-Fi Connection
Your Chromebook won’t connect if you accidentally click “Forget Network” on your Wi-Fi. Go to your device’s “Quick Settings” to see if there is a network connection. If not, navigate to your Wi-Fi settings, look for your Wi-Fi network, and enter its password to reconnect.
If your Wi-Fi adapter has a physical switch, check if you accidentally moved the switch to “off”. If that doesn’t work, disconnect and reconnect to your Wi-Fi.
To disconnect and reconnect to your Wi-Fi, go to your Wi-Fi settings and turn it off. Wait a few seconds, and turn the Wi-Fi on for the device to automatically reconnect to the network.
Learn more from Chromebook help.
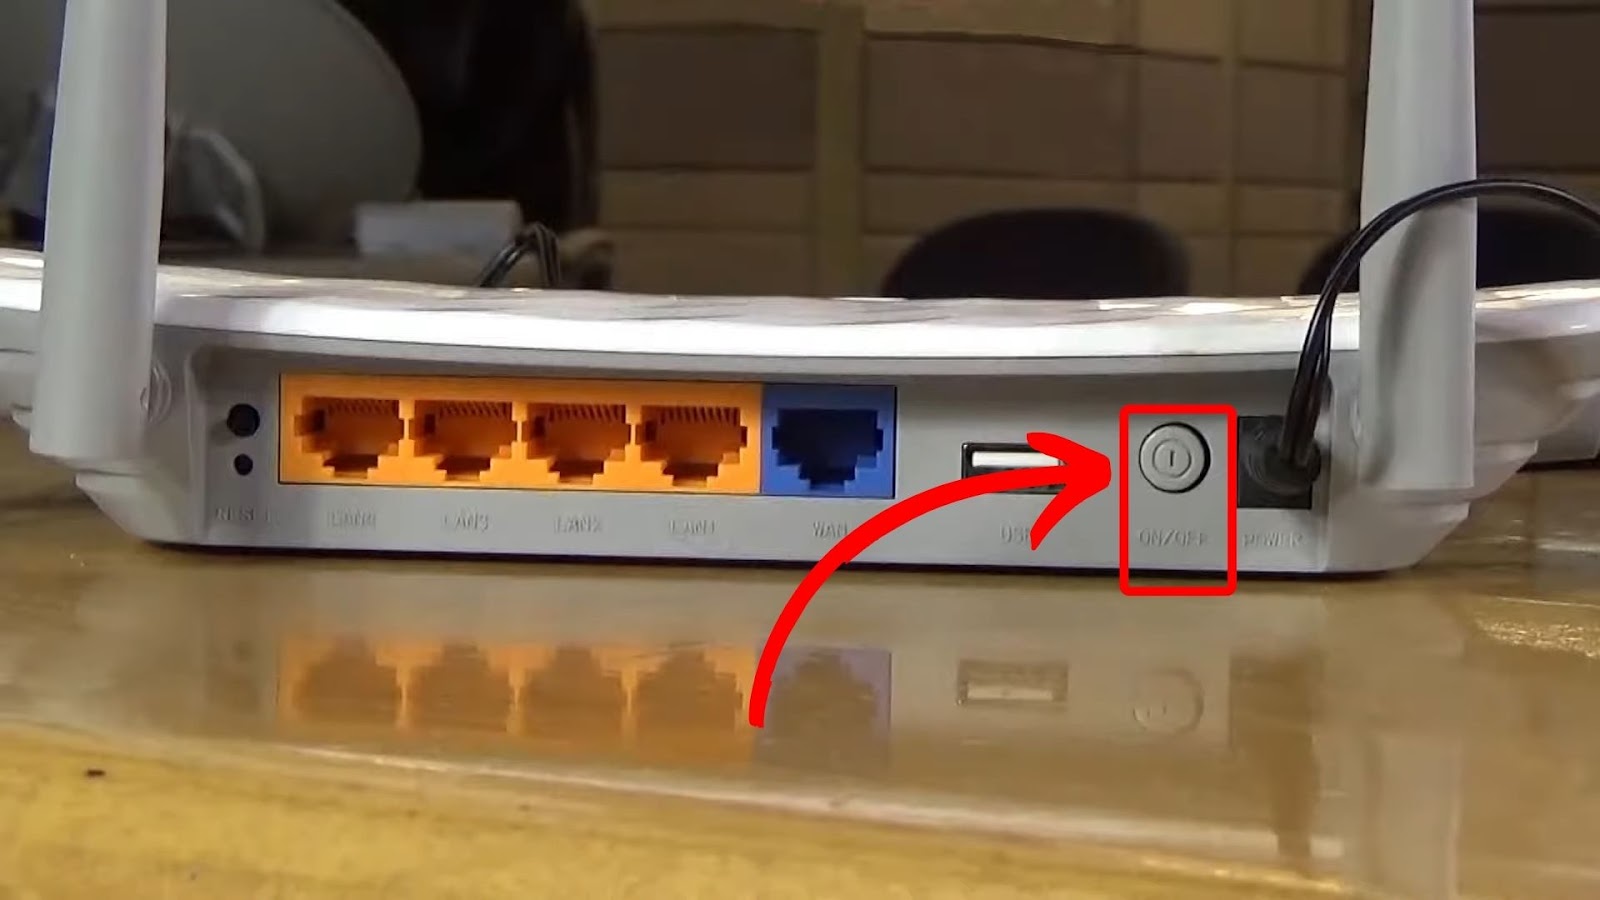
Method 2. Power Cycle Your Wi-Fi Router
Power cycling your router gives it a fresh start, which can help resolve common connection issues, including network not available on Chromebook.
Follow these steps to power cycle your Wi-Fi router:
- Step 1. Turn off your “Router”.
- Step 2. Unplug the “Power cord” from the back of the router.
- Step 3. Wait for 60 seconds.
- Step 4. Plug the “Power cord” back in
- Step 5. Turn your router on.
Method 3. Restart Your Chromebook
Your Chromebook may fail to connect to Wi-Fi if the router has bugs or glitches. Fortunately, a simple restart can fix the issue.
Here’s how to restart your Chromebook:
- Step 1. Press and hold the `Power` button for 3 seconds.
In older Chromebooks, the `Power` button is one of the keys on the keyboard. - Step 2. Wait for a few seconds.
- Step 3. Press the `Power` button again to restart your device.
Read more on how to restart your Chromebook.
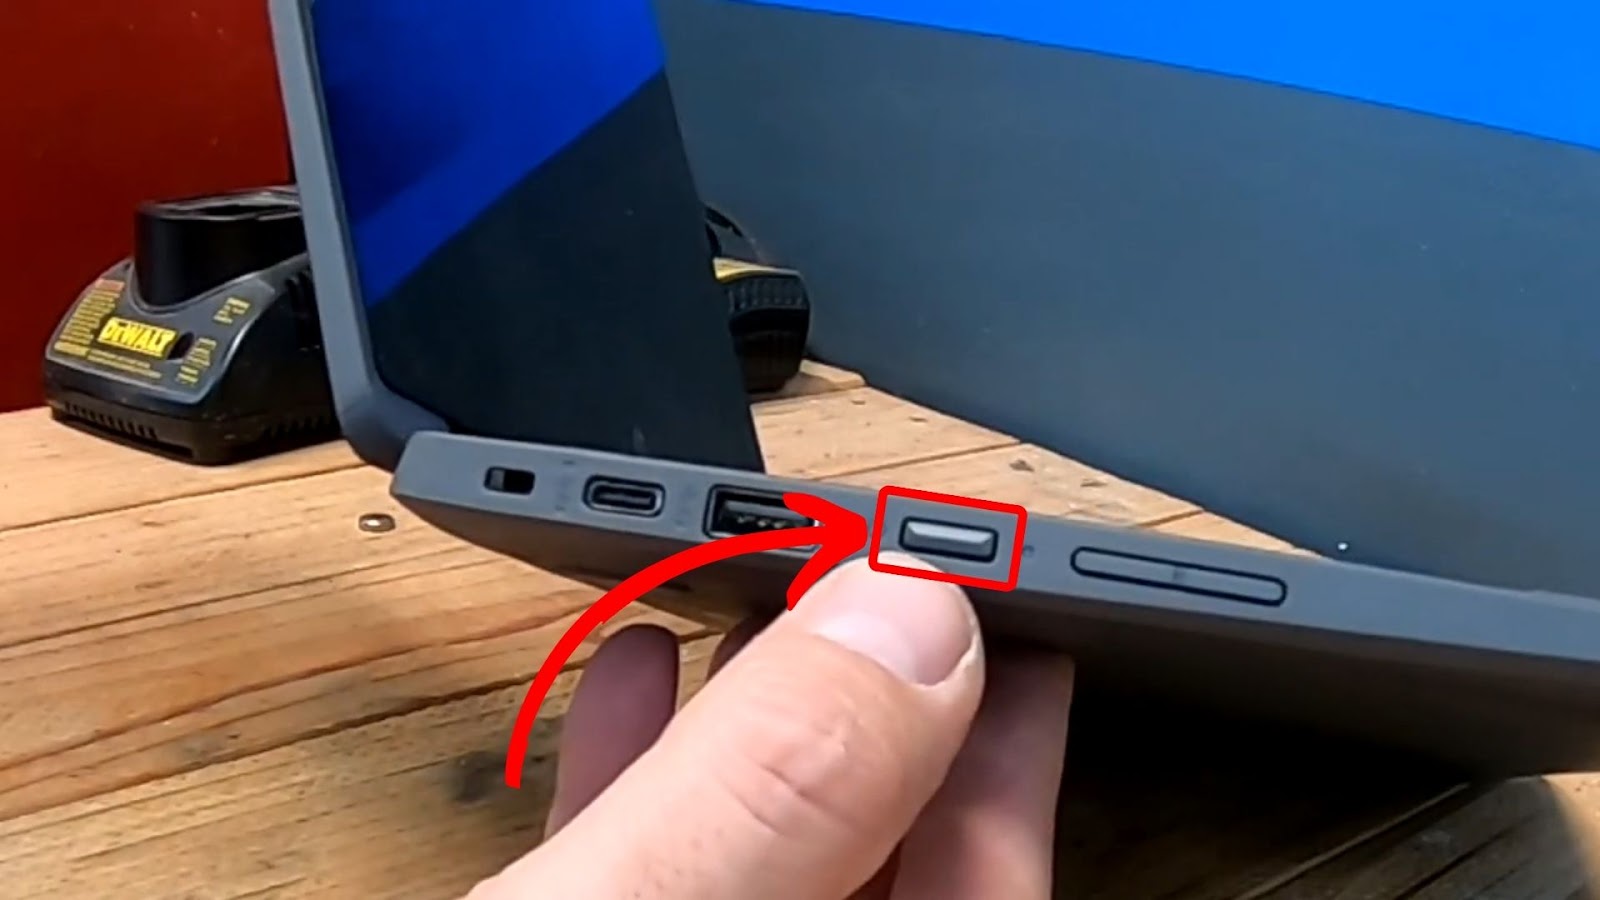
Method 4. Use a USB Ethernet Adapter
You can switch to an Ethernet cable to avoid experiencing Wi-Fi issues.
Cable connections are not affected by issues affecting wireless networks. They are more reliable and offer high-speed internet connectivity.
However, it’s worth noting that most Chromebook models do not support an Ethernet connection, so you must use a USB Ethernet adapter. (Like this one from Amazon)
Plug your adapter into the USB port on your Chromebook. Then, go to your Chromebook settings and select Ethernet from the available connection types to establish a connection.
Method 5. Update Your Chromebook Software
Updating your device improves performance, stability, and Wi-Fi connectivity, fixing issues like the network not available on Chromebook.
These are the steps to update your Chromebook software:
- Step 1. Go to your “Settings > About ChromeOS” on Chromebook.
- Step 2. Hit “Check for updates”.
Your device will automatically install the available update once you click “Check for updates”. - Step 3. Restart your device.

Note: When using cellular data, the Chromebook will alert you of the required mobile data for updates.
Learn more about updates on Chromebook help.
Method 6. Reset Your Chromebook to Factory Settings
When none of the tricks works, you can factory reset your Chromebook as your last resort. This option removes any issue that could trigger the “network not available Chromebook” issue, whether incorrect configurations, software conflicts, or system file errors.
So, before reset, ensure your files are backed up and sign out of your Google account.
Here is how to reset your Chromebook to factory settings:
Important! A factory reset will erase all your Chromebook’s contents.
- Step 1. Press and hold “Ctrl+Alt+Shift+R”.
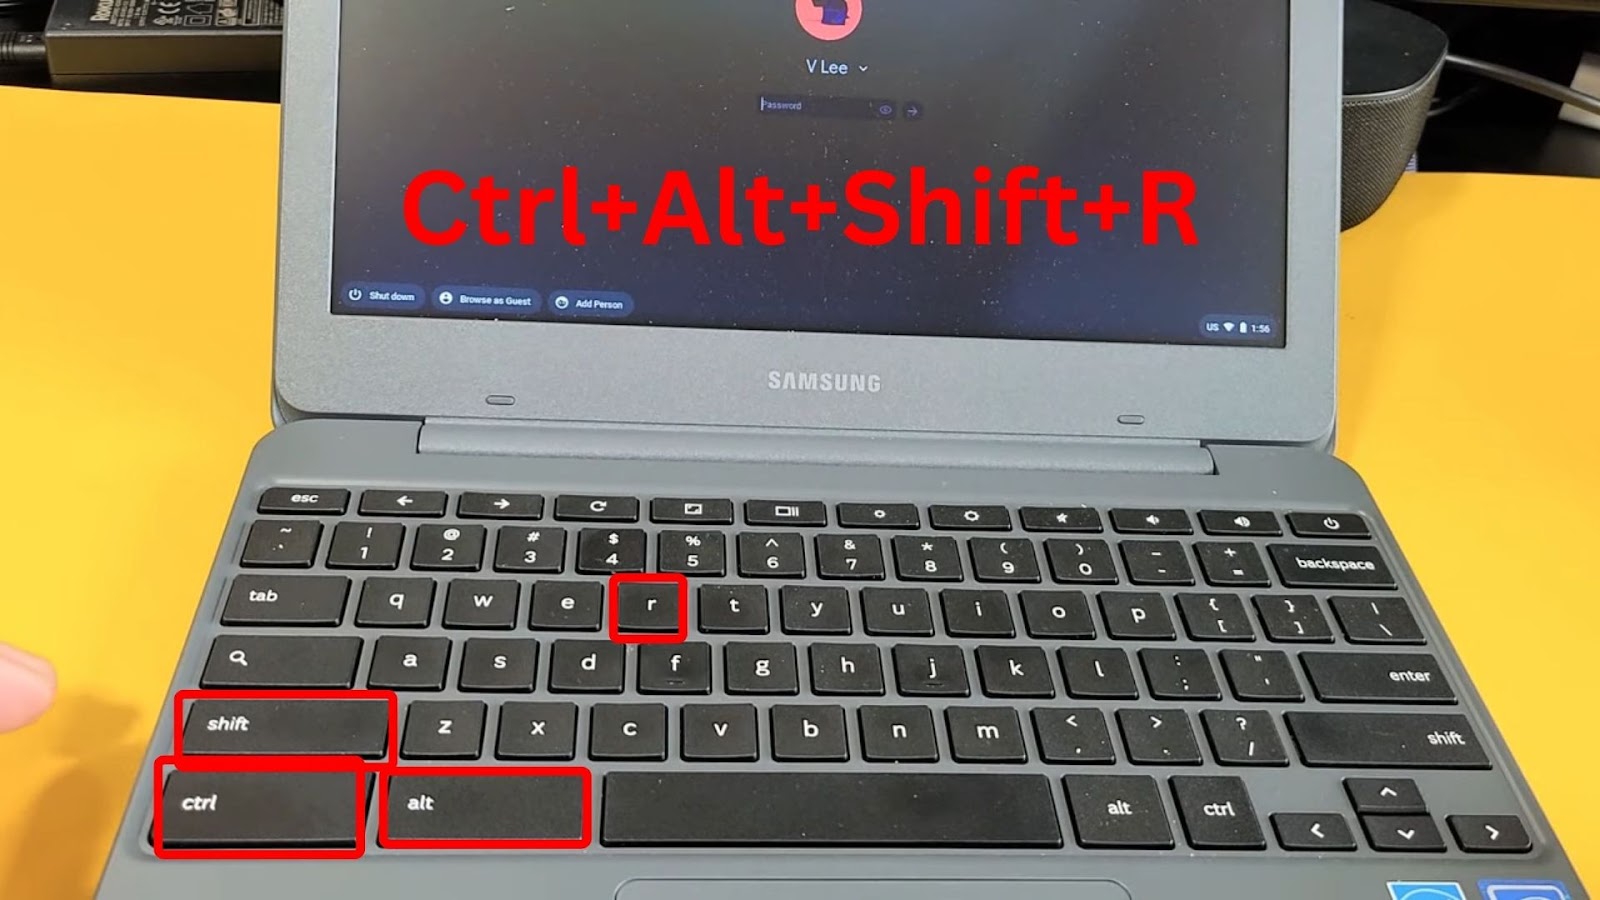
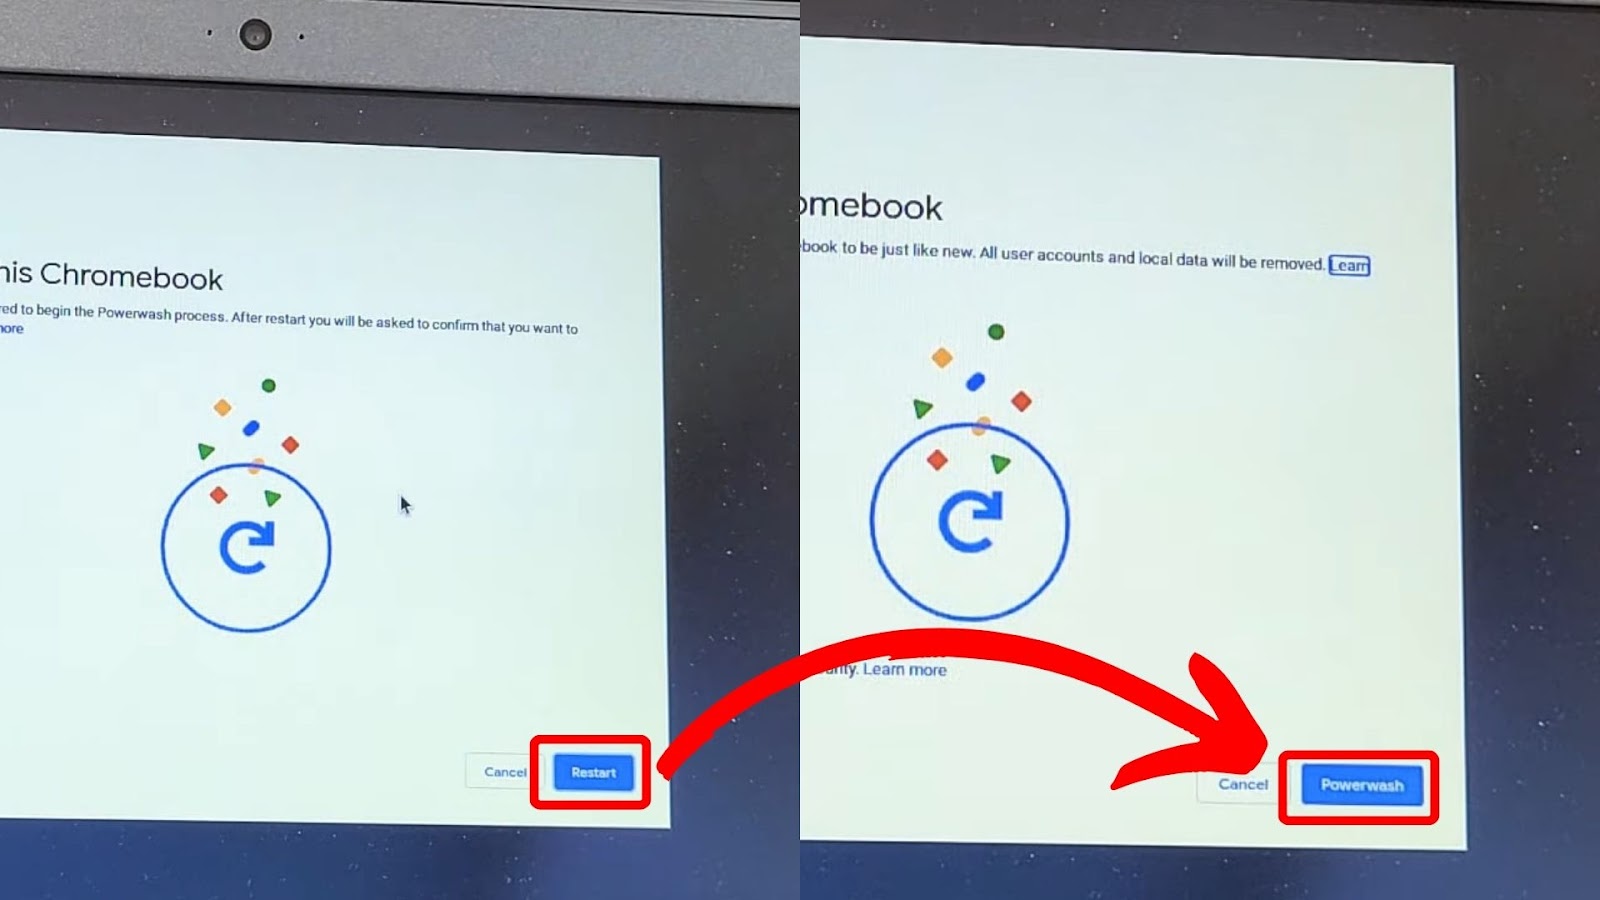
- Step 2. Select “Restart”.
- Step 3. Tap “Powerwash > Continue”.
- Step 4. Log back into your Google account.
Note: After resetting your Chromebook, the first account you use to sign in will become the device’s owner.
Read more on resetting your Chromebook from Chromebook help.
If you’re using a school Chromebook, you need to bypass your administrator to reset it.
Method 7. Contact Chromebook Customer Support
If all else fails, you can contact Chromebook customer support via phone, online support, or the Google community forums. They can provide more guidance to fix any problems you may have.
Before doing so, check your warranty first. If your Chromebook is still under warranty, the manufacturer may repair or replace it for free.
But if your warranty has expired, you may have to pay for any repair or replacement costs. Remember that Chromebook gives a limited one-year warranty on products from the day of purchase. Learn more about how to get help from your Chromebook manufacturer.
Discover why Chromebooks are so bad and what makes them a good device choice.
How to Force Chromebook to Connect to Your Home Wi-Fi
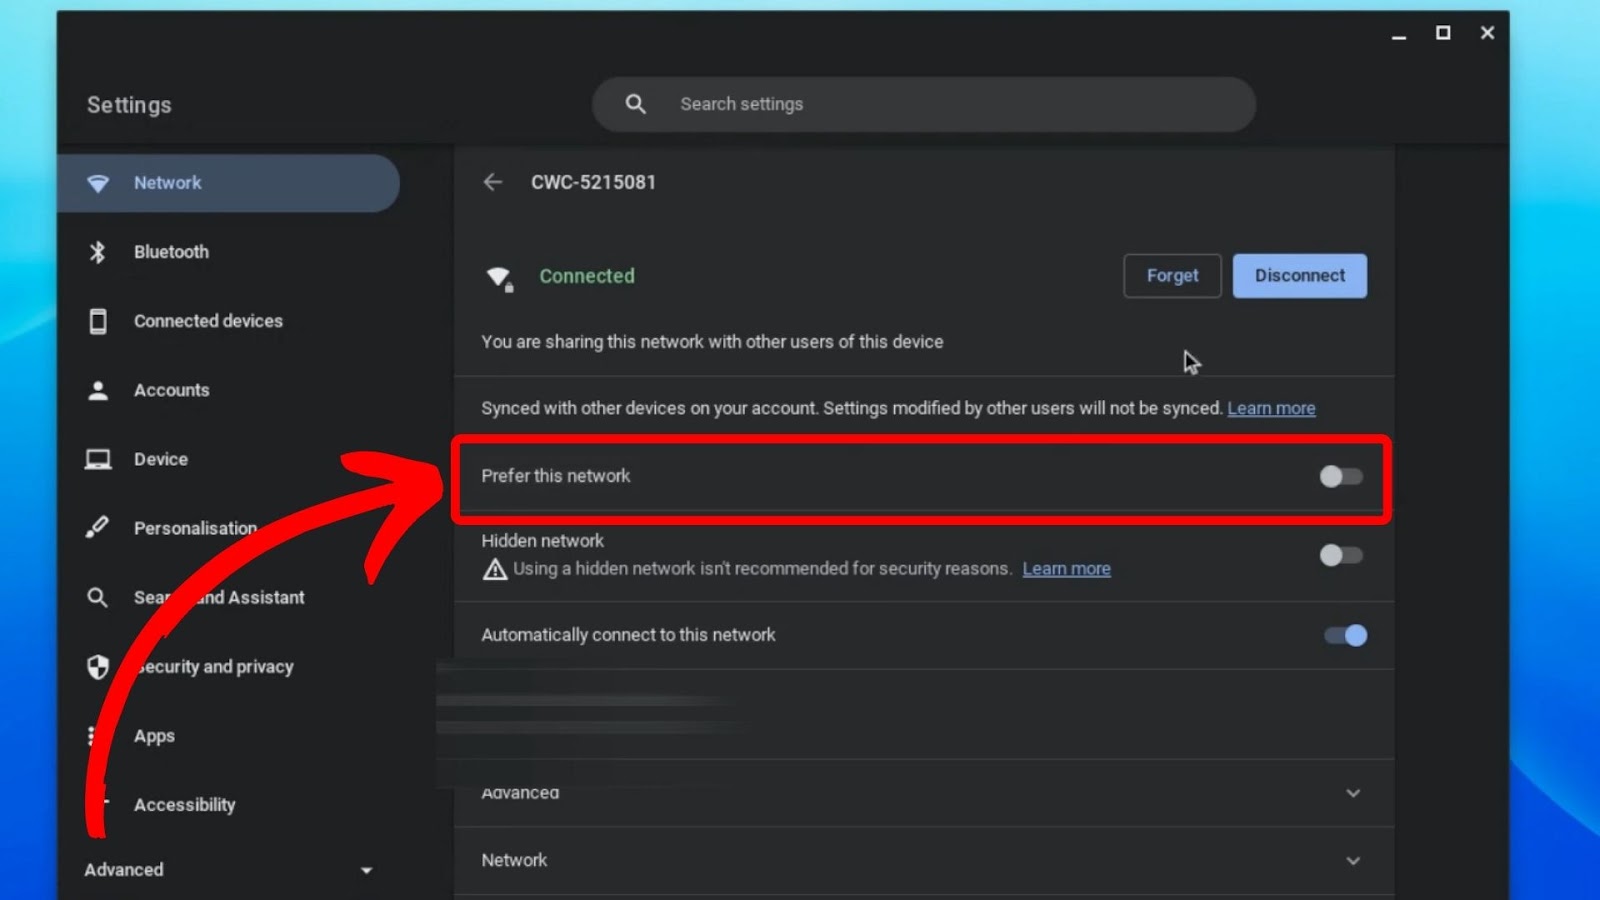
You can force the Chromebook to connect to your home Wi-Fi by choosing a preferred network. This way, your Chromebook will only connect to the selected network, even if you can access multiple networks nearby. Before doing so, connect your Chromebook to the Wi-Fi network you want to set as preferred.
Follow these steps to force your Chromebook to connect to your home Wi-Fi:
Step 1: Open Your “Chromebook Settings”
Step 2: Hit “Wi-Fi”
Step 3: Select the “Network Connection” You Want to Set
Step 4: Tap on “Prefer This Network”
Learn more about Chromebook help.
Can You Connect Your Chromebook to the Internet Without Wi-Fi?
Yes, you can connect your Chromebook to the internet without Wi-Fi using your phone’s cellular data via a portable hotspot or USB sharing. However, Google does not recommend using these methods, as mobile data is less reliable than a Wi-Fi network.
To use mobile data on your Chromebook, look for the “Mobile Hotspot” option in your phone’s settings. Set the option up by assigning a username and password. Then, open your Chromebook’s Wi-Fi and look for your mobile data’s username. Type the password to connect to it.
We have a whole article on how to use Hotspot on a Chromebook.
Moreover, you can use USB sharing by connecting your smartphone to your Chromebook via a USB cable. Then, go to your phone’s settings and turn on USB tethering. This will allow your Chromebook to use your phone’s data connection to connect to the internet.
Learn more about using mobile data on Chromebooks.


