Mac OS WindowServer process supports each activity on the device. Many users do not notice it as it runs silently in the background.
Windowserver process on the Mac, however, can sometimes consume a lot of resources (specially CPU usage) and therefore it can slow down your computer.
The WindowsServer CPU usage increases due to a variety of reasons such as having many windows open. But… what is exactly the WindowServer process on a Mac?

What Is Windowserver On Mac?
WindowServer is a process on Mac that facilitates communication between displays and apps. All open apps are rendered on display by this process. Simply put, when you have your Mac open, it is the Windowserver Mac responsible for allowing you to see it on your device.
A simpler way of answering the question of what is Windowserver on Mac is: Windowservers on Mac enable your machine to run smoothly by providing a communication mechanism between the display and apps.
It is what allows Mac users to see whatever is running on the machine.
Windowserver on Mac is responsible as well for redrawing your screen whenever you switch to another tab in Safari, moving open windows around, or editing videos or images.
Users need to know what Windowserver on Mac is to understand the implications of running too many apps or opening too many windows all at the same time.
Where Do You Find Windowserver CPU usage?
Your WindowServer on Mac might consume a high CPU load because you have multiple folders or files cluttering up the desktop screen.
Enabling visual effects like Motions and Transparency also results in multiple displays, which increases the WindowServer Mac CPU usage.
Here’s how you can check the CPU usage of Windowserver on your Mac.
Step 1: Open the Spotlight Search by pressing Command + Spacebar

Step 2: Type “Activity monitor” and press enter
Step 3: Open the active processes by clicking on the “CPU” tab
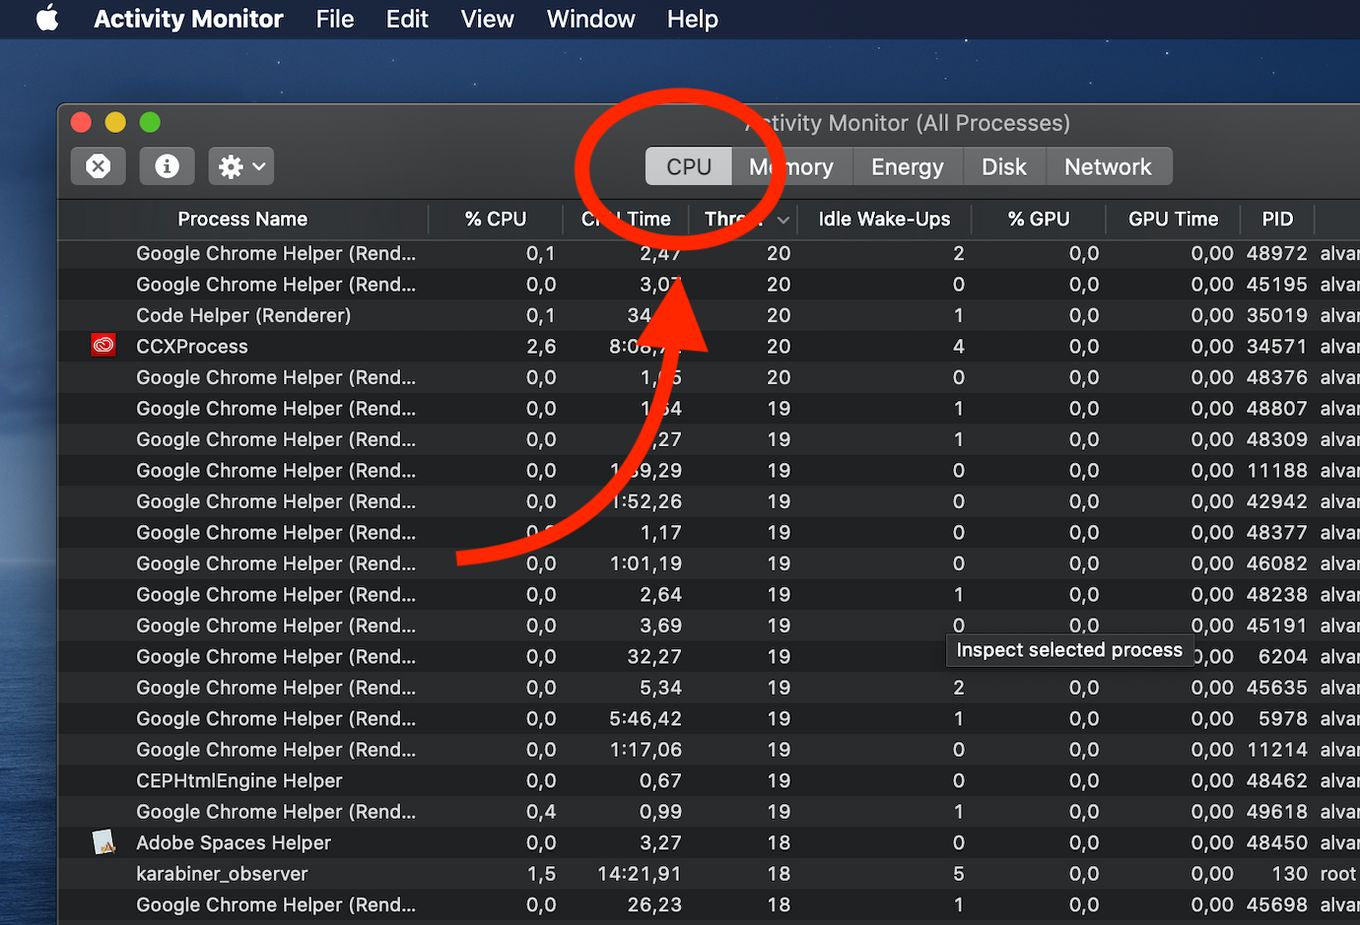
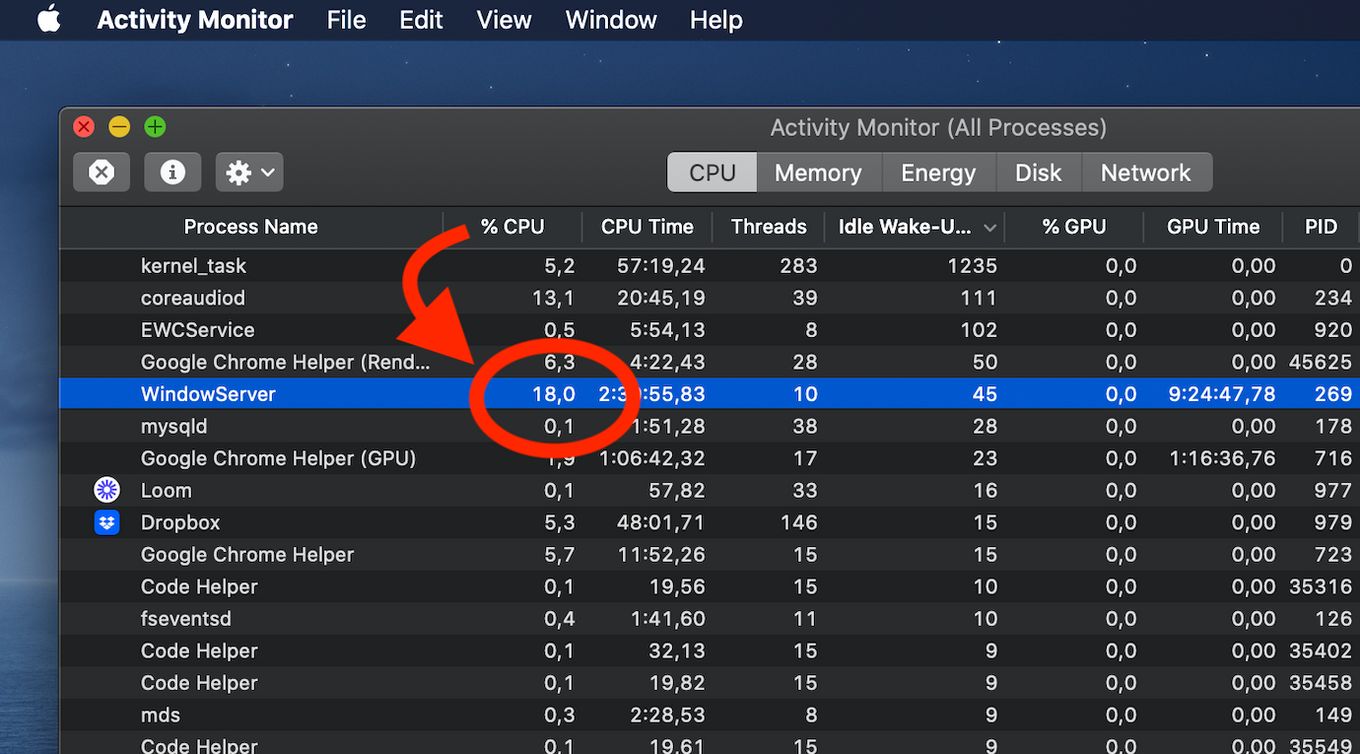
Step 4: Search for the “WindowServer” among the list of processes
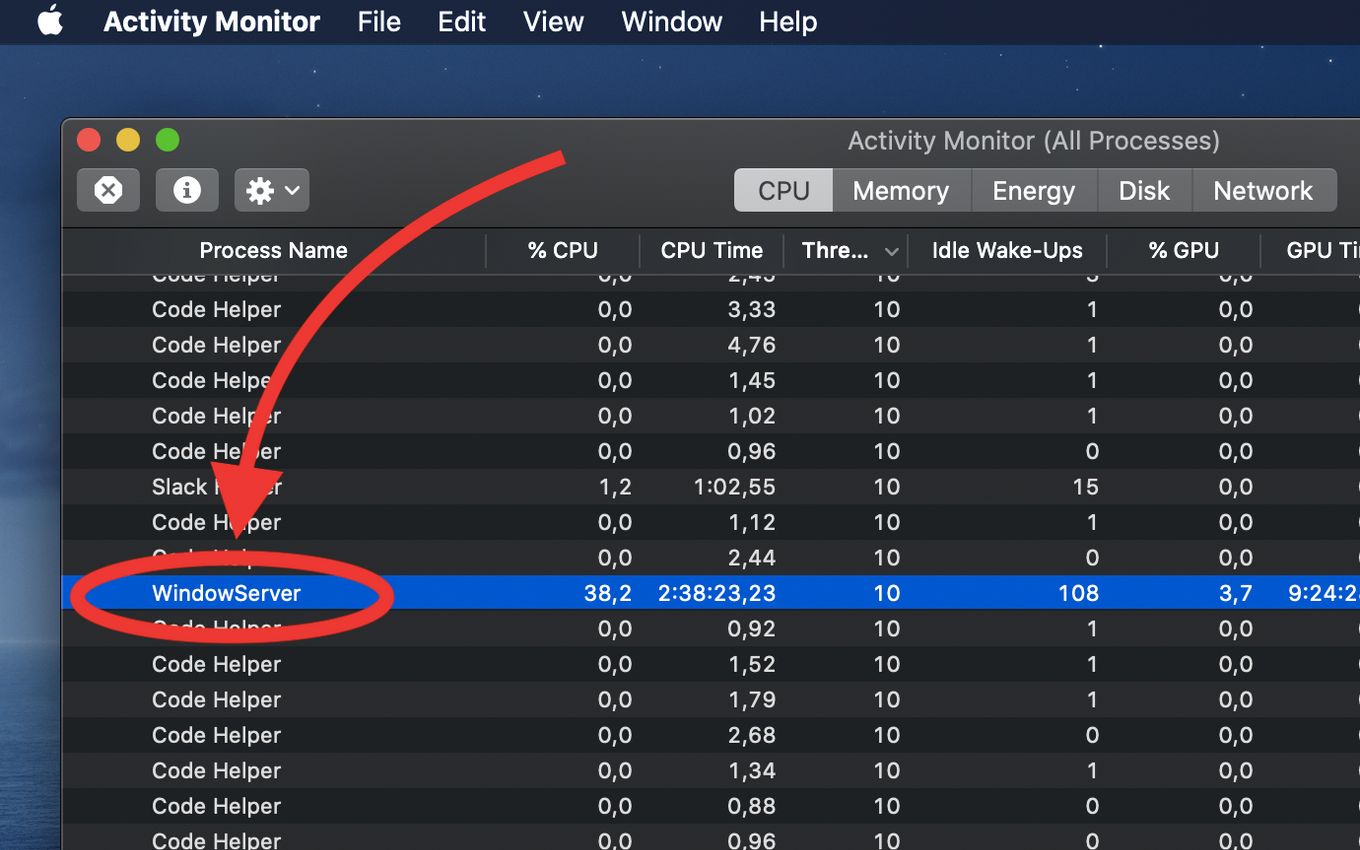
Step 5: Look for the “CPU percentage” of the Windowserver
9 Ways To Reduce the High CPU Usage of Windowserver on Mac
Having high CPU usage is relatively normal, but it can be concerning in some cases. This increased usage may cause your MAC to lag frequently. High CPU usage can also make it difficult for your device to perform even the simplest tasks.
Ideally, the Windowserver on your Mac should not take up more than 30%of CPU resources.
Below are some steps you can follow when you want to fix the high CPU usage of the Windowserver on your Mac.
Solution 1. Close Unnecessary Windows
Having many open windows makes WindowServer work harder. This is especially true if you’re using an older Mac device.
To reduce the overall load on your Mac system, you should also close all browser tabs you aren’t using.
Solution 2. Close Additional Desktops
You can also lower the Windowserver on Mac CPU usage by closing additional desktops. Here’s how.
-
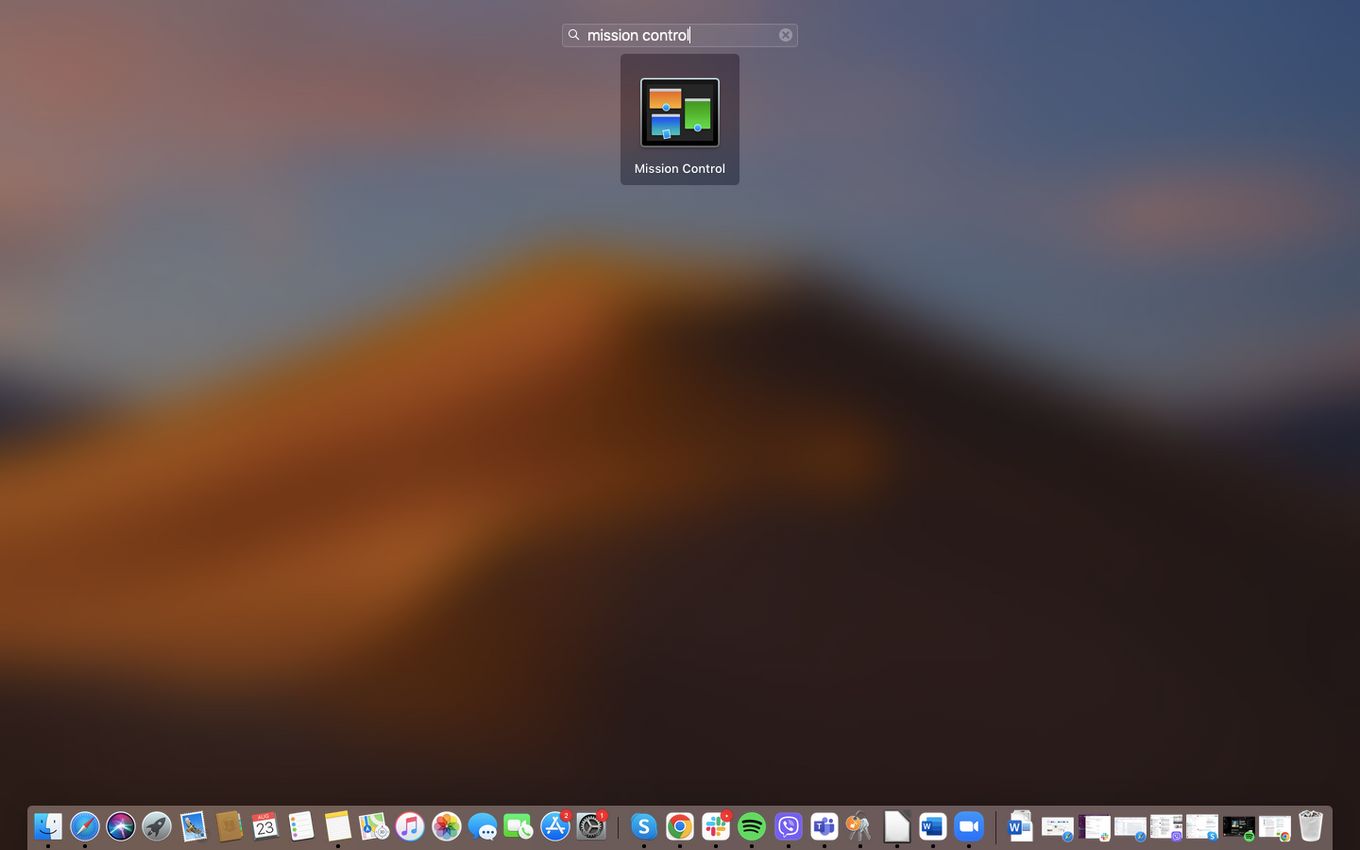
Step 1: Go to the Dock and click the “Launchpad” Icon

-
Step 2: Choose “Mission Control”
-
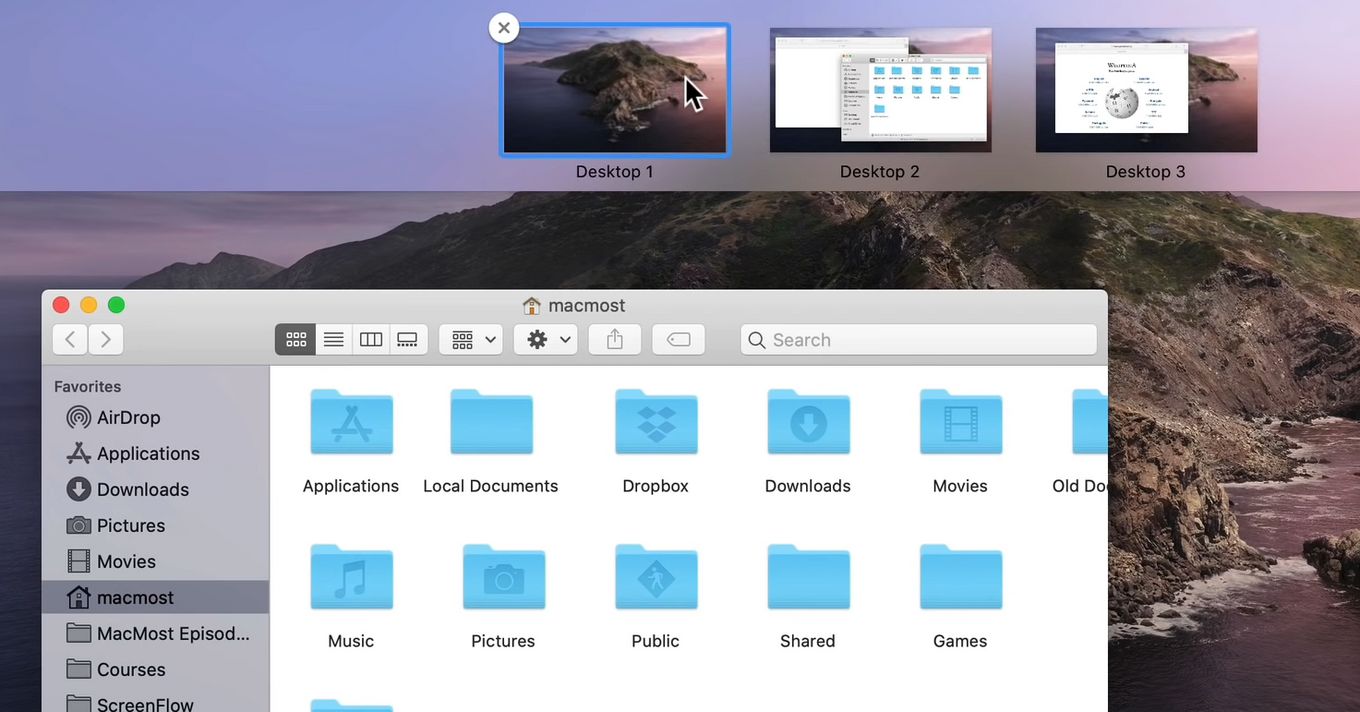
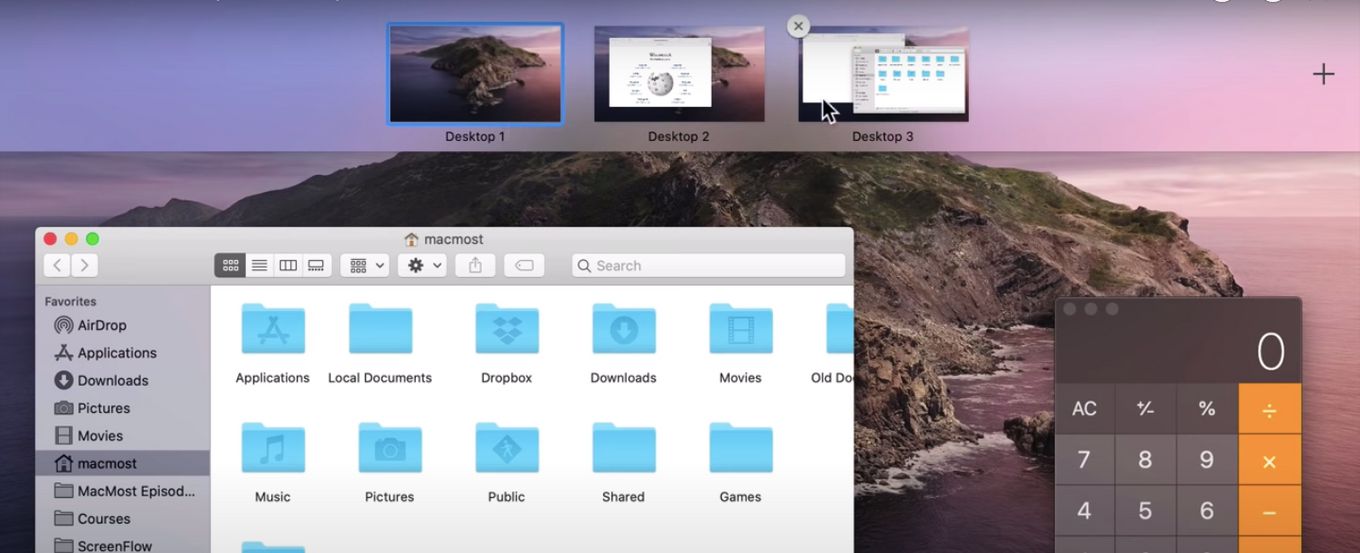
Step 3: Use the mouse pointer to hover over unattended desktops
-
Step 4: Close it by clicking on ‘X’ in the upper corner of the desktop

Solution 3. Reduce Transparency And Motion
Some visual effects settings on Mac devices are automatically enabled including Transparency and Motion. This allows Mac users to experience an enhanced visual experience overall.
Automatic enabling of visual settings, however, consumes a greater amount of CPU power. You may be able to avoid this problem by reducing these features.
You can follow these steps.
-
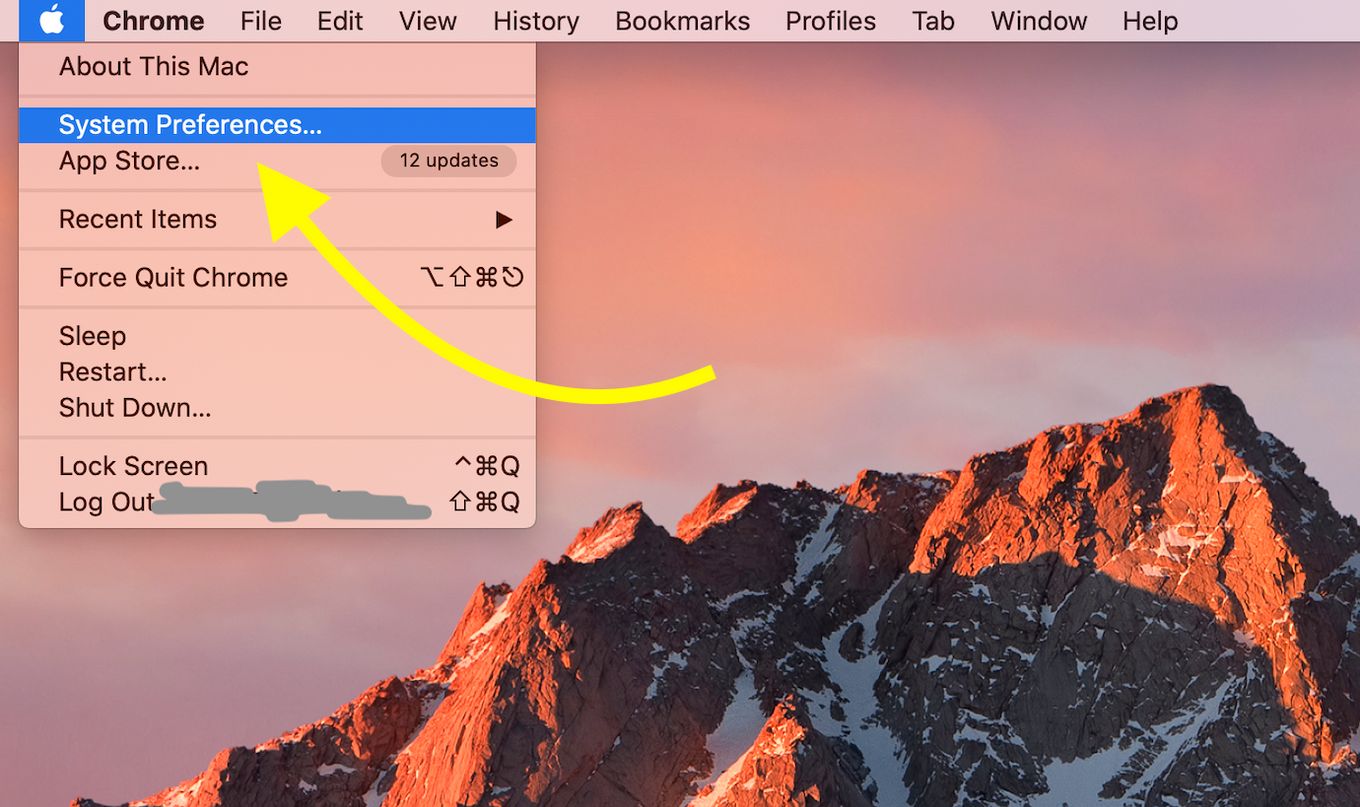
Step 1: Click on the “Apple Logo” found at the top left of your device’s screen
-
Step 2: Click “System Preferences”
-
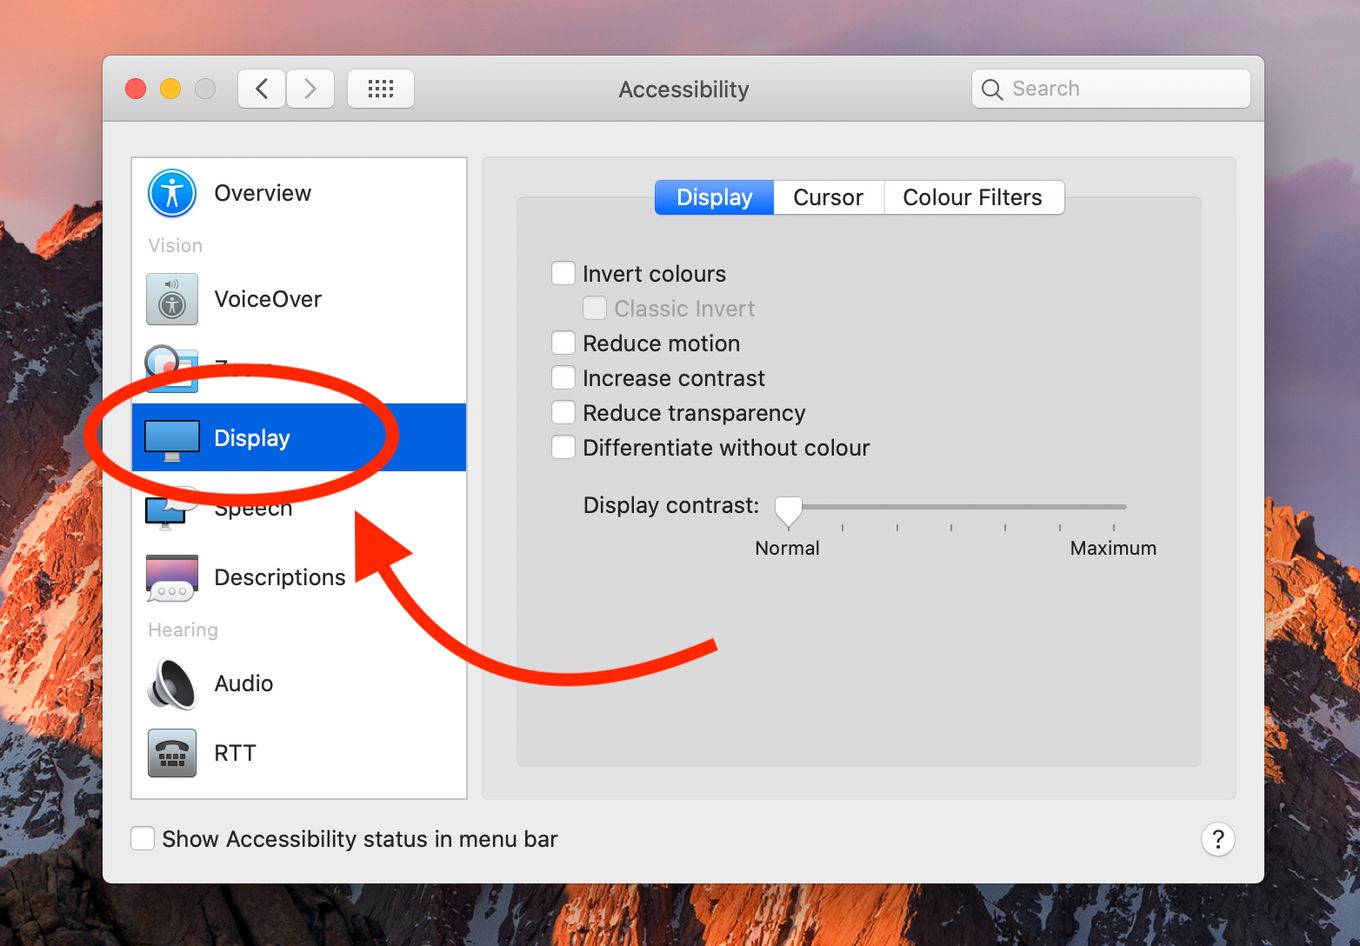
Step 3: Double-click the “Accessibility” icon
-
Step 4: Click the “Display” option from the left panel
-
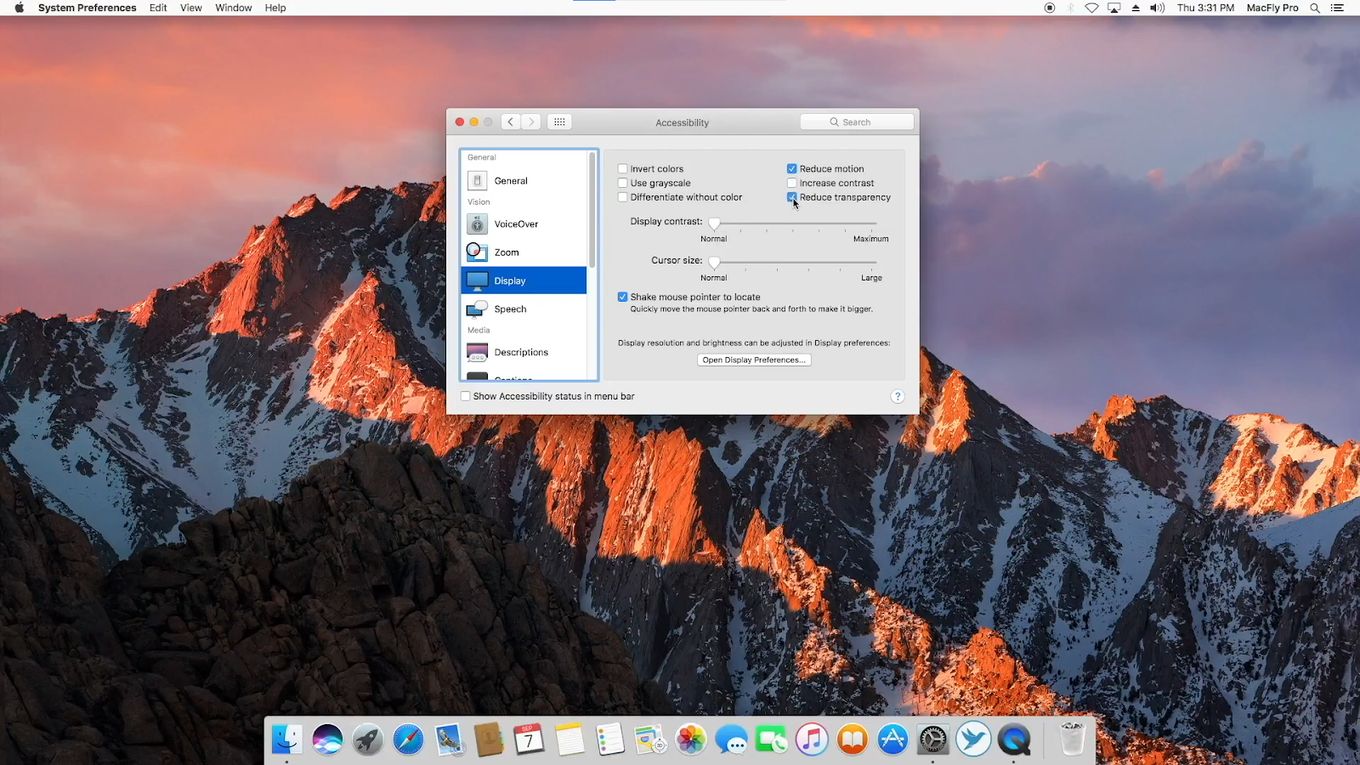
Step 5: Tick the boxes for “Reduce Motion” and “Reduce Transparency”
Solution 4. Clear Files
Aside from the disorganization of having plenty of files on your Mac device, it can also increase the CPU usage of your WindowServer.
This is because more visual elements are required as the number of files increases.
To prevent this from happening, you should either move all these files to a new folder or remove them from the desktop. This will allow you to significantly decrease the Windowserver CPU usage.
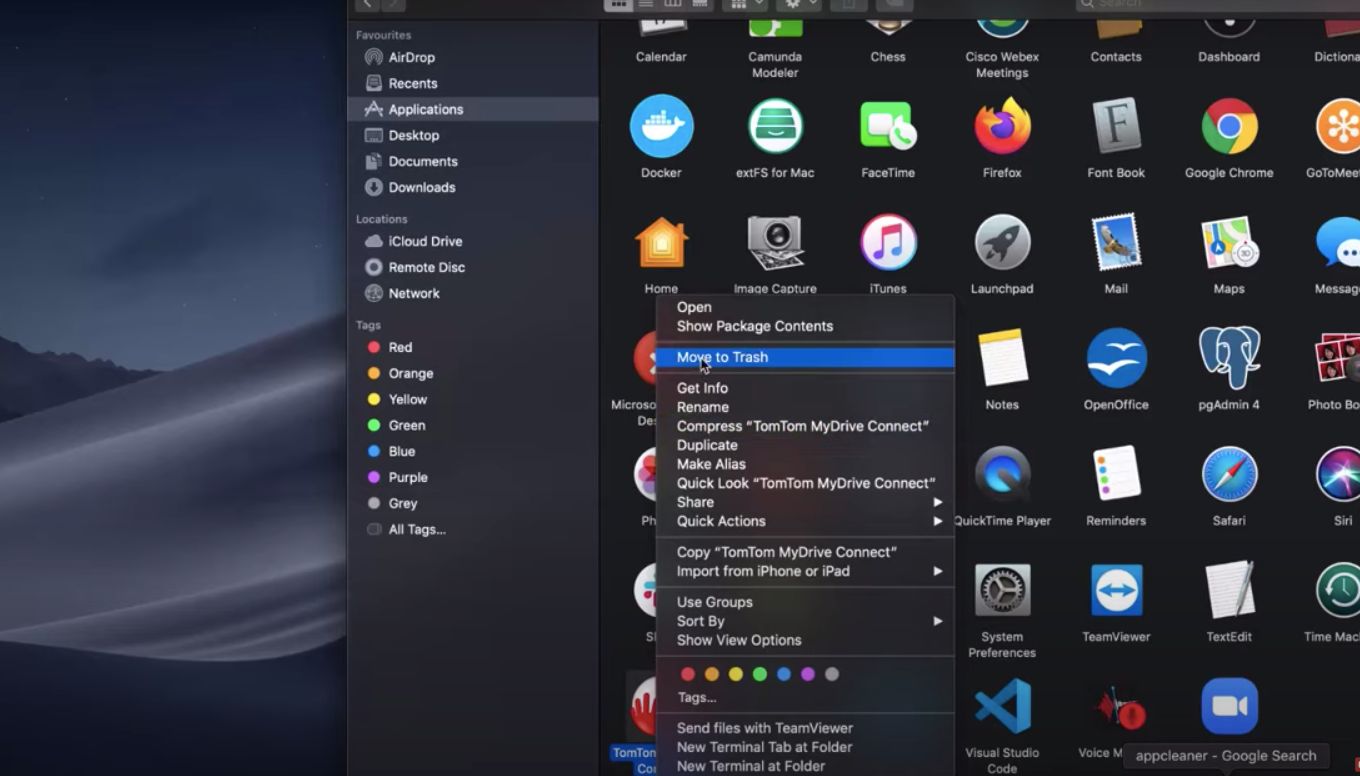
Solution 5. Uninstall Corrupt Applications
Sometimes, your Mac may be experiencing performance problems due to a corrupt application. It can also be consuming a lot of CPU energy and usage.
Try reverting to when the application was last installed and see if the problem occurred recently. See if your issue can be fixed by locating and uninstalling it from your device.
Follow these steps:
-
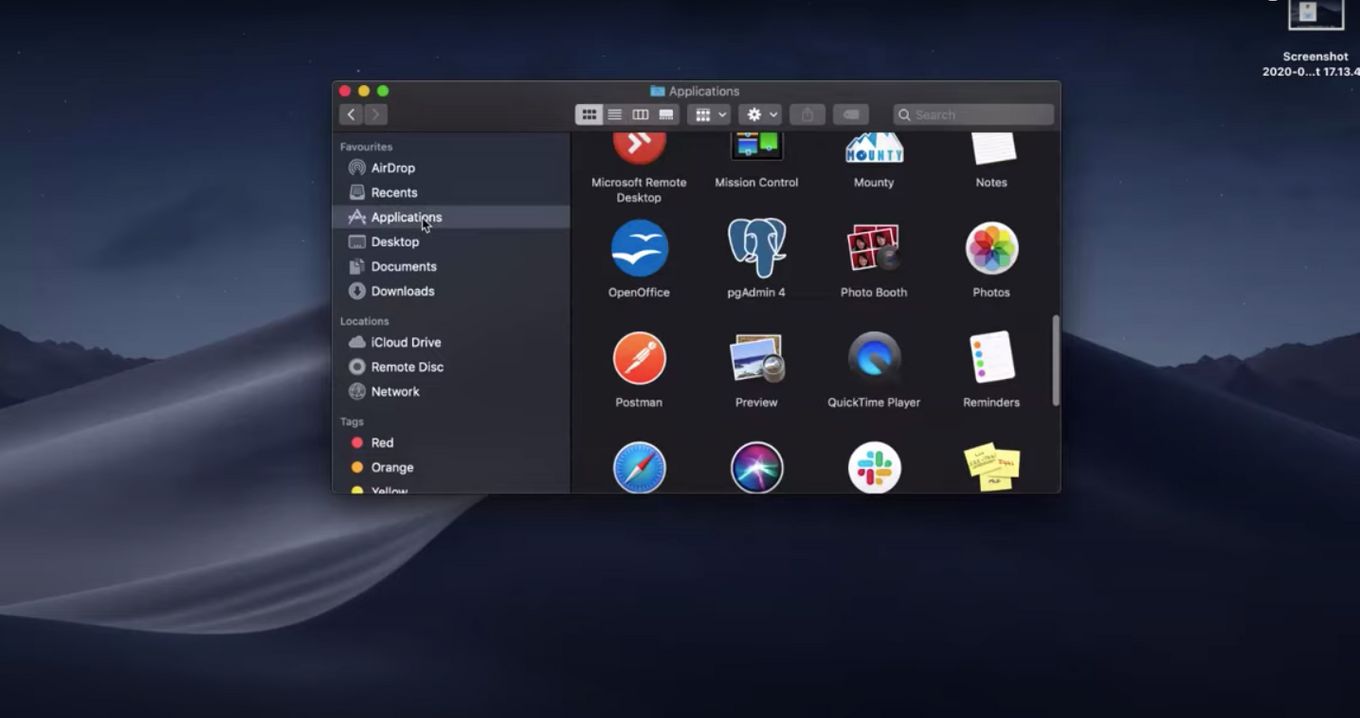
Step 1: Go to “Finder”
-
Step 2: Click “Applications”
-
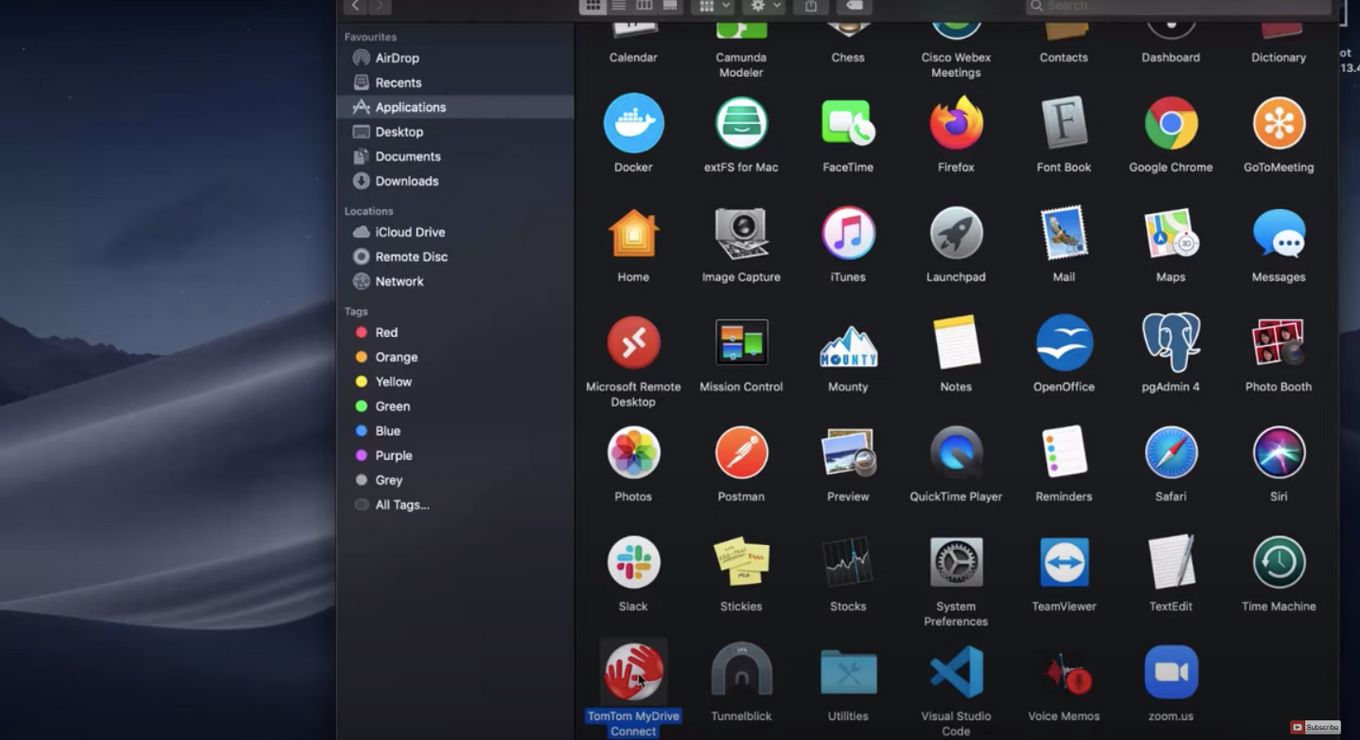
Step 3: Select the problematic app by command-clicking it
-
Step 4: Choose “Move to Trash” option from the list

Solution 6. Turn Off Multiple Displays
Having more than one monitor connected to your device might also be causing the heavy CPU consumption of the WindowsServer on Mac.
The process is heavily affected by this factor given that external monitors lack a separate graphics processor unit or more commonly known as GPU.
This means that your device is taking care of all the graphical and visual processing.
Thus, your WindowServer on Mac is taking up an extraordinarily heavy CPU load. Taking out the external monitor may result in a decrease in CPU usage.
Related article: Mac stuck on “Checking for Updates”
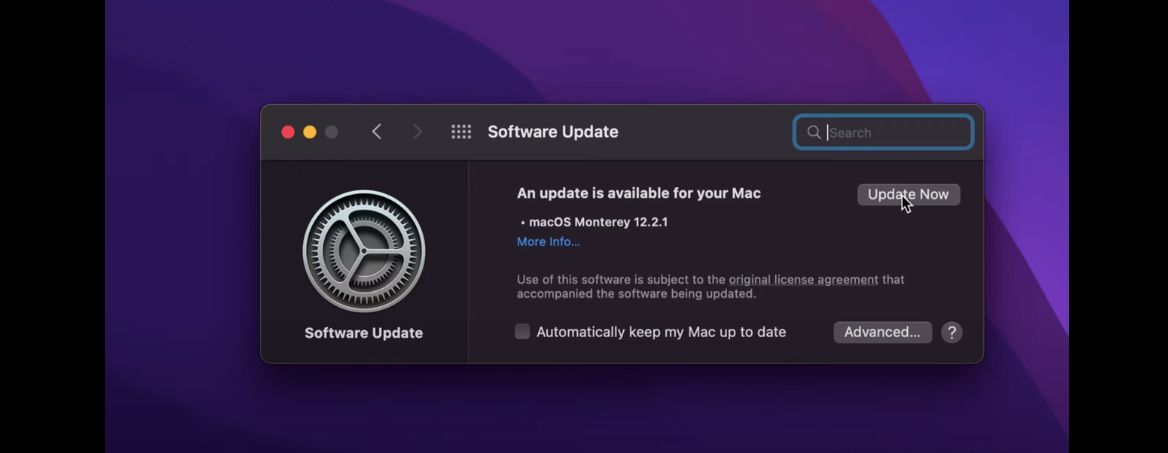
Solution 7. Ensure That The System Software Is Updated
In many cases, system errors or bugs might be infiltrating the current version of your Mac.
This then might result in an even higher load on your process.
In order to prevent such issues, you should ensure that your Mac’s system software is up to date.
Here’s how to ensure the software is updated.
-
Step 1: Click the Apple logo on the upper left of your screen
-
Step 2: Go to the “System Preferences” option
-
Step 3: Go to “Software Update”
-
Step 4: Click the “Update Now” button if an update is available


Solution 8. Restarting Your Mac
Many Mac users do not shut down or restart their devices. They simply close the lid of their device after they’re done working and simply open it again.
Restarting, however, is essential as it deletes temporary files and cache, and frees up RAMs.
It can also fix problems such as too many CPU cycles being consumed by certain processes. Do your device a favor and shut down or restart your Mac now and then instead of simply putting it to sleep.
Solution 9. NVRAM/SMC Reset
You can also opt to reset your MAC’s NVRAM or SMC if it continuously fails to respond or still lags.
There is evidence that these resets help resolve minor issues and improve the smooth operation of your Mac.
To Reset NVRAM, Follow These Steps:
-
Step 1: Turn off your Mac by clicking the “Shut Down” option in the Apple Logo Menu.
-
Step 2: Press and hold down for roughly 10 seconds “Command + Option + P + R” keys
-
Step 3: Upon hearing the startup sound from your Mac, release all the keys.


To Reset SMC Follow These Steps:
-
Step 1: Shut down your Mac by clicking the “Shut Down…” option in the Apple Logo Menu.
-
Step 2: Press and hold simultaneously the “Shift + Option + Control + Power” buttons
-
Step 3: Release the keys and turn the power on again.


Is WindowServer On Mac A Virus?
The WindowServer On Mac is not a virus and is completely safe. The most important thing to know is that WindowServer on Mac is what every application you use on the device needs to display its content on the screen.
Why Does Windowserver Run On Mac?
The Windowserver process on Mac is the process that is responsible for managing the graphical interface as well as the overall visual appearance of the Mac. Without this process, your device may not run smoothly. Neither will you be able to view anything on your Mac dynamically.
The Windowserver on Mac plays a significant yet harmless role in the operating system.
Should You Stop Windowserver From Running On Your Mac?
No, experts do not recommend quitting the WindowServer on the Mac process given its critical role in the overall operation of your computer. You will be prompted to log out and all of your applications will be terminated if you choose to quit this process.
If you’re concerned that the Windowserver on Mac is causing your device to slow down, then you can simply check the CPU usage, and take action as outlined above.
The Windowserver On Mac Is Essential
The Windowserver on Mac has an essential role to play in the system as it is what allows displays and apps to communicate with each other.
Whatever you see on the screen of your Mac, you can be sure that the Windowserver is behind it. It’s not a virus, and should not be removed or terminated.
The WindowServer on Mac, however, can take up a significant percentage of the CPU resources, thus slowing down your device. You can check if this is the case and fix the problem accordingly.
Some of the steps you can do include closing unused windows and desktops, clearing files, turning off additional displays, and restarting your device.


