A Mac for your computer or phone has always been a solid choice. You can always expect excellent quality from a Mac regarding gadgets. However, it has a significant downside if you’re into playing video games.
Playing games on a Mac typically involves some sort of workaround, and unfortunately, that includes older 32-bit games. So, in this post, we’ll look at how to play 32-bit games on a Mac.
Can You Play 32-Bit Games on Mac?
Yes, you can play 32-bit games on Mac using an old version of macOS, emulators, or Bootcamp. Since 2019, Apple operating systems only support 64-bit apps, so you should still be able to play your favorite 32-bit games on older systems released before 2019.
If you’re on a device that uses a more recent operating system, you can still play 32-bit games on Mac, but you’ll need to install additional third-party software.
If you are having trouble running Steam on Mac, know there is now a 64-bit app version.
Related Post: How to Connect Steam Link to Chromecast
What Mac OS Can Run 32-Bit Games?
MacOS Mojave was the last Apple operating system that could run 32-bit games, so any operating system before that could play them, too. MacOS Catalina, launched on October 7, 2019, was the first macOS that only supported 64-bit apps.
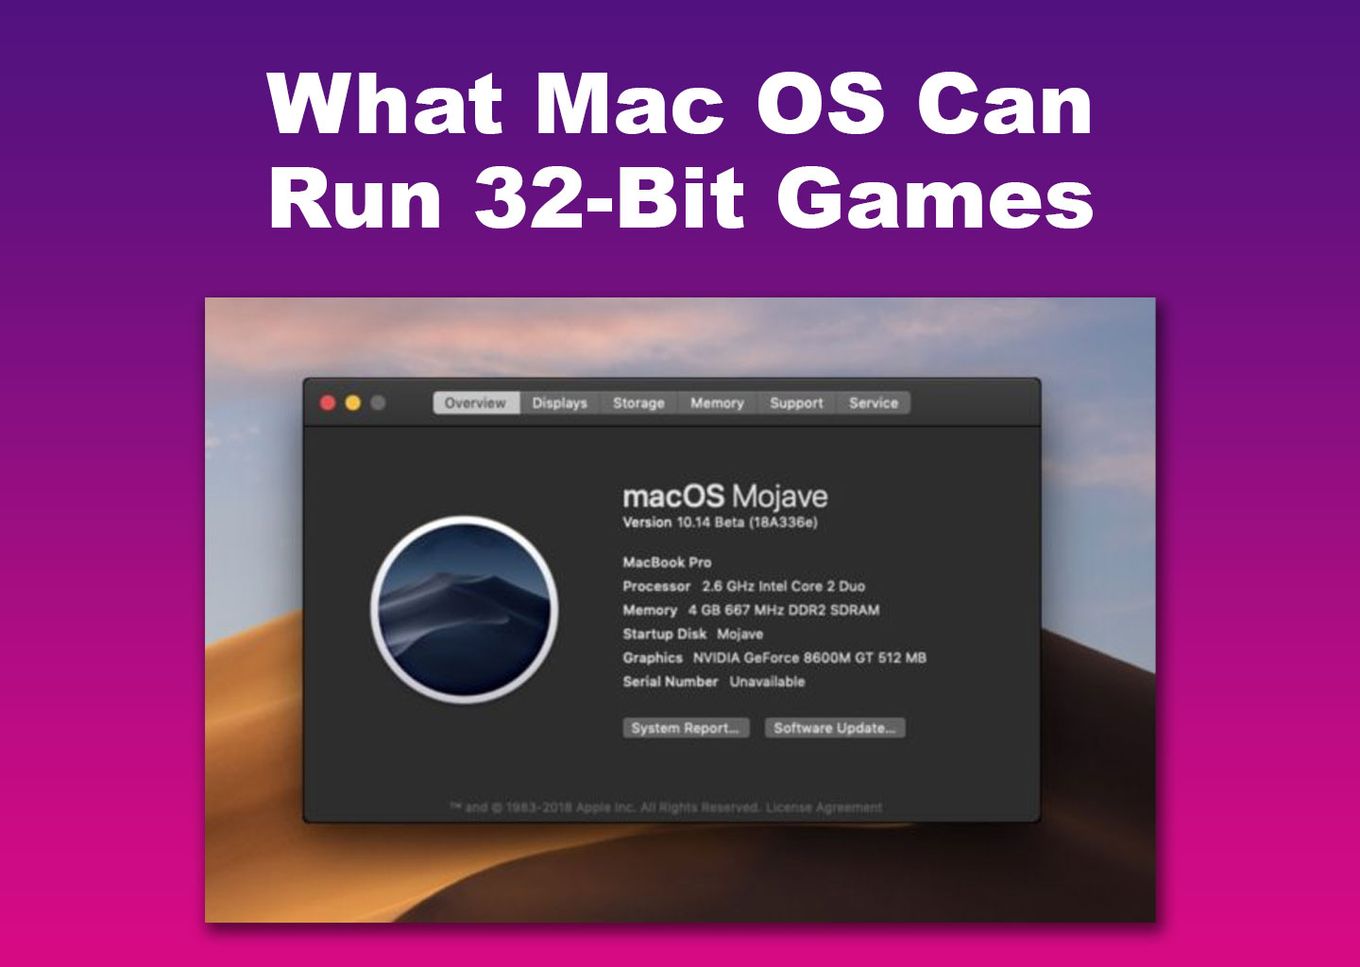
Anything that came out after macOS Catalina will require a virtual machine or emulator to run 32-bit games. You can check what operating system your device is running by opening the Apple Menu and then selecting About This Mac.
Here’s a list of operating systems that can play 32-bit games on Mac without third-party software:
| Operating System | Year Released |
|---|---|
| Mac OS X Public Beta | 2000 |
| Mac OS X 10.0 | 2001 |
| Mac OS X 10.1 | 2001 |
| Mac OS X 10.2 | 2002 |
| Mac OS X Panther | 2003 |
| Mac OS X Tiger | 2005 |
| Mac OS X Leopard | 2007 |
| Mac OS X Snow Leopard | 2009 |
| Mac OS X Lion | 2011 |
| OS X Mountain Lion | 2012 |
| OS X Mavericks | 2013 |
| OS X Yosemite | 2014 |
| OS X El Capitan | 2015 |
| macOS Sierra | 2016 |
| macOS High Sierra | 2017 |
| macOS Mojave | 2018 |
If you’re a game enthusiast, you probably know that Apple banned Fortnite on their devices years ago? But did you know you can still play Fortnite on Mac?
How to Run 32-Bit Games on Mac
If you’re on a Mac with one of the newer operating systems, you have a few different choices when it comes to third-party software for running 32-bit games. This post covers installing a virtual machine, Boot Camp, and Wine Emulator.
Note: Two of these options, namely the virtual machine and Boot Camp, will involve the installation of Windows 10 onto your Mac. Windows has 32-bit and 64-bit versions of their operating systems, so ensure you have the 32-bit version ready.
Don’t want to go through the technicalities of running 32-bit games on your device? Check out these free MMOs for Mac!
Here are some options to run 32-bit games on Mac:
Method 1. Create a Windows Virtual Machine
Virtual machines are computer software that allows multiple operating systems on a single physical device. Their primary purpose is to enable users to run programs or apps requiring different operating systems on one computer, like playing 32-bit games on a Mac.
Plenty of virtual machines are available, and most are free to use. Some more popular virtual machines include VirtualBox, Hpyer-V, and VMware Fusion.
However, the most popularly used one is Parallels Desktop. The Pro Edition of this virtual machine, recommended for gamers, costs $119.9 a year. The subscription lets you install Windows and play 32-bit games on your Mac.
These are the steps to create a Windows Virtual Machine on Mac using Parallels:
-
Step 1. Download & install the free trial of “Parallels Pro Edition.”
To install the virtual machine, head to your Mac’s “Downloads” and click on the Parallels file you downloaded. Follow the on-screen instructions. You will have to enter your Administrator name and password.
-
Step 2. Install “Windows 11.”
Once “Parallels Desktop” opens, you will see a download page for Windows 11. Click “Install Windows” at the bottom right corner of that page.
-
Step 3. Sign into your “Parallels Account.”
If you are a first-time user, Parallels will give you a 14-day free trial.
-
Step 4. Click on “Activate.”
Your Mac will have a Windows 11 OS after the installation process.
-
Step 5. Go to “Windows Settings > Windows Update > Check for Updates.”
Your Mac will automatically download and install any available Windows updates. Once the updates are done, your computer will restart.
-
Step 6. Turn off the “Virtual Machine.”
This critical action will allow you to configure your Mac’s CPUs and Memory.
-
Step 7. Navigate to “Actions > Configure” to configure CPUs & Memory.
-Click on “Change” beside the “Configure for” option.
-Select “Games Only.”
-Click on “Hardware” from the “Windows 11 Configuration” page.
-Set the processors and memory to “Auto.” -
Step 8. Turn your “Virtual Machine” back on.
-
Step 9. Activate “Windows 11.”
You must purchase a “Windows Activation Key” for this step. To acquire the license, go to “Microsoft Store.” You can buy the Windows 11 Home or Pro, but the Home version is significantly more affordable.
-
Step 10. Download your favorite 32-bit games & enjoy.
Learn more about Creating a Windows Virtual Machine.
Method 2. Use Boot Camp
Boot Camp, or Boot Camp Assistant, is an official tool built into Apple operating systems that assists people in installing Microsoft Windows onto their Macs.
Instead of running different operating systems simultaneously, like with a virtual machine, Boot Camp lets you switch between Mac OS and Windows after it is installed.
This is the safest way to run 32-bit games on Mac since Boot Camp is an actual operating system feature. Of course, it still requires you to install a copy of your preferred Windows version; just ensure it supports 32-bit apps.
Learn more about how to install BootCamp Assistant on your Mac.
Here’s how to install Windows on Mac using Boot Camp:
Note: Make sure you have downloaded the Windows version you want to install on your Mac before following these steps.
-
Step 1. Go to “Utilities > Applications.”
Boot Camp comes pre-installed on Macbooks.
-
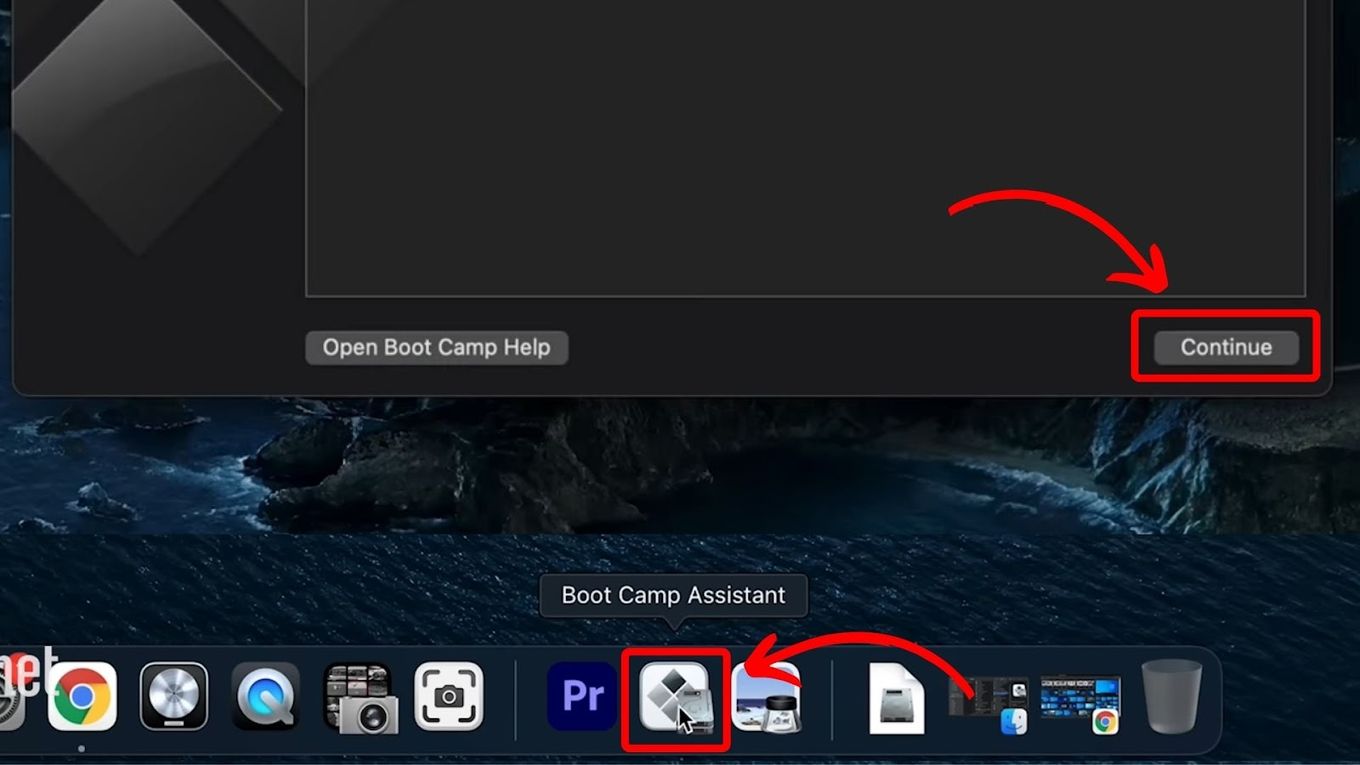
Step 2. Open “Boot Camp Assistant > Continue.“
Select “Create a Windows 10 or Later Install Disk” and “Install Windows 10 and Later Version.”

-
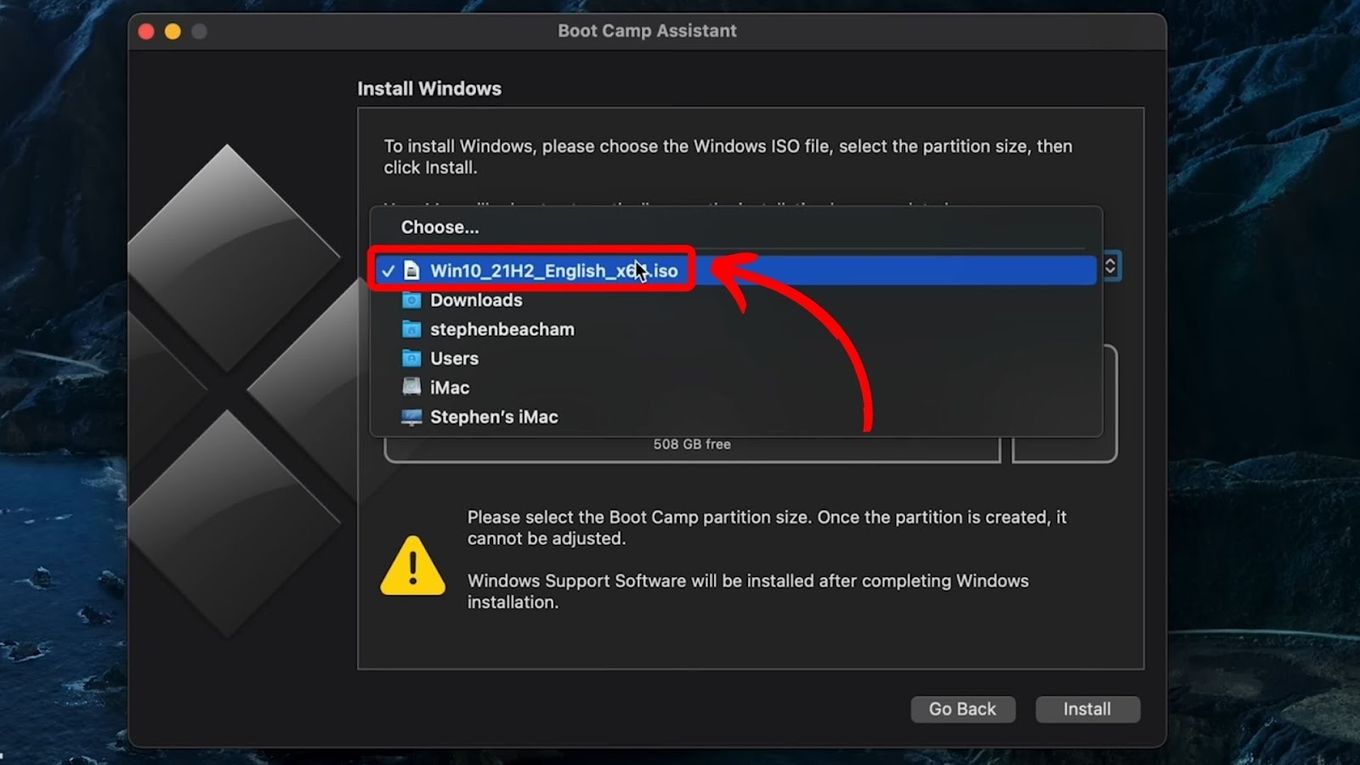
Step 3. Select the “Windows” version you have downloaded.
Once selected, click “Continue.” This will prompt the Windows version you decided to download and install. Take note that the process can take a while.
-
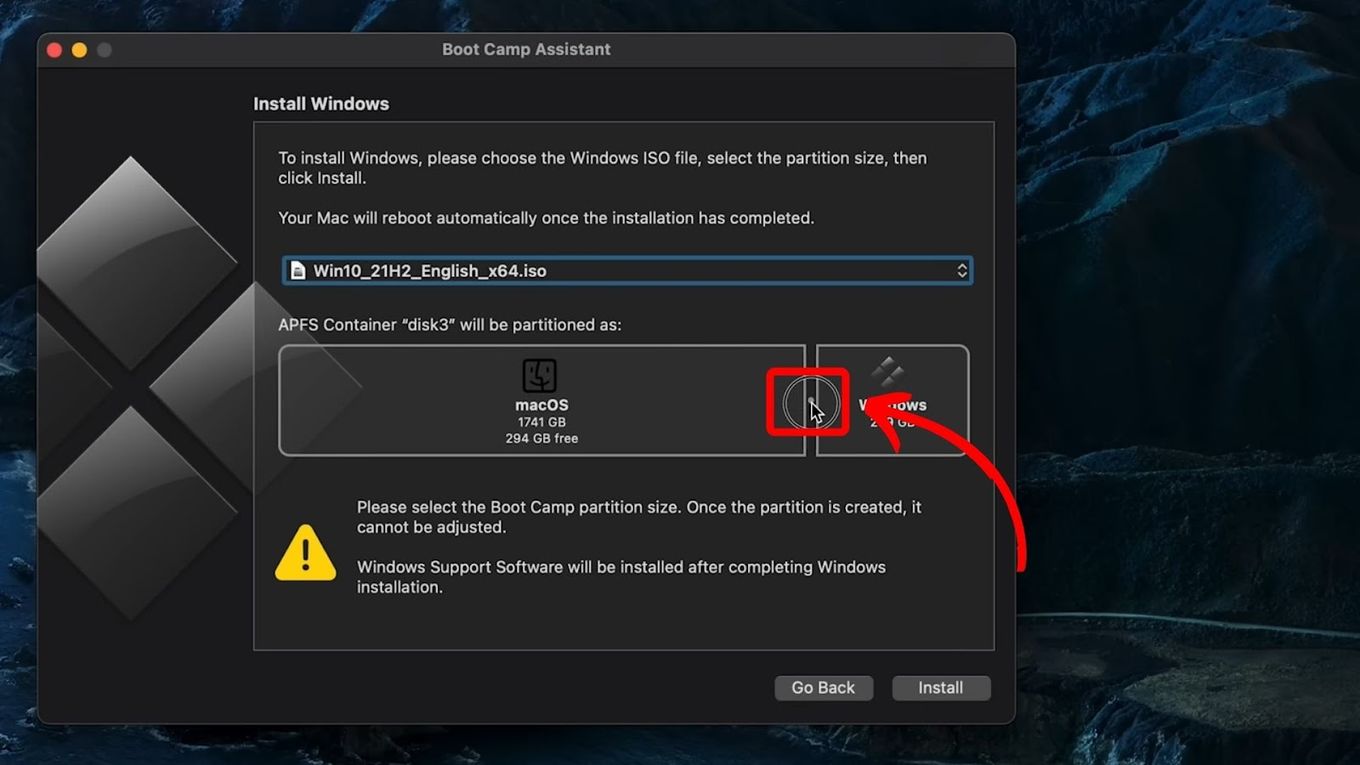
Step 4. Select a “Partition” for Windows.
When asked to set the size of the Windows partition, ensure you have at least 64GB of free storage space on your Mac.
Your Mac will restart once Boot Camp is done doing its thing. When it starts back up, you will be on the Windows installer.
-
Step 5. Click “Install.”
Your Mac will restart after the installation process.
-
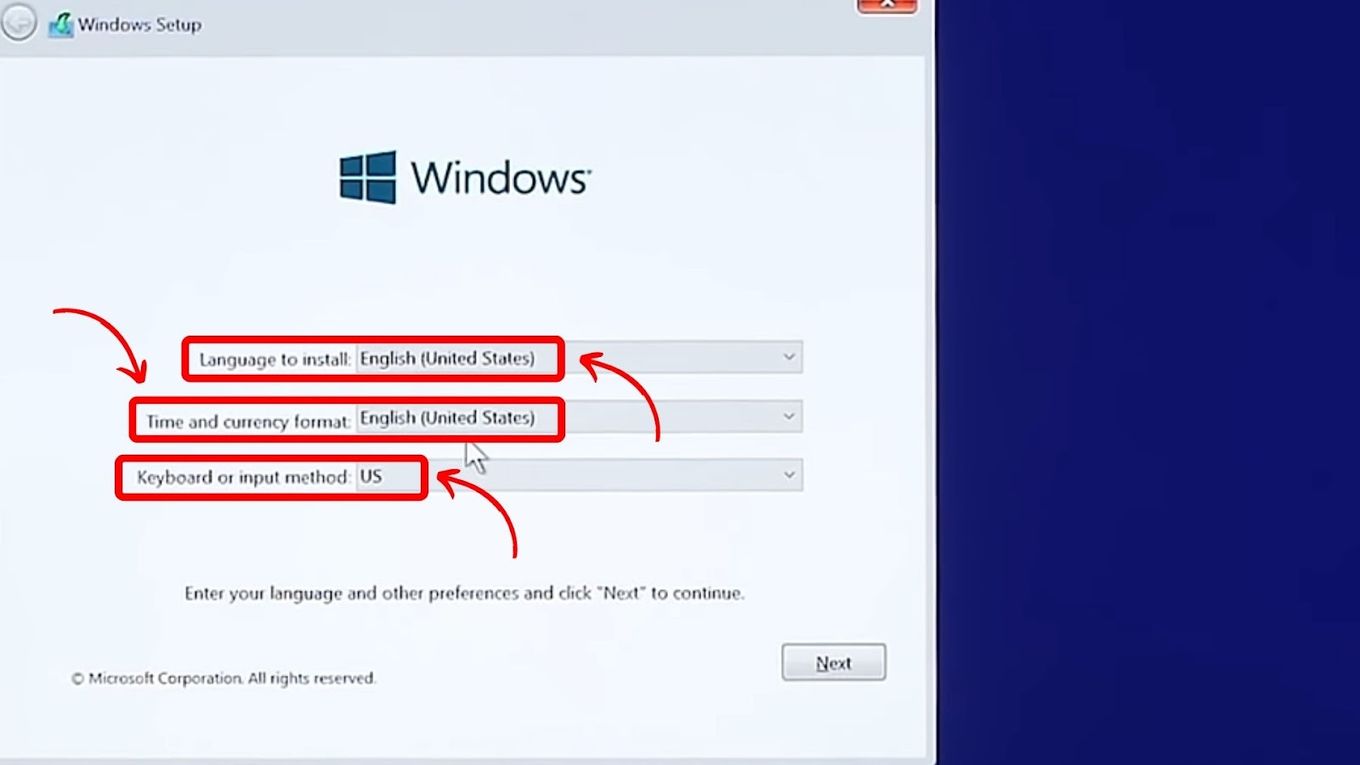
Step 6. Set up your “Language > Time & Currency > Keyboard Input.”
-
Step 7. Enter a “Product Key.”
Select “I don’t have a product key” if you have not bought a Windows license yet. Either way, your Mac will restart after the Windows installation is done.
You should now be able to switch between Mac OS and Windows. To do that, restart your Mac and hold down the Option key as your device starts.
Learn more about Installing Windows on Mac With Boot Camp.
Method 3. Install Wine Emulator on Mac
Emulators function similarly to virtual machines since they use computer resources to run a separate operating system. Ironically, though, Wine is an acronym for “Wine Is Not an Emulator.”
Emulators are also third-party apps, so take a bit of caution when installing such programs. Wine should be available to download for free.
You can follow these steps to get Wine Emulator installed on your Mac.
-
Step 1. Head to “Wine Bottler > Download Wine Bottler Stable.”
-
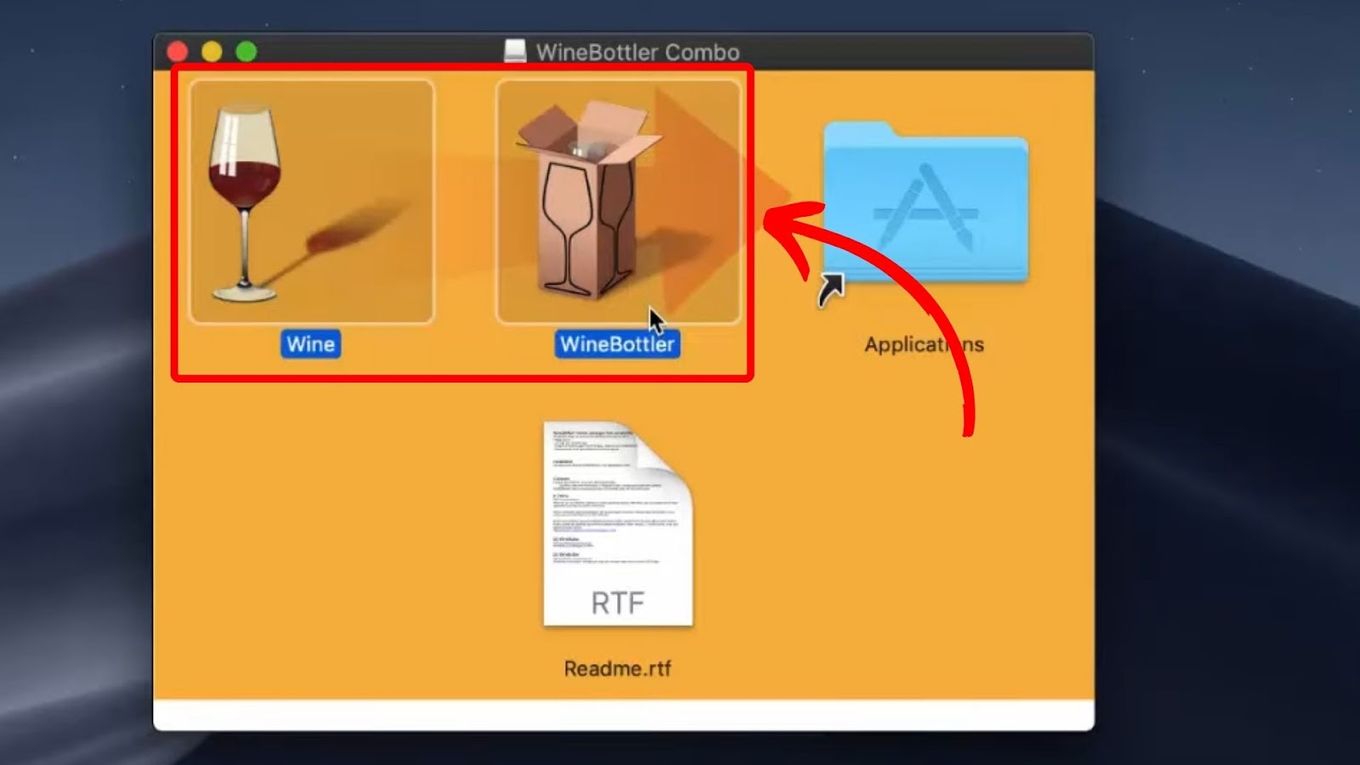
Step 2. Open the app from the “File Location.”
Once you open the downloaded app, you will see the Wine Emulator and Wine Bottler.
-
Step 3. Select “Wine” & “Wine Bottler.”
Drag these two apps inside your “Applications” folder.
-
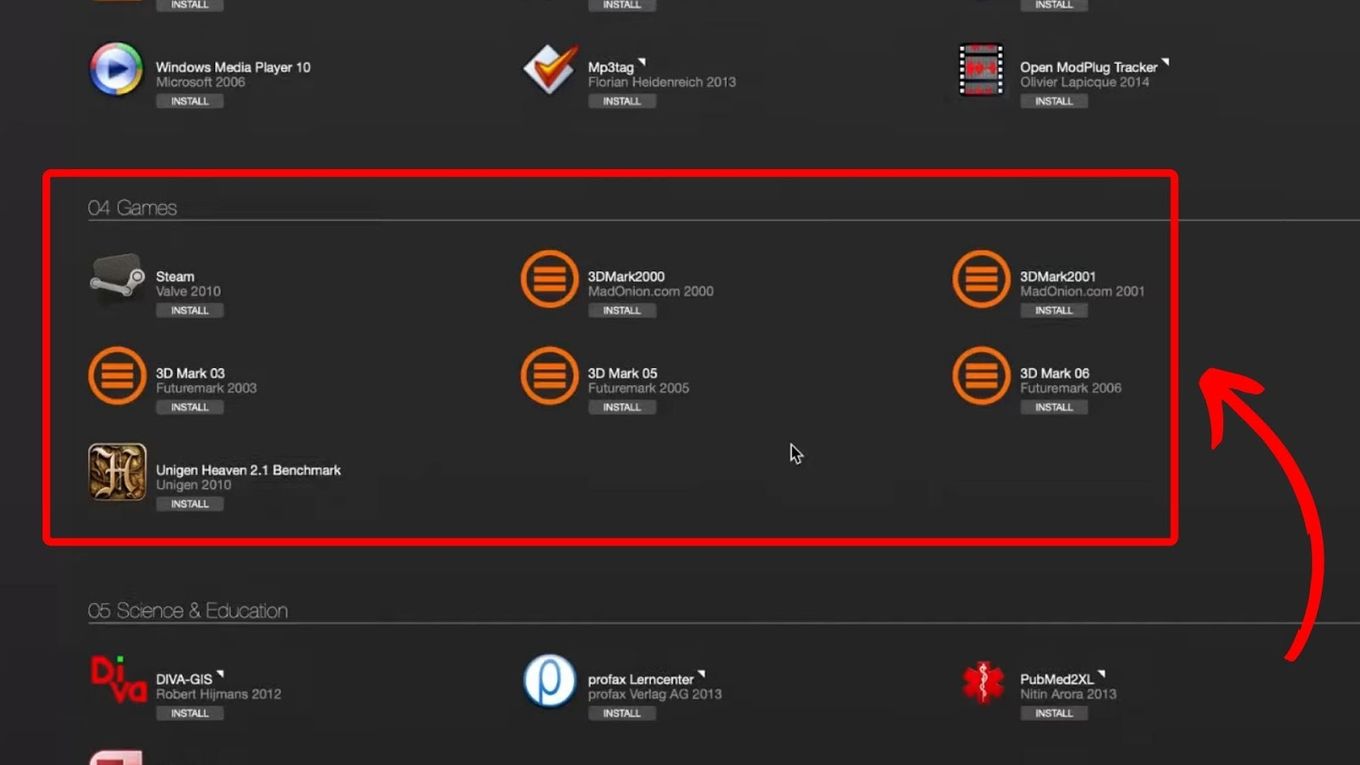
Step 4. Open the “Wine Bottler” app.
You will find various Windows applications from the app that you can run on your Mac. This will allow you to download and run 32-bit games on a Mac using Wine.
If these options seem overwhelming, you can also try to download macOS Catalina 10.15 or later. However, you should remember that this OS is also a bit dated now, and Apple no longer provides Catalina support.
How Much RAM Can 32-Bit Games Use?
32-bit games can use up to 2GB of RAM by default. However, you can bump this limit to 4GB if you are comfortable tinkering around with your computer settings. An adequate amount of RAM for running games will give you a smoother gaming experience.
Using up a large portion of your RAM can slow down your device. That said, you can free up some of your RAM by closing unnecessary background programs and minimizing the number of open apps.
Why Did Apple Stop 32-Bit Support?
Apple stopped supporting 32-bit programs because new Macs use 64-bit processors. Therefore, 64-bit apps and games are way more efficient in terms of resources. 32-bit apps and games have become outdated and are inefficient on newer Macs.
Though this means you will need some sort of workaround to play 32-bit games on Mac, the transition to a 64-bit-only system will result in a better user experience overall.
Here’s a great article from Apple explaining the transition from 32 to 64 bits.
Getting 32-Bit Games to Work on Mac
So, those are some of your options for playing 32-bit games on Mac. New freeware is constantly being developed, so watch for other virtual machines or emulators that could run better or be easier to set up on your computer.
Boot Camp is your safest bet if you feel uncomfortable tampering with third-party software. If you run into any issues while setting it up, you can contact Apple Support since it is an official tool built into Mac operating systems.


