Chromebooks run on the Chrome operating system and allow you to install Android apps. However, they can’t run Windows apps by default and, therefore, can’t execute .exe files. This is why one of the most commonly asked questions among new Chromebook users is how to open exe files on their Chromebook.
In this post, we will discuss if you can run .exe files on Chromebook and the possible different ways of doing it.

Can Chromebook Run .exe Files?
Yes, you can run .exe files on a Chromebook, but the process is not straightforward. .exe files are designed for Windows. So, you will need third-party apps or tools that allow you to emulate Windows or directly run these files, such as Wine or Crossover.
Before running the files, you must enable Linux from the Chromebook and install one of the third-party apps. Then, you can download the .exe file from the internet and ensure it is compatible with the app.
How To Run .exe Files On A Chromebook?
There are at least 5 different ways of running exe files on Chromebook:
- Using Wine App
- Access a Windows Computer Remotely
- Using Crossover
- Using AppOnFly
- Using Parallels Desktop App
Let’s check each method one by one:
1. How To Run EXE Files On Chromebook Using Wine App
Wine app is an open-sourced, free compatibility app often used to let computer games and application software for Windows operating on Unix-like operating systems.
Here’s how to run exe files on Chromebook Linux using Wine App.
Step 1: Install Linux Development Environment
-
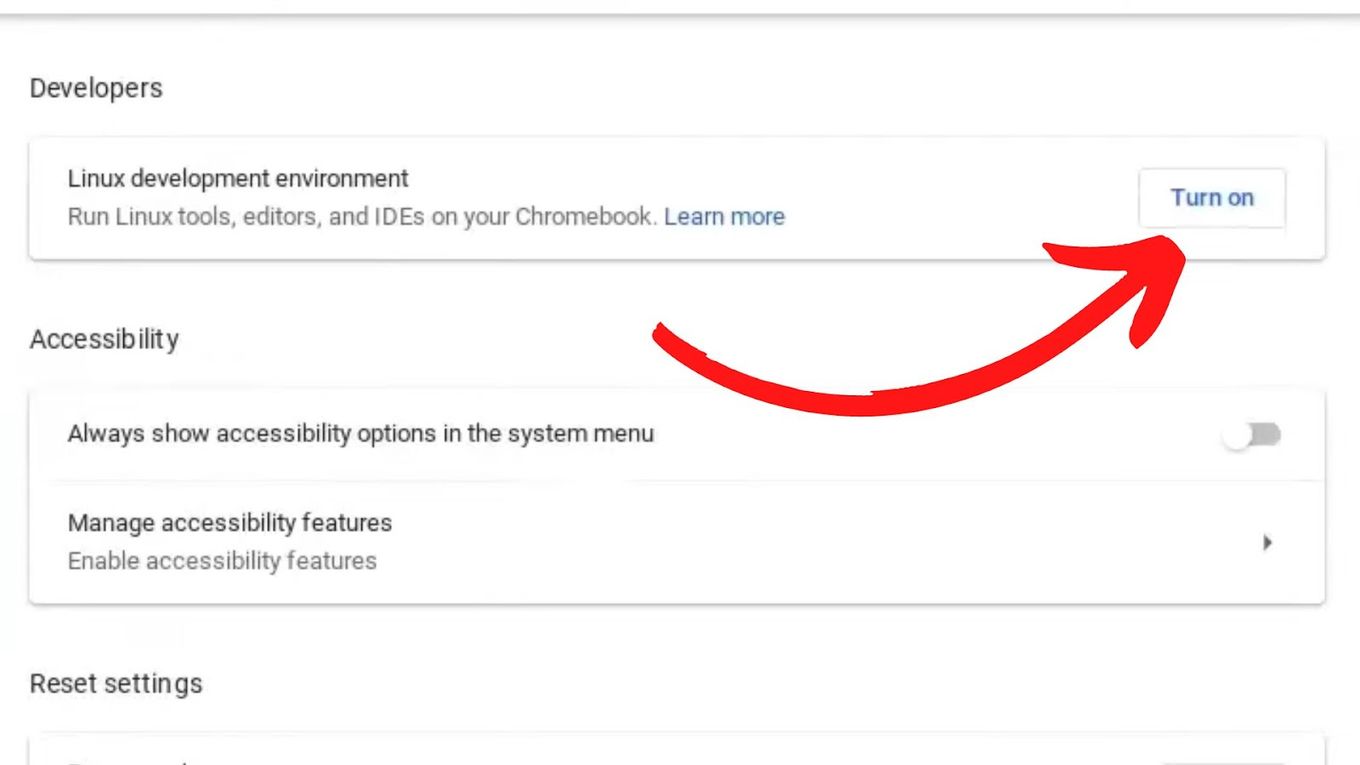
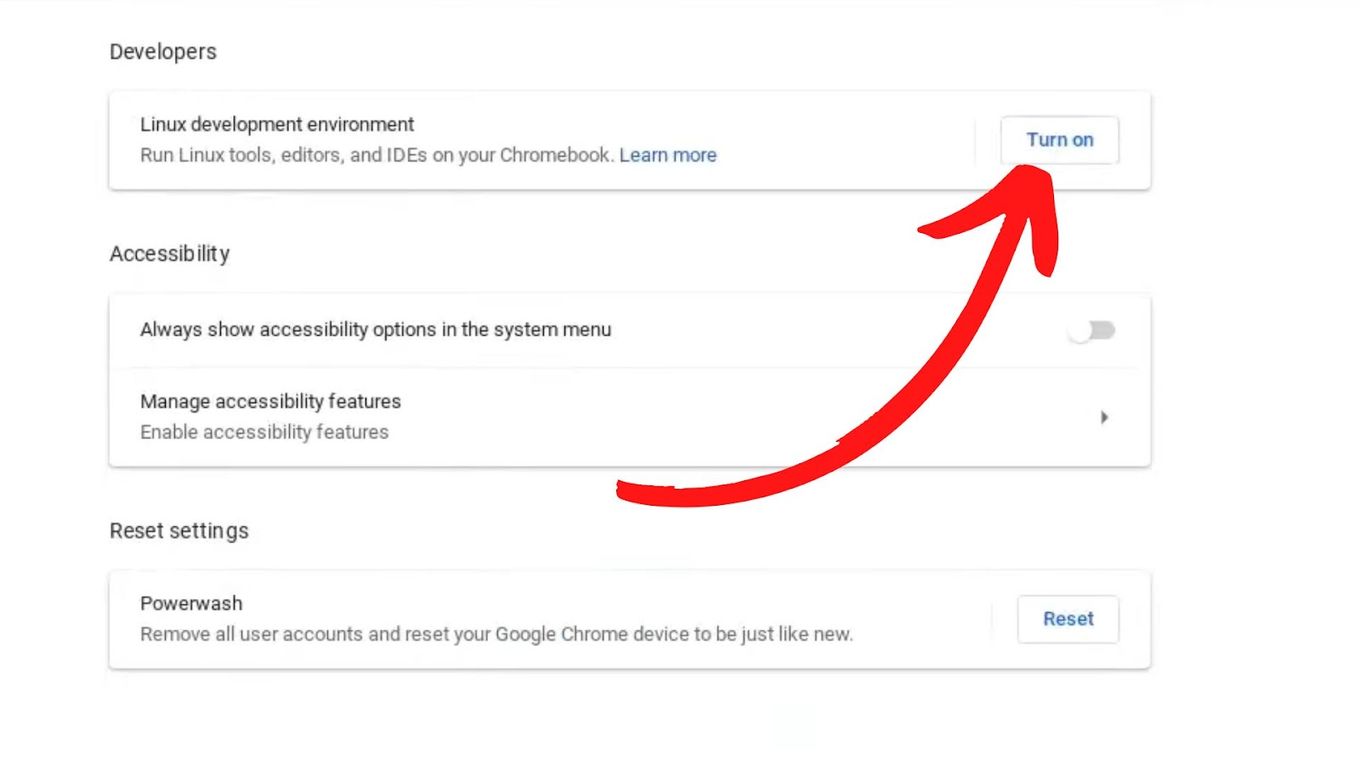
Click on “Settings > Advanced > Developers”.
img: install-linux-chromebook
alt: How to Install Linux on a Chromebook -
Turn on the “Linux development environment” option.

-
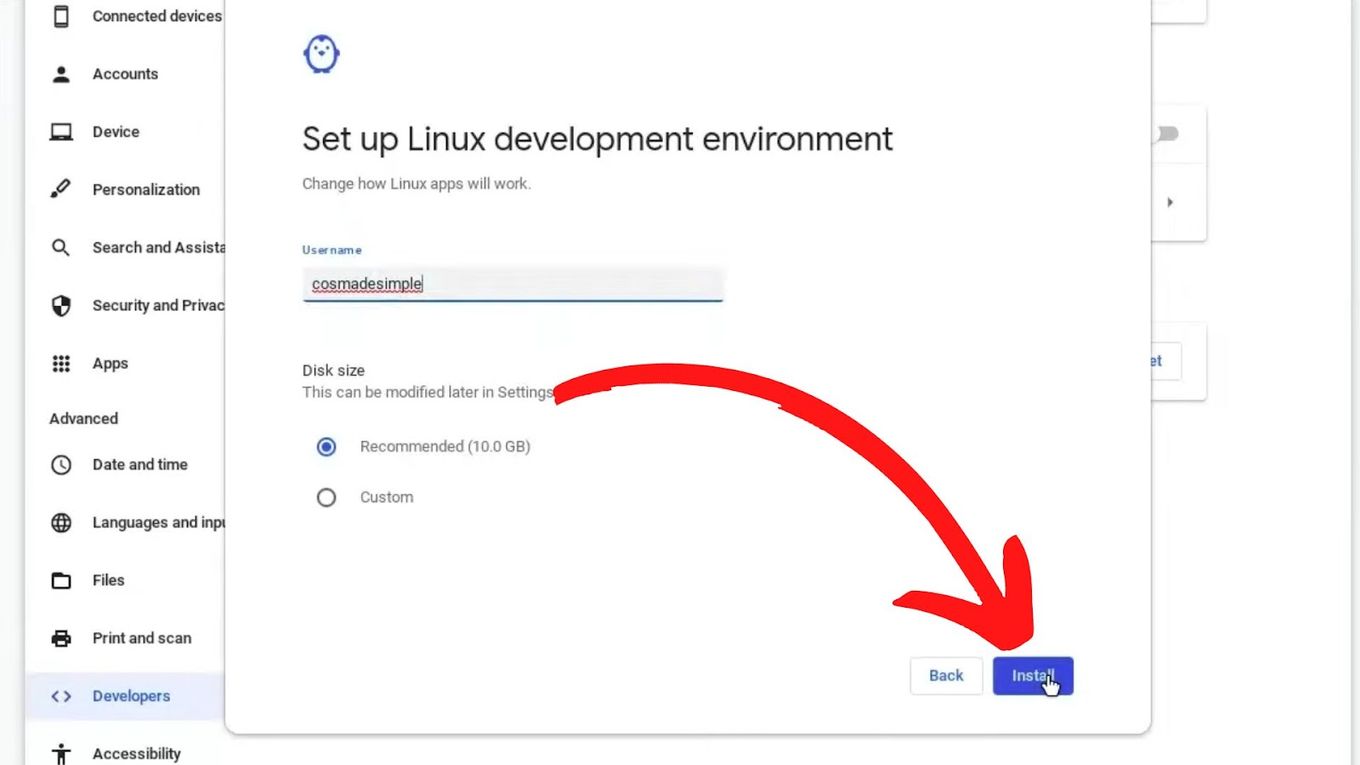
Click on “Next” and install Linux on your Chromebook.
Follow the prompts/instructions and wait for the installation process to finish. The process can take roughly 10 minutes. This will allow us to use Linux commands.

Step 2: Install Wine App
-
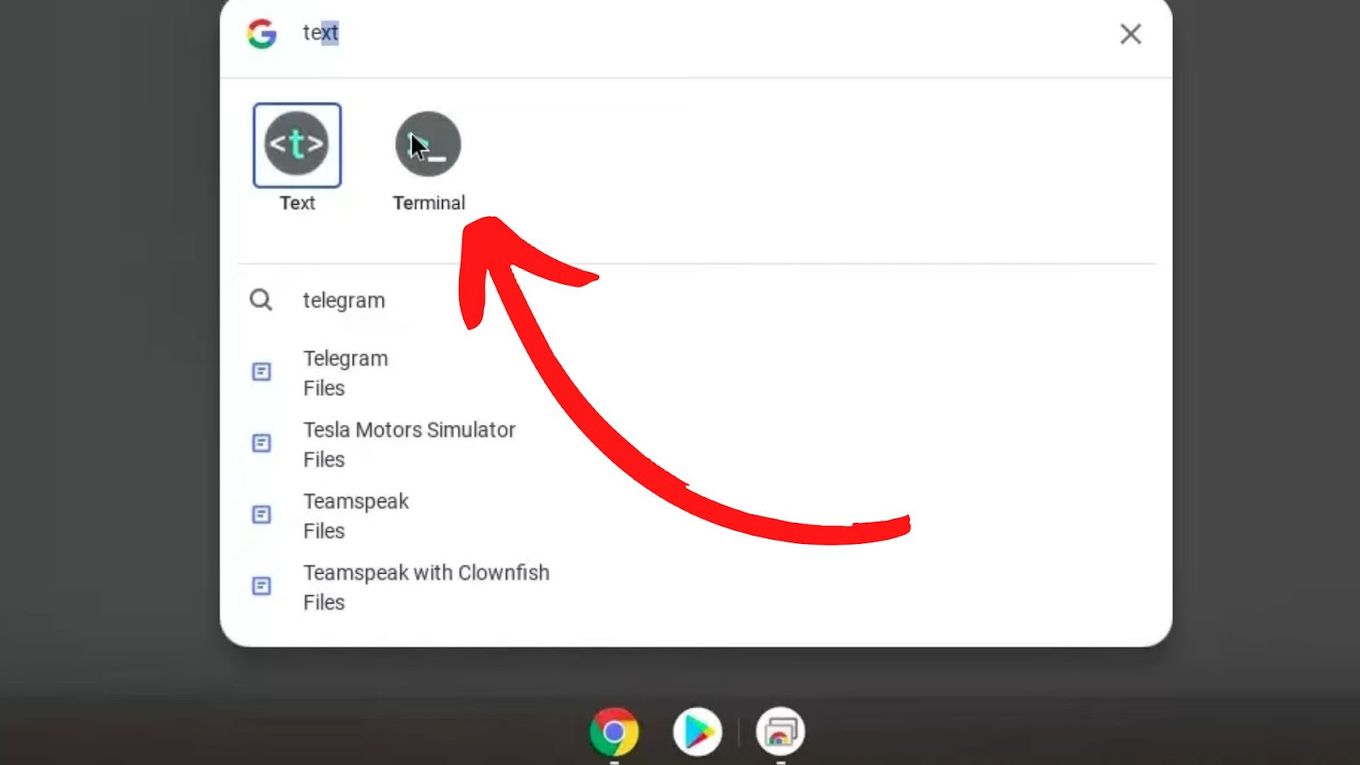
Open a Terminal Session from the “App Menu”.

-
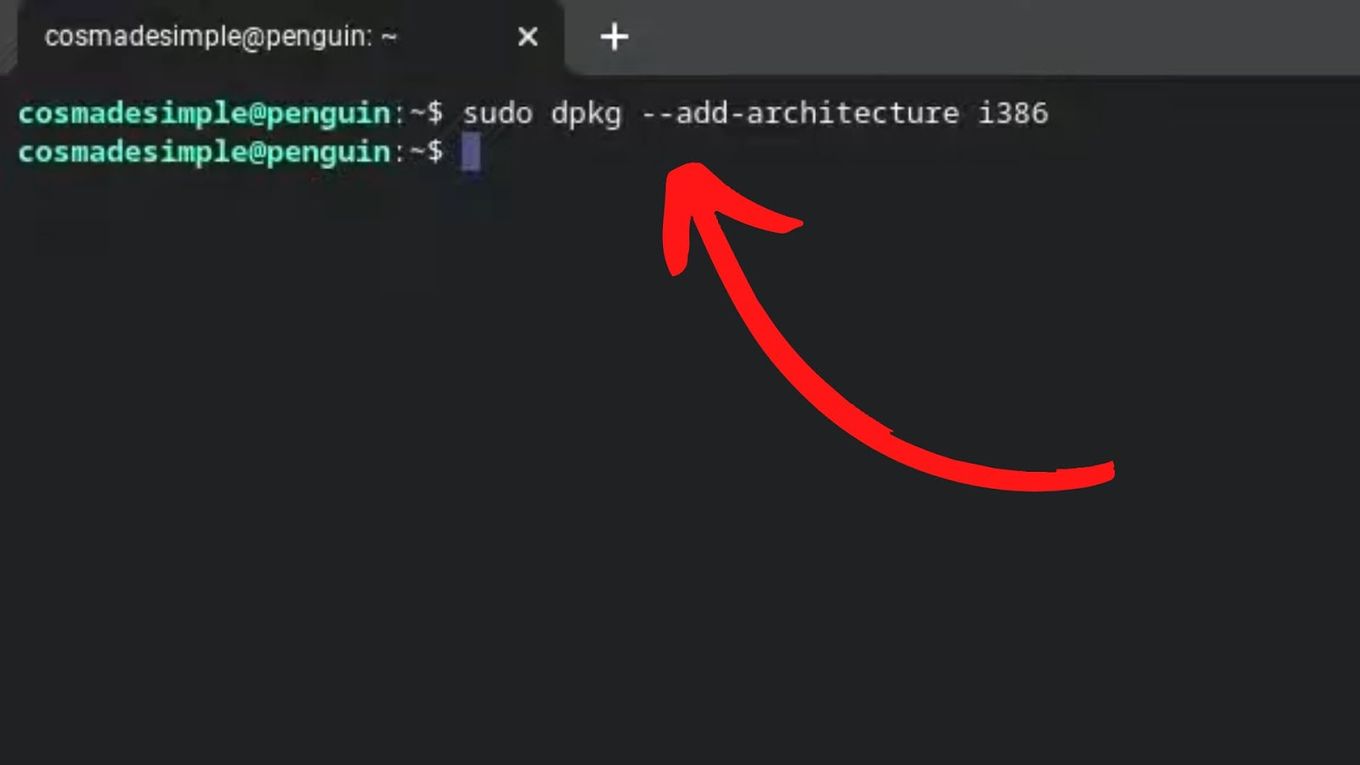
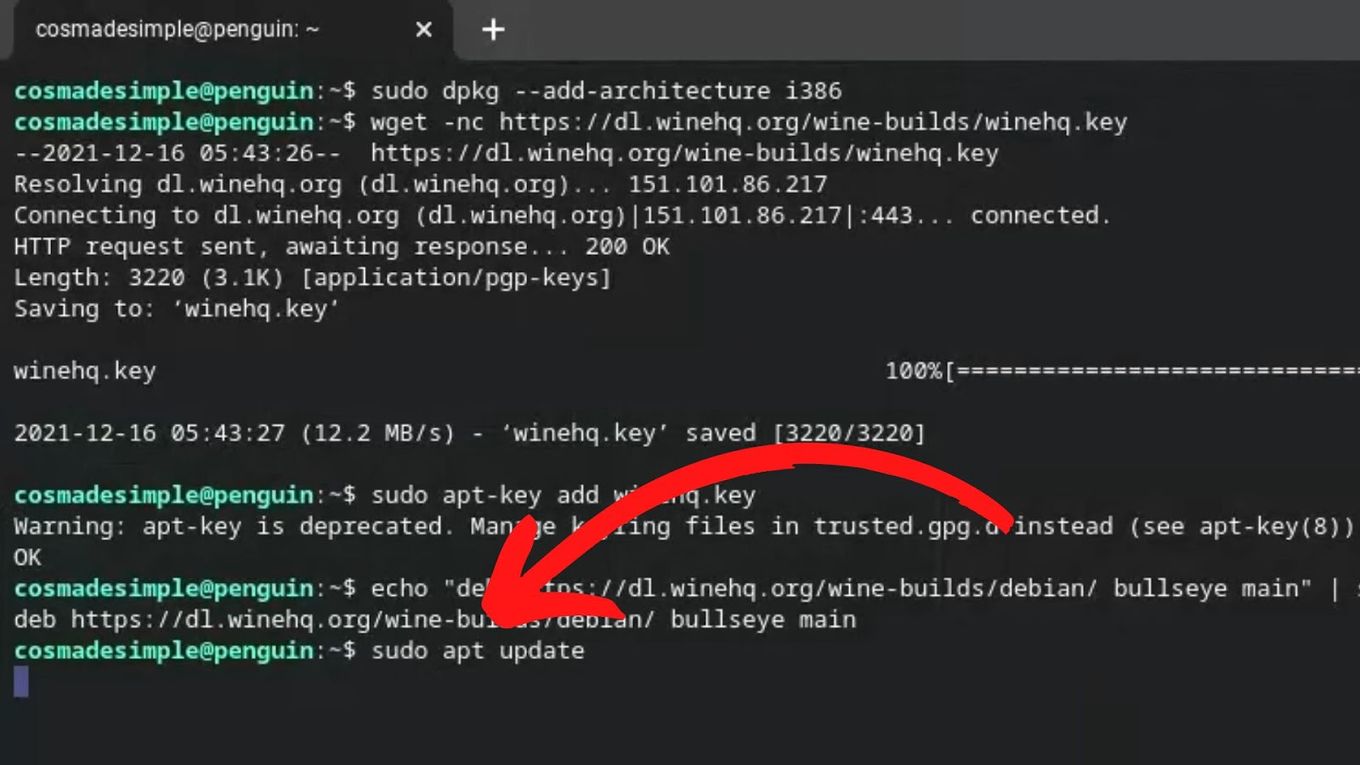
Enable x32 build architecture for Wine.
Enter this command on the terminal and then press “Enter”:
sudo dpkg --add-architecture i386Code language: JavaScript (javascript)
-
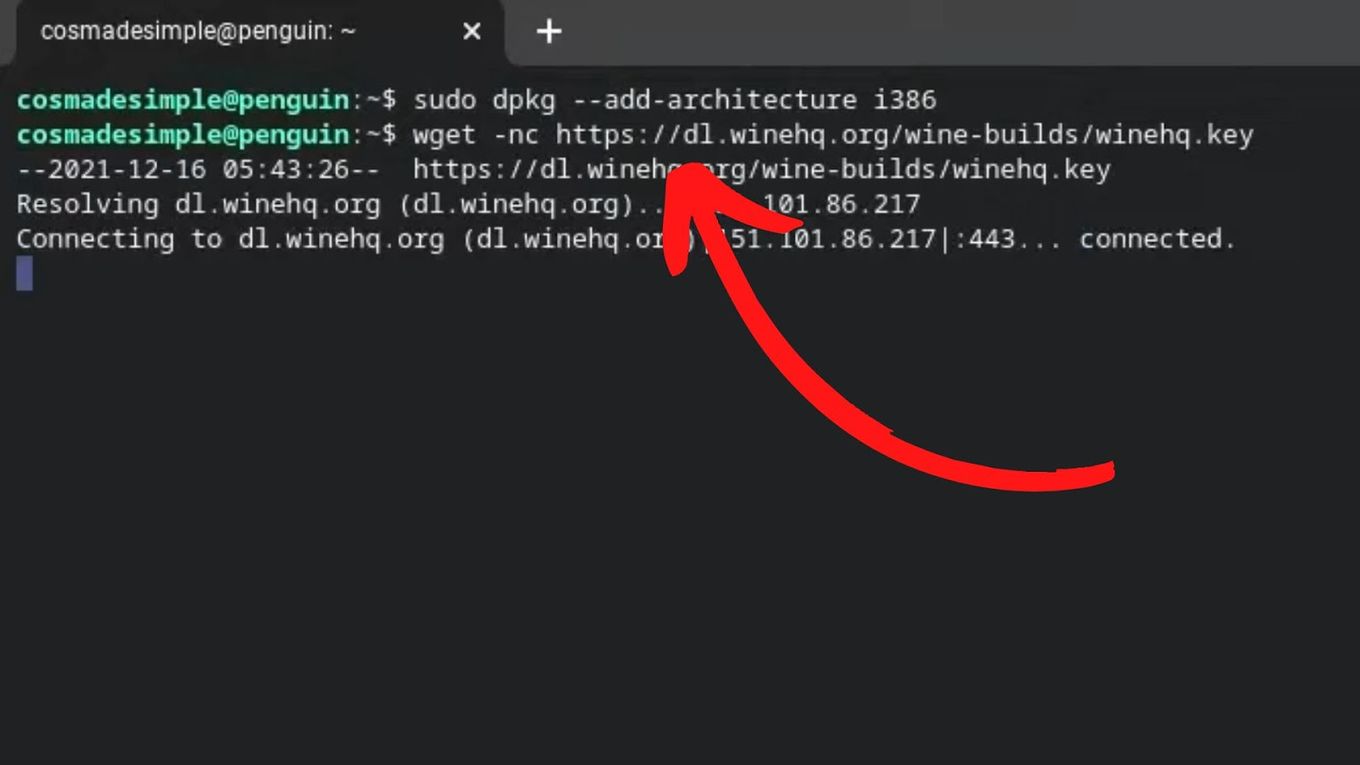
Download Wine App Security Key
Enter the following command and press “Enter“:
wget -nc https://dl.winehq.org/wine-builds/winehq.keyCode language: JavaScript (javascript)
-
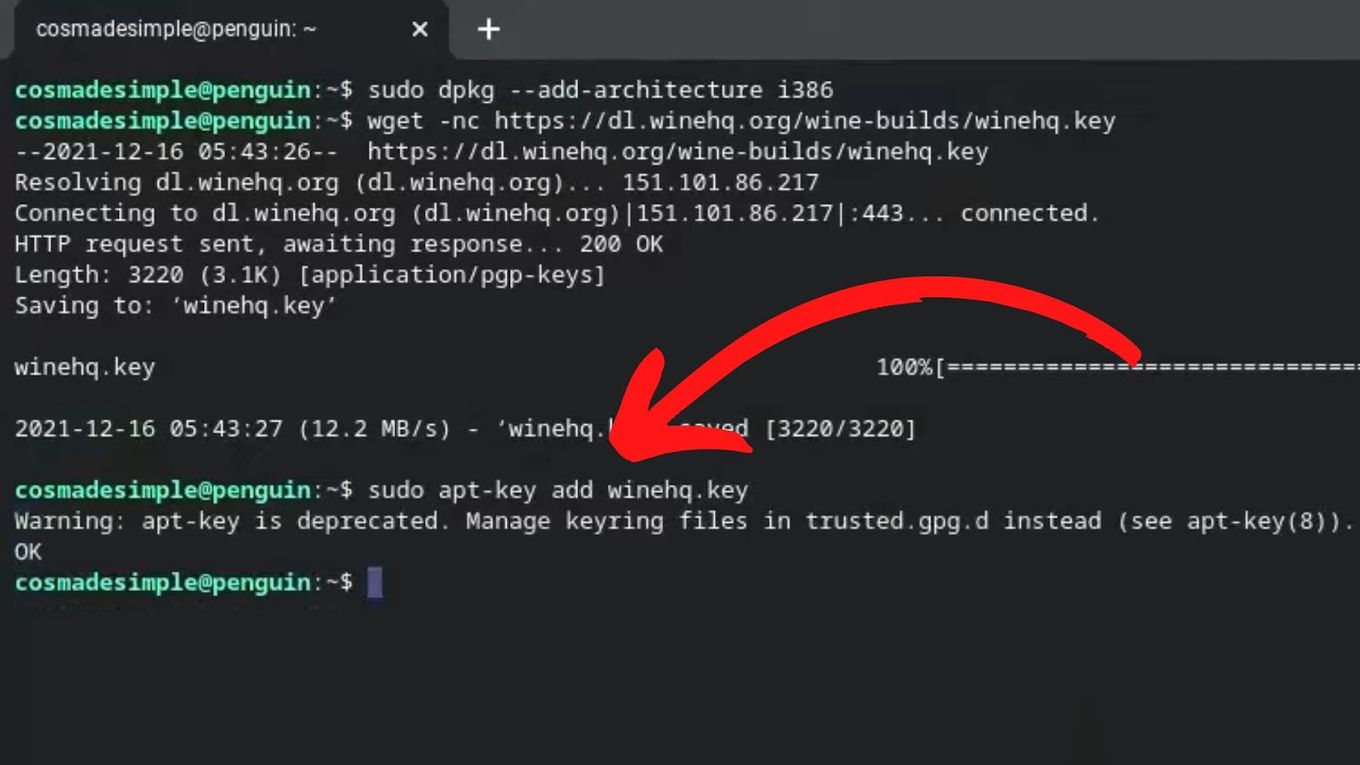
Add Wine Security Key to your system
Enter the following command and press “Enter”:
sudo apt-key add winehq.keyCode language: JavaScript (javascript)You might see a warning. Just ignore it.

-
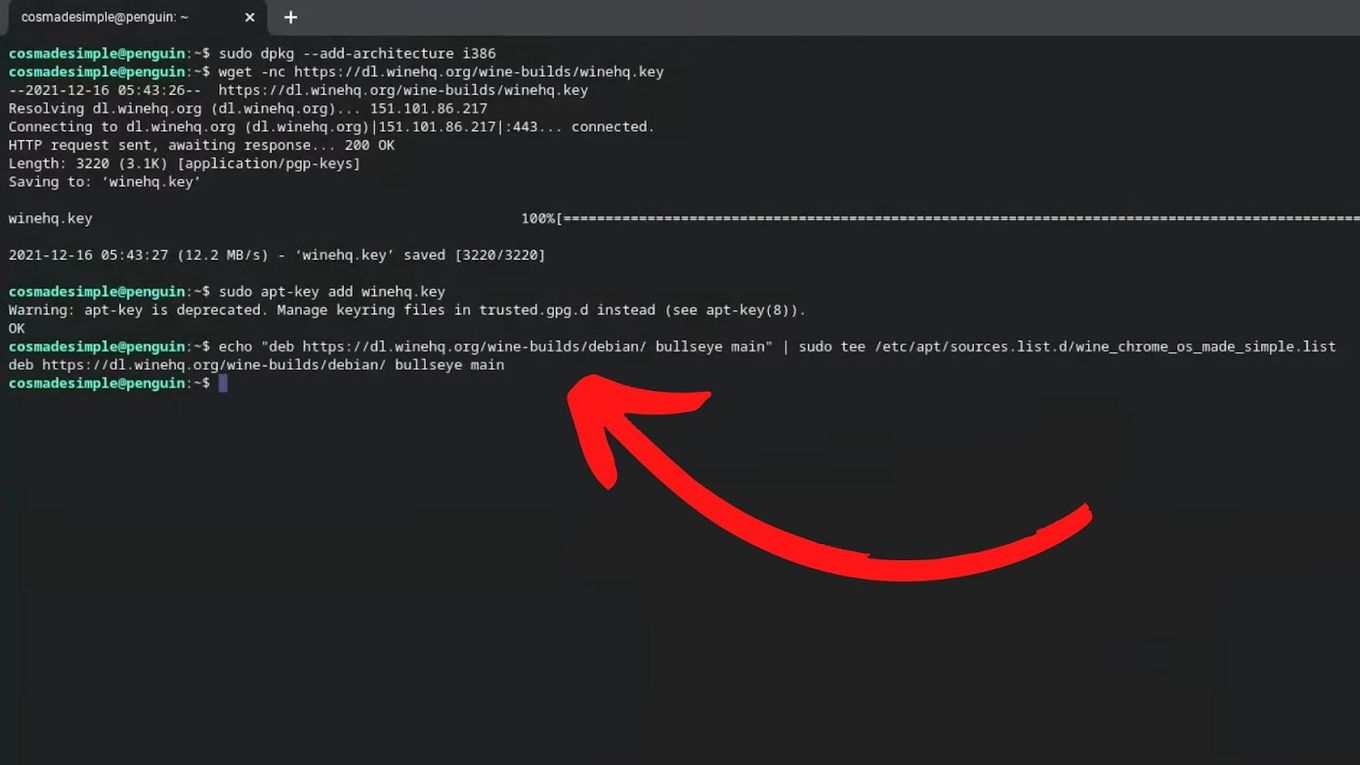
Add Wine Repository to your system.
Enter the following command and then press “Enter”:
echo "deb https://dl.winehq.org/wine-builds/debian/ bullseye main" | sudo tee /etc/apt/sources.list.d/wine_chrome_os_made_simple.listCode language: JavaScript (javascript)
-
Update your Linux apps.
Enter the following command and then press “Enter”:
sudo apt update -yCode language: JavaScript (javascript)
-
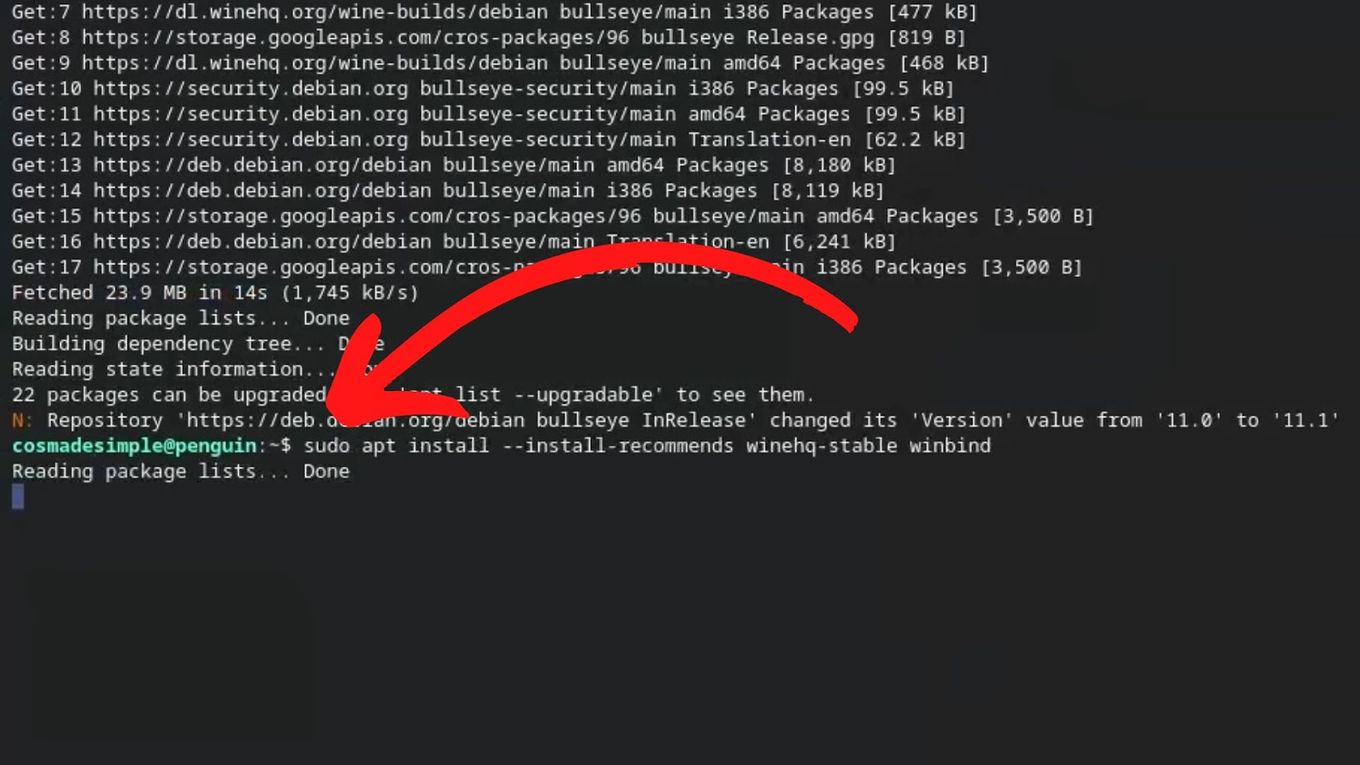
Install Wine.
Enter the following command and then press “Enter”:
sudo apt install --install-recommends winehq-stableCode language: JavaScript (javascript)You will be prompted to confirm the installation. Press “Enter” again.

Step 3. Install additional Wine packages to ese the .exe files.
-
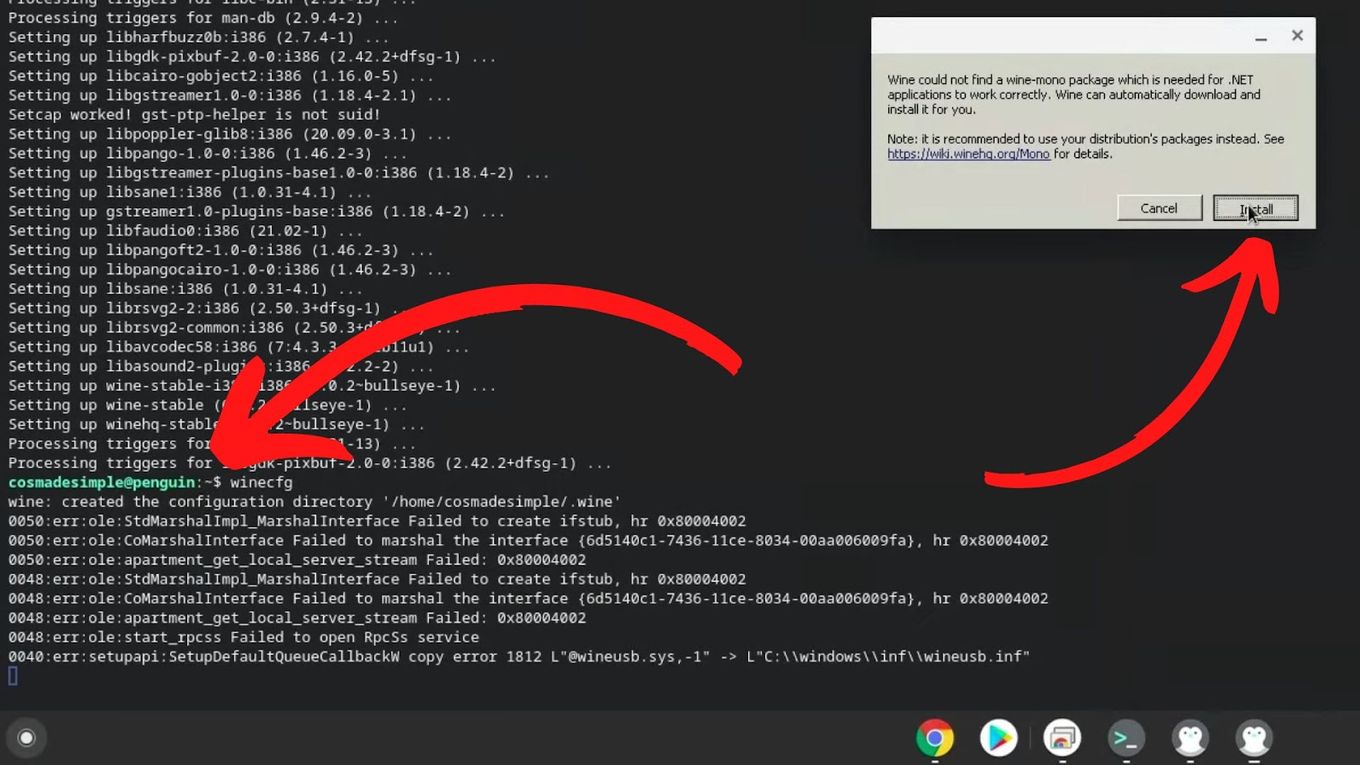
Create Wine Configuration.
Enter the following command and then press “Enter”:
winecfgCode language: JavaScript (javascript)Some messages will pop up. Click on “Install” until you finish.

-
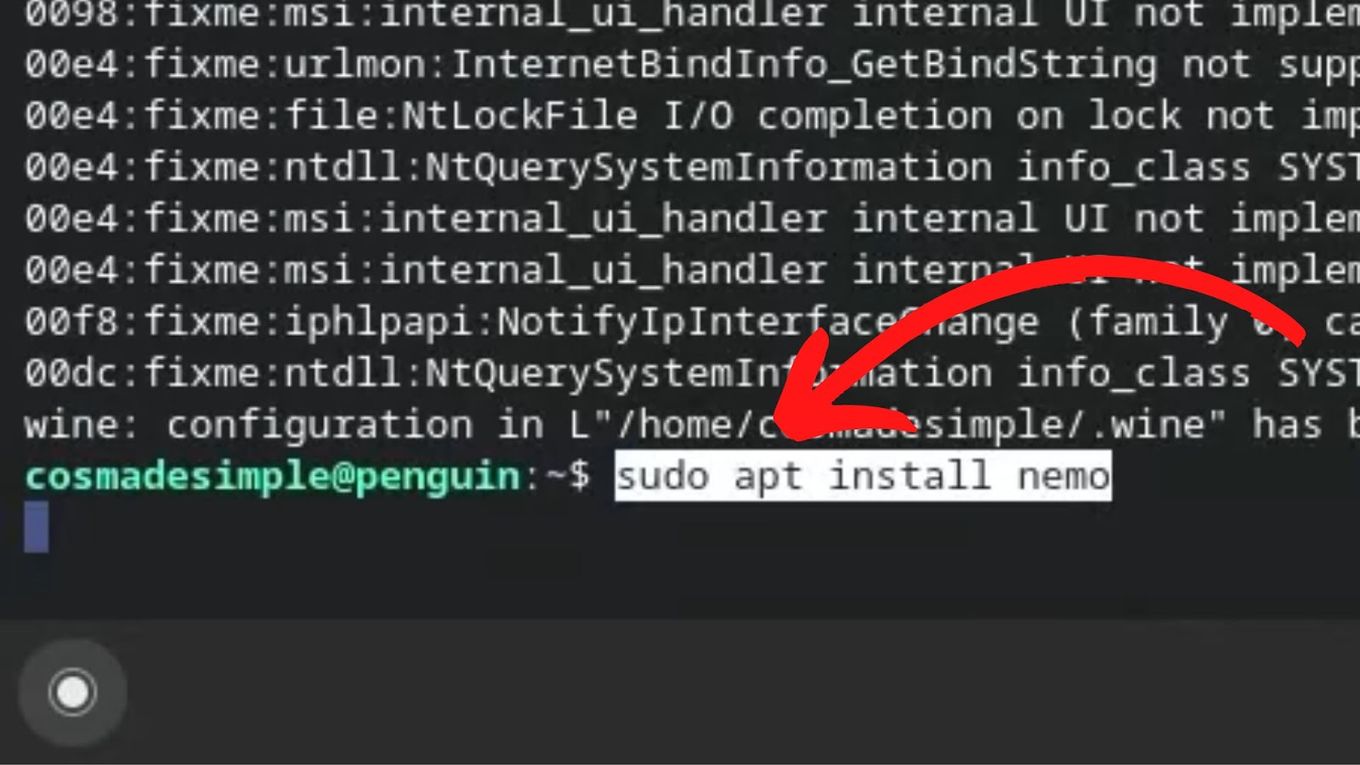
Install a File Manager to launch .exe applications.
Enter the following command and then press enter:
sudo apt install nemoCode language: JavaScript (javascript)You will be prompted to confirm the installation. Press “enter” again.

Step 4. Open .exe files.
-
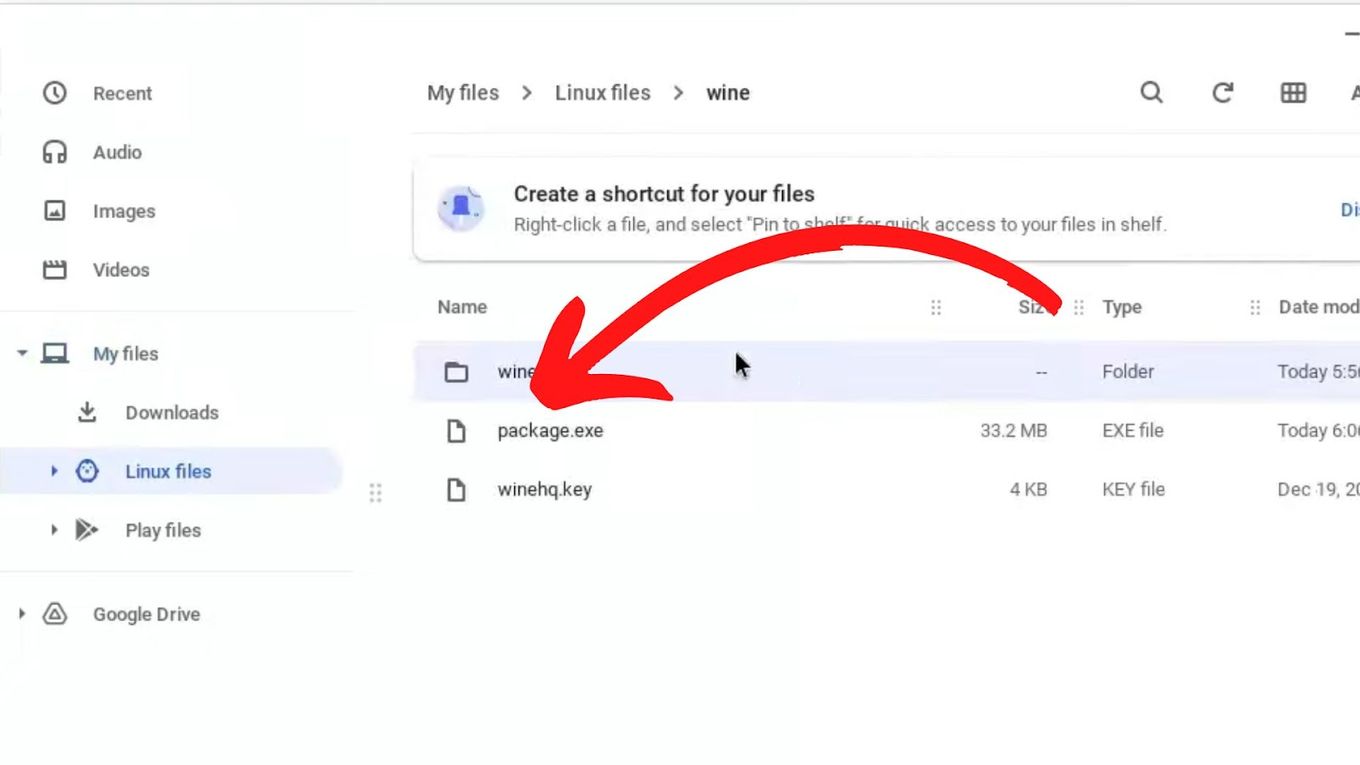
Move your .exe files to the “Linux Files” folder.

-
Open the file by running “wine nameOfYourFile.exe” on your terminal.
-
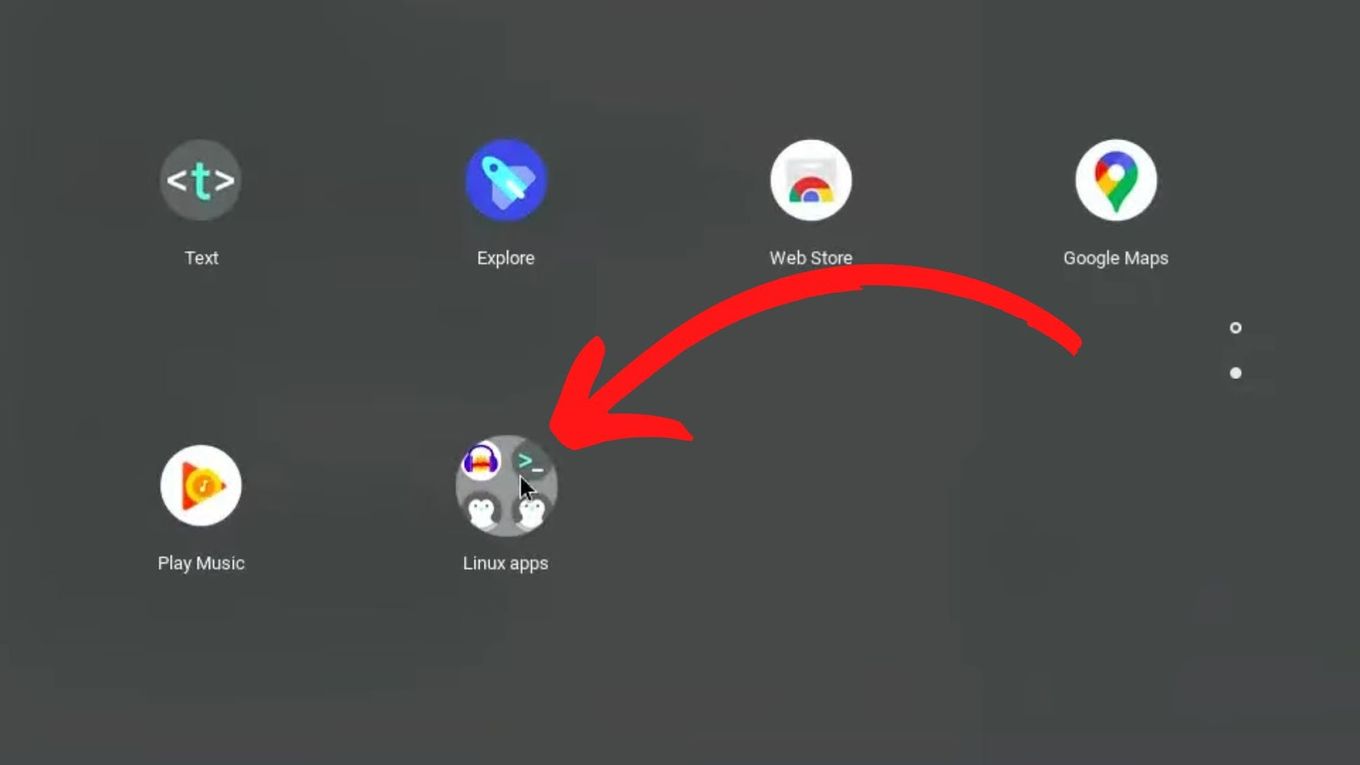
Go to “Apps” and look for “Linux Apps” to find your installed Windows apps.

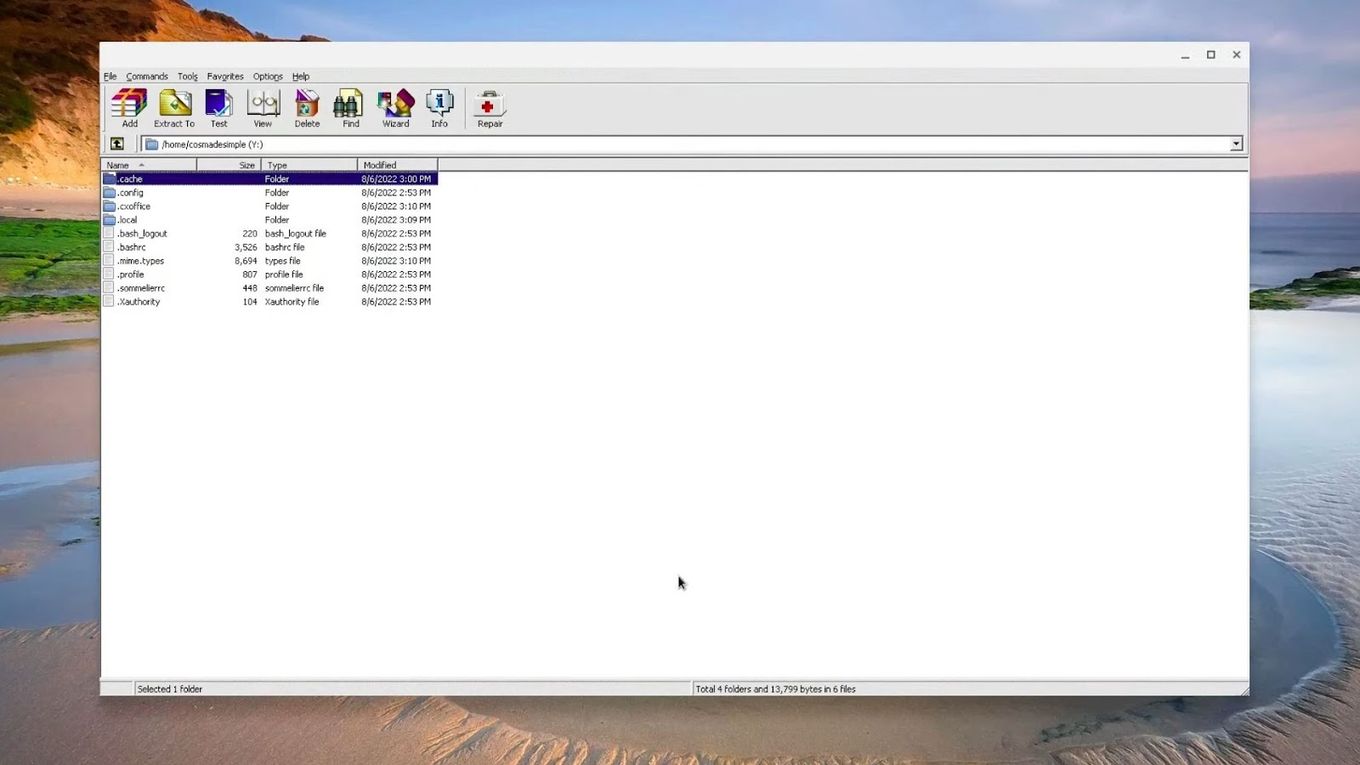
You can also create a link to Wine Folder so it seems similar to Windows System. Use this command for the process:
ln -s  /home/username/.wine/drive_c/users/username/Desktop /home/username/wine
Code language: JavaScript (javascript)
Did you know that by installing Linux you can also use OBS on Chromebook?
2. Run EXE Files On Chromebook With Remote Access
Note: This method requires an additional Windows Computer
You can also open Windows files on your Chromebook remotely. This method involves transmitting a Windows computer’s screen and commands to the Chromebook rather than running .exe files on the Chromebook itself.
Here are the steps to run .exe files on a Chromebook using Chrome Remote Desktop:
-
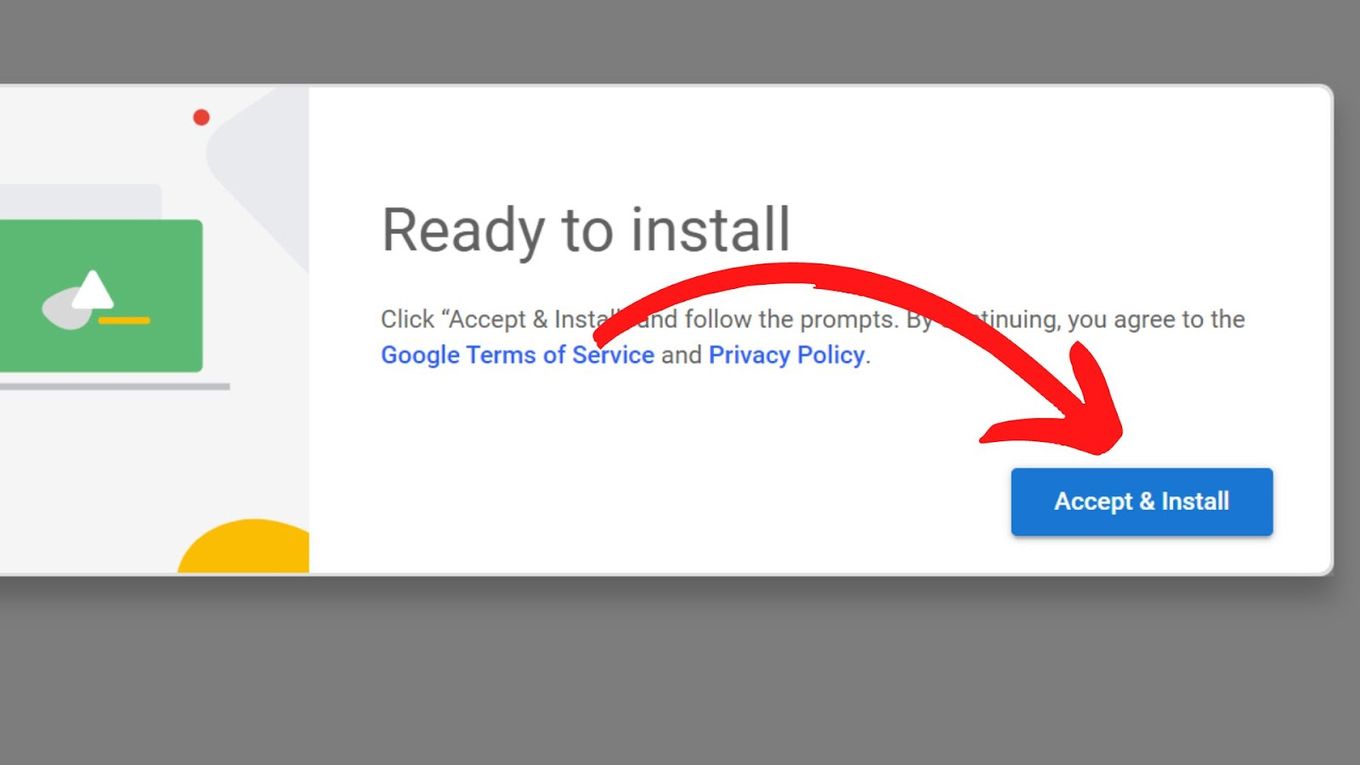
Step 1: Download & install Chrome Remote Desktop on your Windows computer.

-
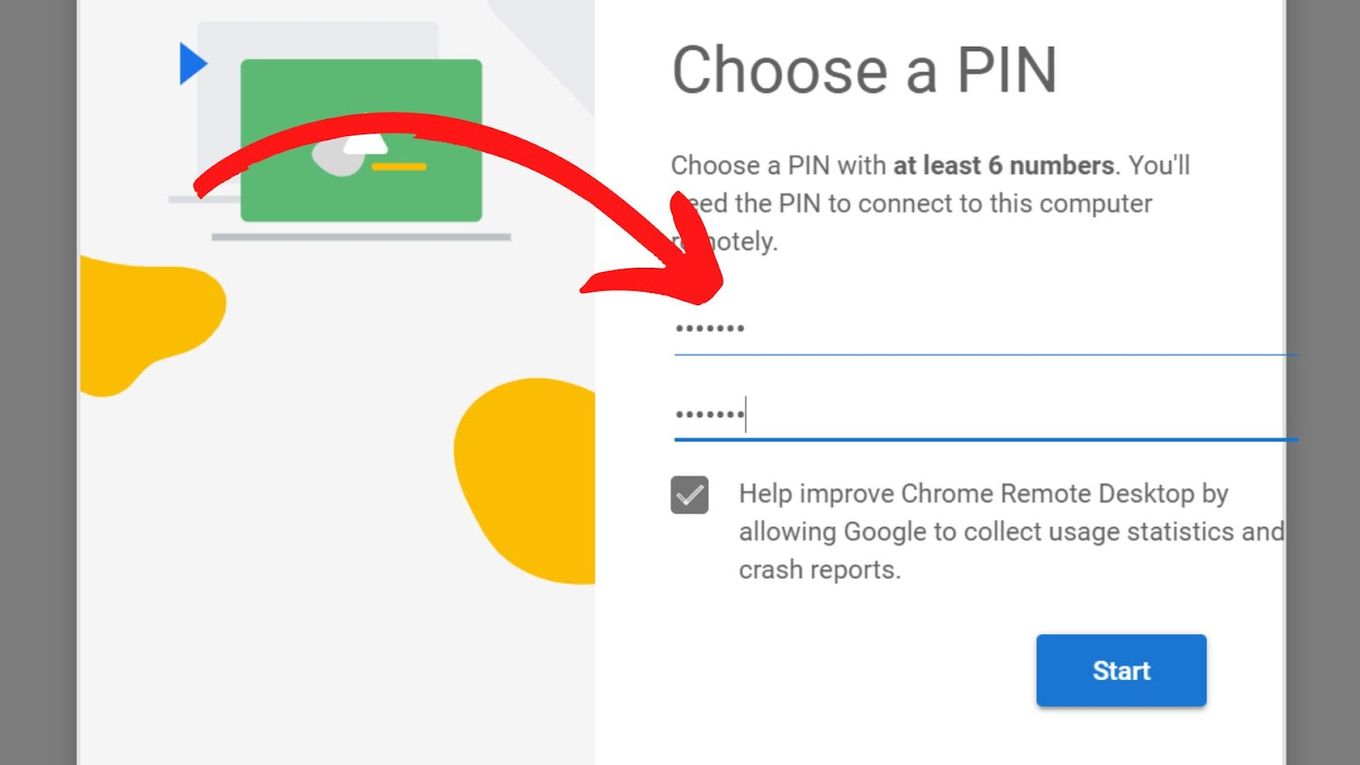
Step 2: Set a PIN.
Enter the necessary information, choose a pin then, click start.

-
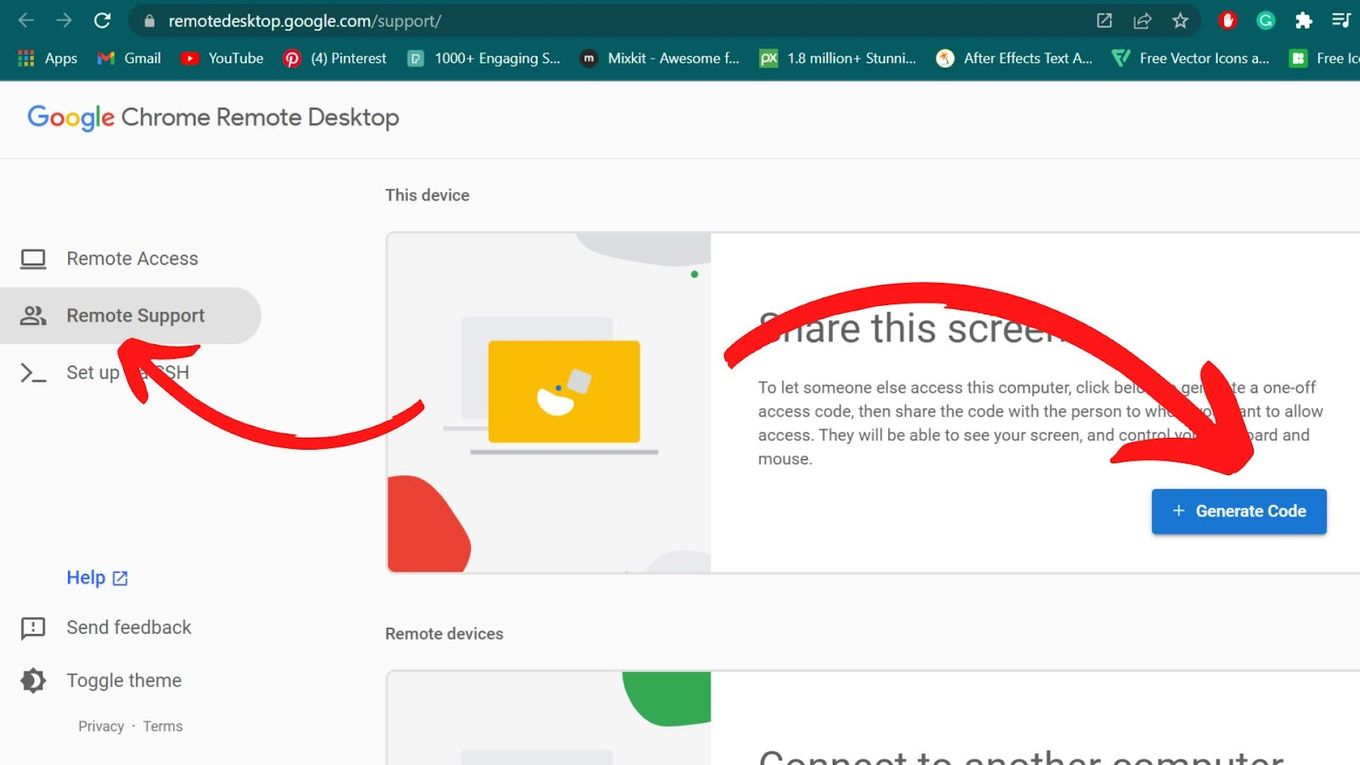
Step 3: Go to “Remote Support” and choose “+ Generate Code”.
You will need this code later to access your Windows PC from the Chromebook.

-
Step 4: On your Chromebook, go to “Chrome Remote Desktop’s website“.
- Step 5: Click “Access”
- Step 6: Input the code you generated earlier.
Your Chromebook and Windows computer are now connected, allowing you to control your Windows PC remotely.
Learn how to Jailbreak a Chromebook and have total control over it.
3. How To Run EXE Files On Chromebook Using Crossover
You can also use the Crossover app, a PC emulation software for running Windows-based programs to run exe files on your Chromebook. Here’s how.
-
Step 1: Enable Linux Development Environment.
Go to “Settings” and click on “Advanced > Developers”. Turn on the “Linux development environment” option. Follow the instructions that will appear on your screen to install the Linux environment.

-
Step 2: Download “Crossover for ChromeOS“.
You will have to enter your name and email.
-
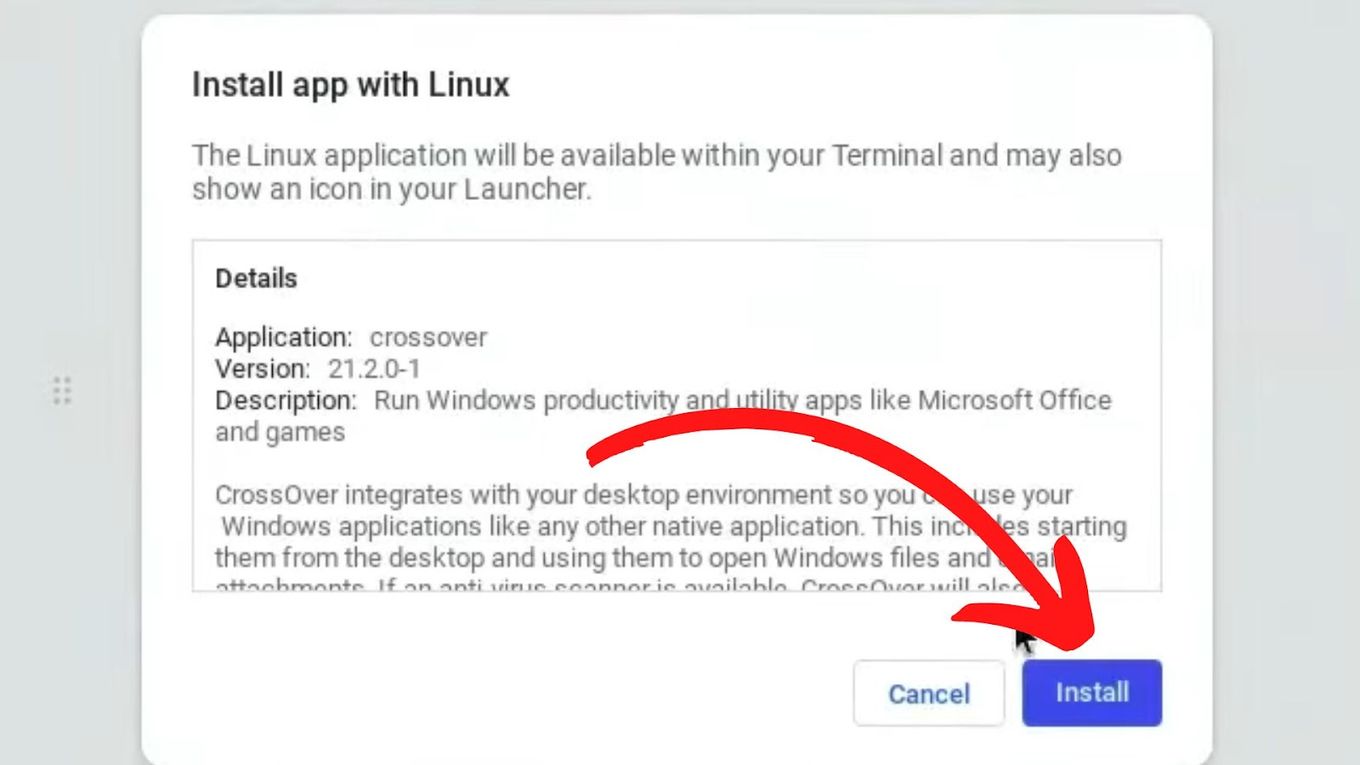
Step 3. Install Crossover with Linux Apps.

-
Step 4: Launch Crossover.
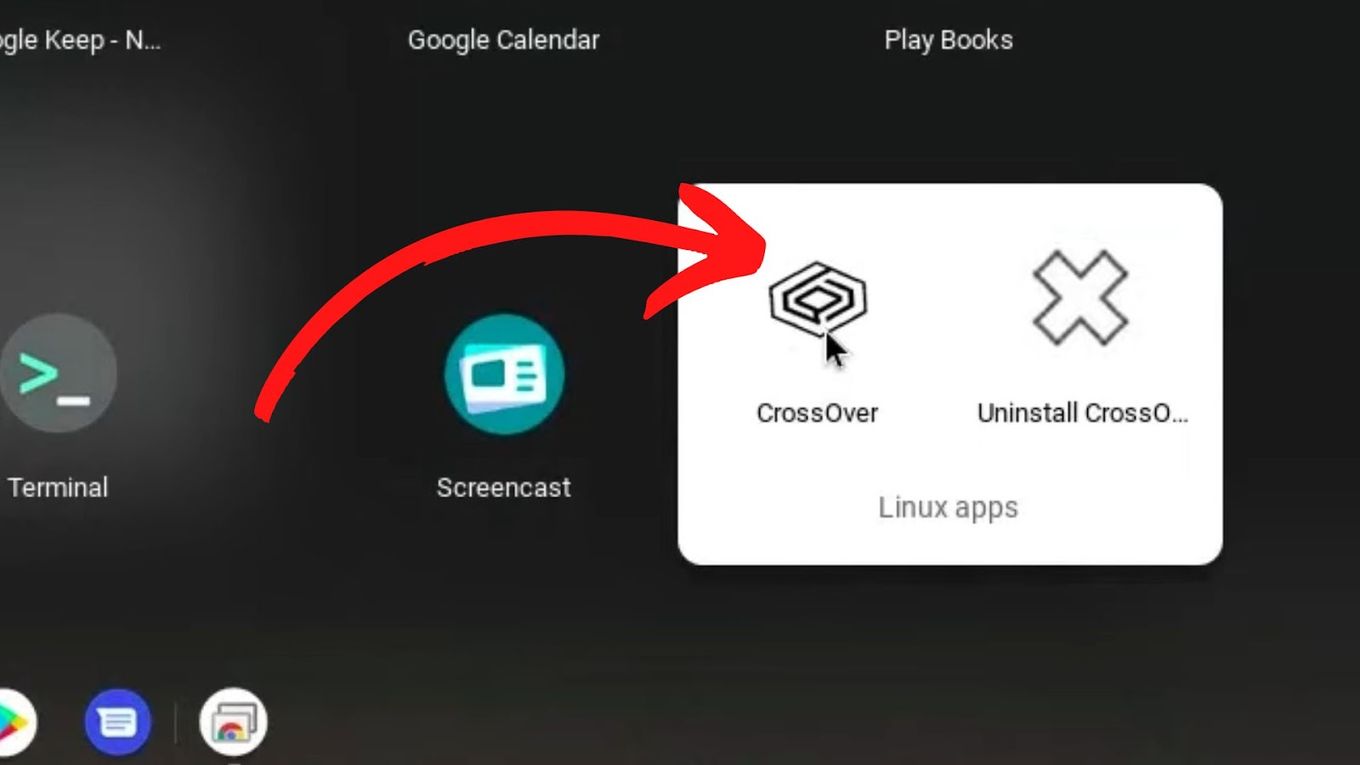
Launch the Crossover app from your “Linux Apps” and look for the “unknown app.” Then, choose “Install Unlisted Applications.”

-
Step 5: Open any .exe file.
Save your file under the “Linux Files Folder” and double-click to run it. The .exe file should now be open and running on the Chromebook.

You can also install Windows Apps directly from the Crossover application.
4. How To Run EXE Files On Chromebook Using AppOnFly
AppOnFly is a cloud-based Remote Desktop service that lets users open Windows apps quickly. To run .exe files on a Chromebook, sign up for a free trial and run your files online through online remote desktop.
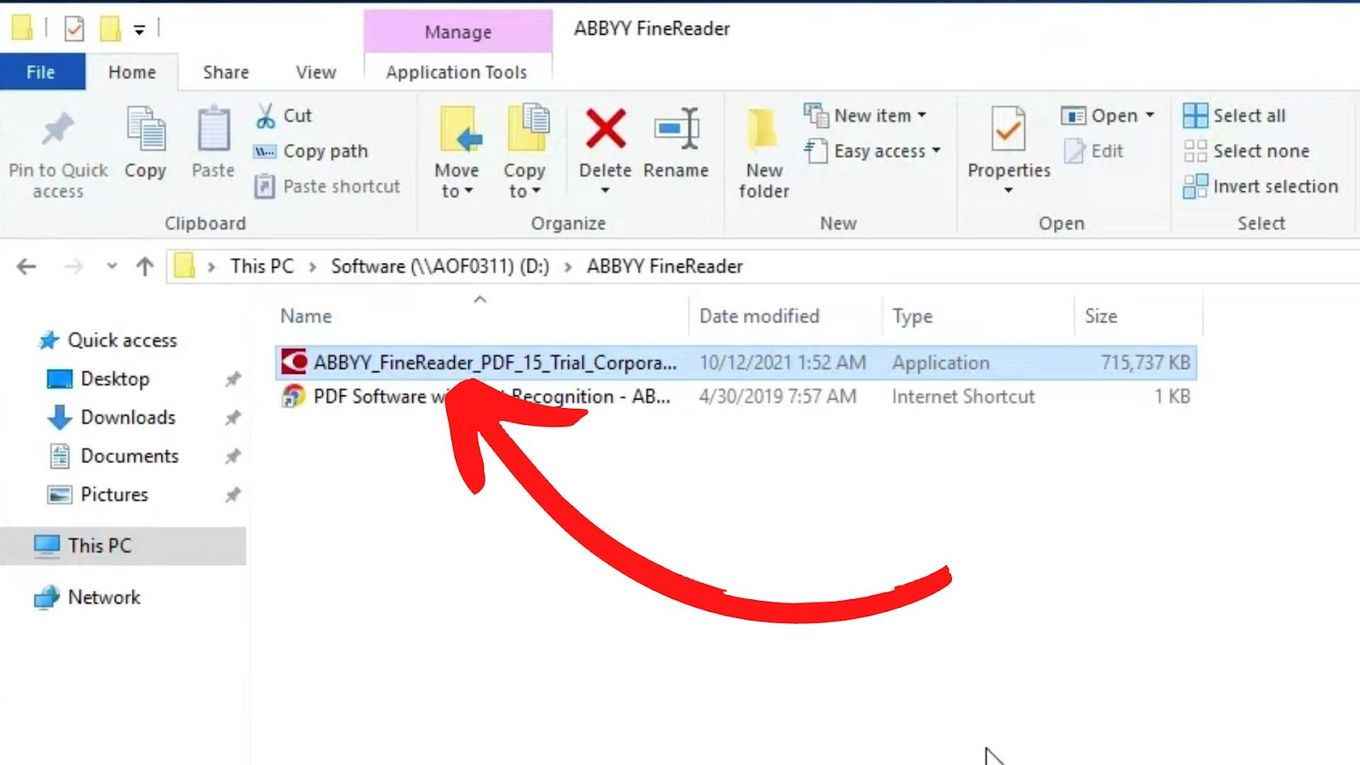
5. How To Run EXE Files On Chromebook Using Parallels Desktop App
Parallels Desktop is a software designed to let users open Windows files on their Chromebooks. Here’s how to use it to open .exe files.
You will need a Windows disc image (ISO file) to use this method. Check also the minimum system requirements to use it.
-
Step 1: Download & Install “Parallels Desktop for ChromeOS“.
-
Step 2: Download “Windows Disc Image” (.iso file) on your “Downloads” folder.
-
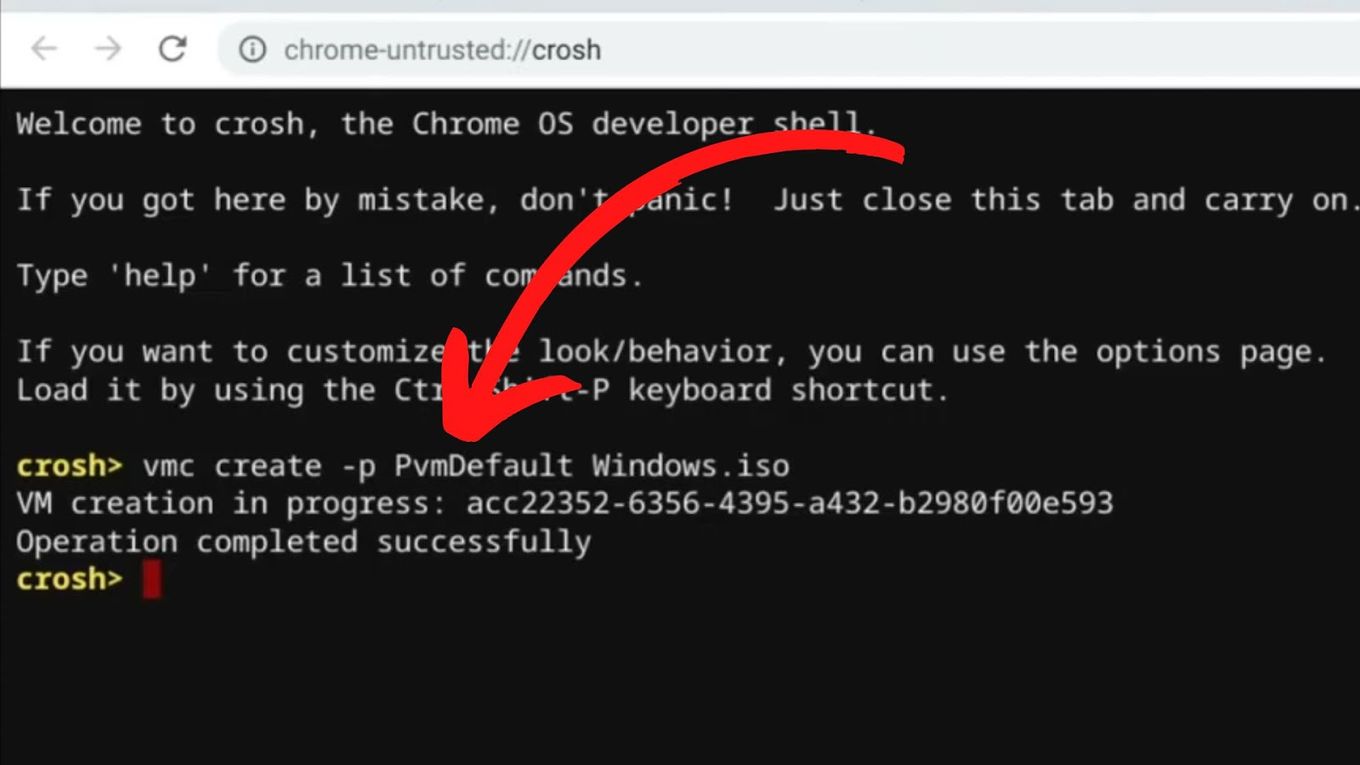
Step 3: Create a “Windows Virtual Machine“.
Open Chrome and press “Ctrl + Alt + T” to open the Crosh Terminal. Enter the following command :
vmc create -p PvmDefault <filename.iso>.Code language: JavaScript (javascript)Where the filename is the name of your Windows .iso disk image file.

-
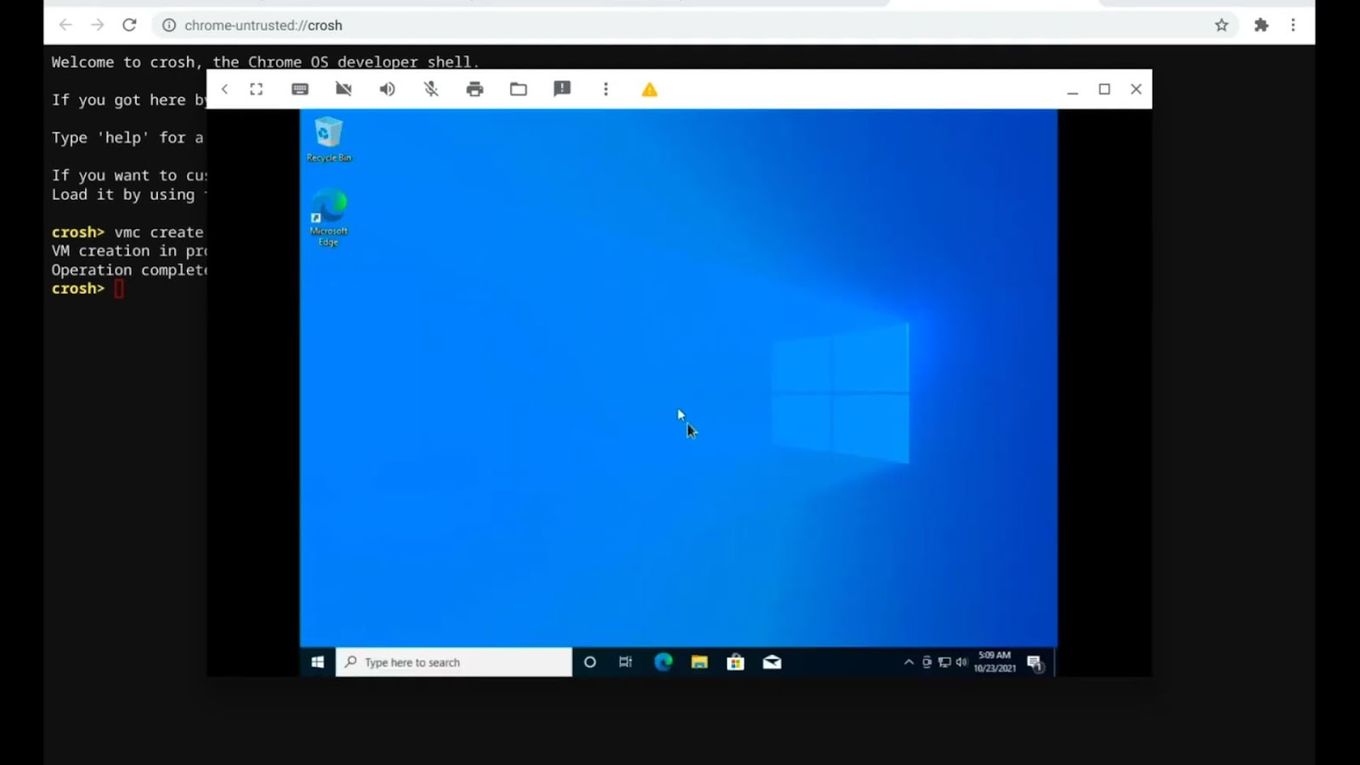
Step 4: Start “Parallax Desktop“.

-
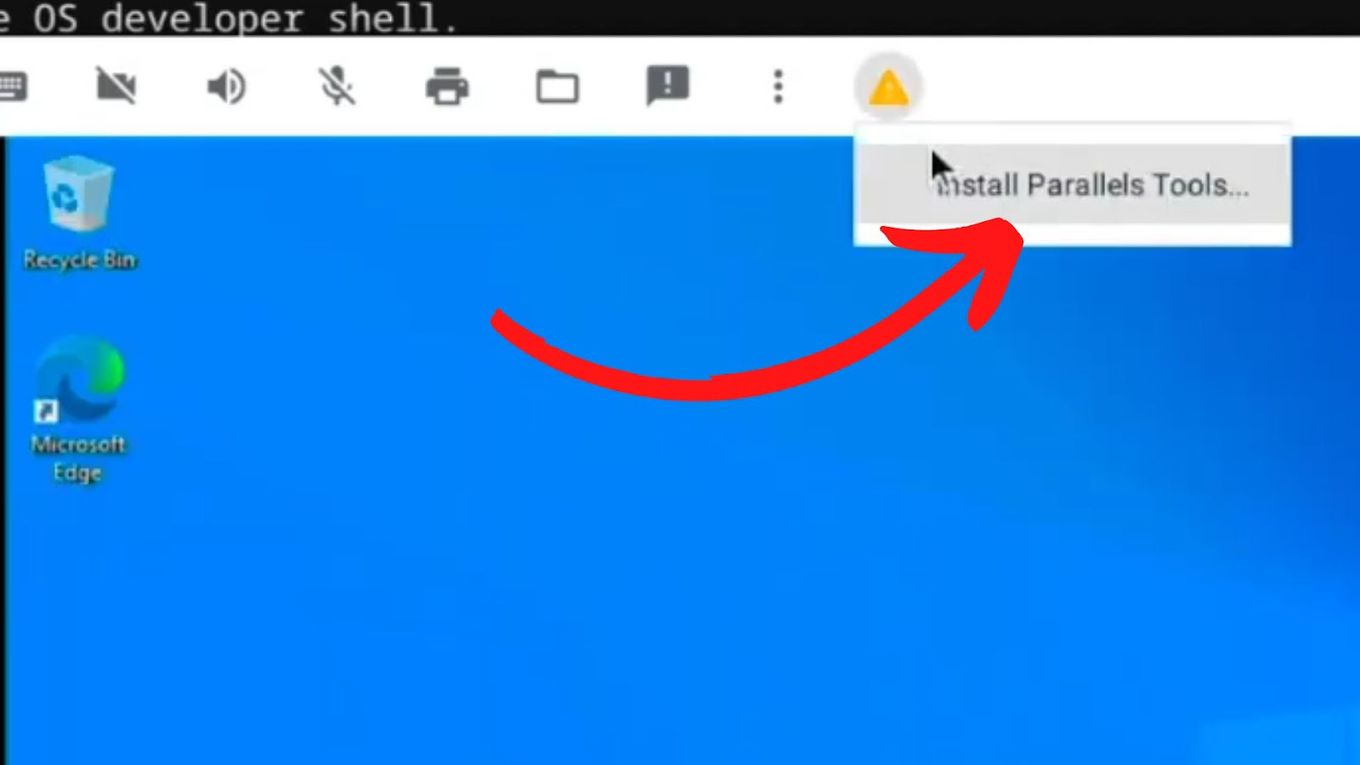
Step 5. Install “Parallels Tools” to add a set of Windows drivers.

-
Step 5. Open any .exe file.
Different Ways of Running EXE Files On Chromebook
You can run exe files on Chromebook using a variety of methods. You can use third-party apps like Wine or have your Windows ISO file on hand.
You can also splurge for a license and install Parallel Desktop. The choice is yours.
It is important to follow the instructions carefully on how to run exe files on Chromebook. You should be able to use programs on your notebook that weren’t previously available for the Chrome OS.
![What Makes Chromebooks So Bad [And What They're Good For] why-chromebooks-bad](https://alvarotrigo.com/blog/wp-content/uploads/2024/01/why-chromebooks-bad-300x188.jpg)

![Use Multiple Monitors for Chrome Remote Desktop [ ✓ Solved ] chrome remote desktop monitors share](https://alvarotrigo.com/blog/wp-content/uploads/2023/08/chrome-remote-desktop-monitors-share-300x150.png)
![How to Get & Play Valorant on Chromebook [ ✓ Solved ] valorant chromebook share](https://alvarotrigo.com/blog/wp-content/uploads/2023/08/valorant-chromebook-share-300x150.png)
![How to Jailbreak Chromebook [+ Know What to Consider] jailbreak chromebook share](https://alvarotrigo.com/blog/wp-content/uploads/2023/08/jailbreak-chromebook-share-300x150.png)
![Wine For Chromebook [How To Install It] wine chromebook share](https://alvarotrigo.com/blog/wp-content/uploads/2023/08/wine-chromebook-share-300x150.png)