A snipping tool lets you take quick snapshots of your screen. You can save images to your clipboard and share them via social media, Google Classroom, Hangouts, Docs, or Slides. It is a very useful tool for studying or working.
In this article, we will learn if Chromebooks come with a pre-installed snipping tool. Then, we’ll tackle how to use the snipping tool on a Chromebook to take full or partial screenshots or screenshots of a specific window.
Does Chromebook Have a Snipping Tool?
Yes, Chromebooks have a free built-in snipping tool called “Screen Capture” that allows you to take full or partial screenshots. You can find it in the “Quick Settings Panel,” which opens when you click the “Clock” icon. You can also open it with the shortcut “Ctrl + Show Window“.
After you take a screenshot, it appears in the bottom right corner. Click on it to open editing tools, add comments, draw, crop, and save the image to your preferred device.
However, if you are looking for more features or functionalities, the built-in tool may be too simple for your needs. In that case, you can get a third-party app like the “Nimbus Screenshot” or Lightshot extensions for Chrome.
Snipping Tool Shortcut on Chromebook
The snipping tool shortcut on Chromebook is “Ctrl + Show Window”. However, you can also use a couple more shortcuts to take a screenshot on Chromebook. Its snipping tool can take full-screen, partial, or specific window screenshots.
Here are all the snipping tool shortcuts to capture screenshots on Chromebooks:
| Action | Key Shortcut |
| Full Screenshot | Ctrl + Show Windows |
| Screenshot of an Area of the Screen | Ctrl + Shift + Show Windows |
| Screenshot of a Specific Window | Ctrl + Alt + Show Windows |
Did you know there are also keyboard shortcuts for using emojis on a Chromebook?
How to Snip on Chromebook
To snip a screenshot on a Chromebook, press “Ctrl + Show Windows” keys. If you want to take a partial snapshot, push “Ctrl + Shift + Show Windows” and if you want to take a picture of a window, push “Ctrl + Alt + Show Windows”.
Here are the detailed steps to snip on Chromebook:
Take a Full-Screen Screenshot
Here’s how to use the snipping tool on Chromebook to take full screenshots:
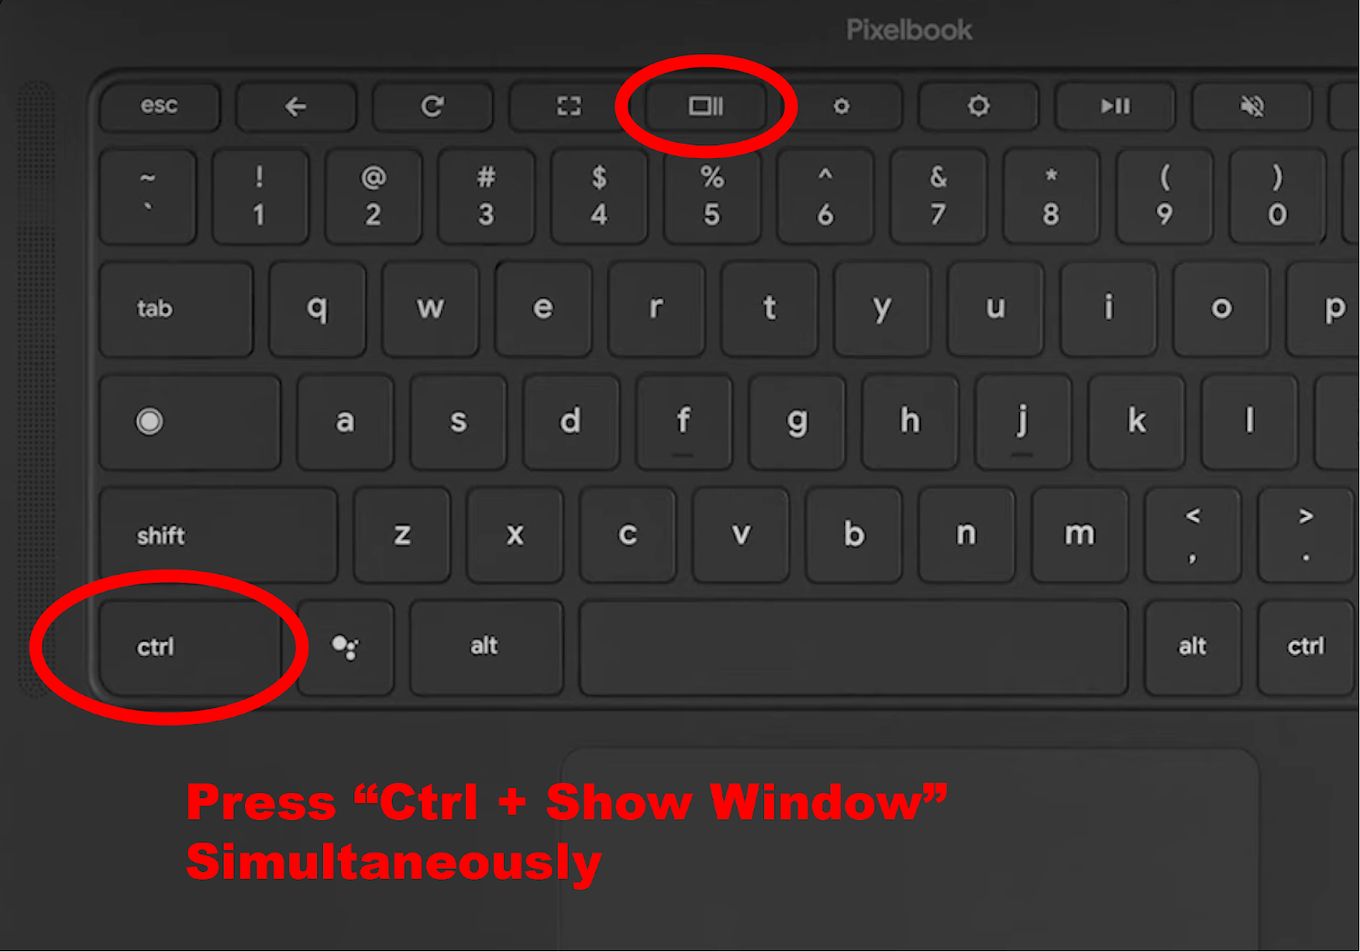
- Step 1. Press “Ctrl + Show Window” simultaneously.
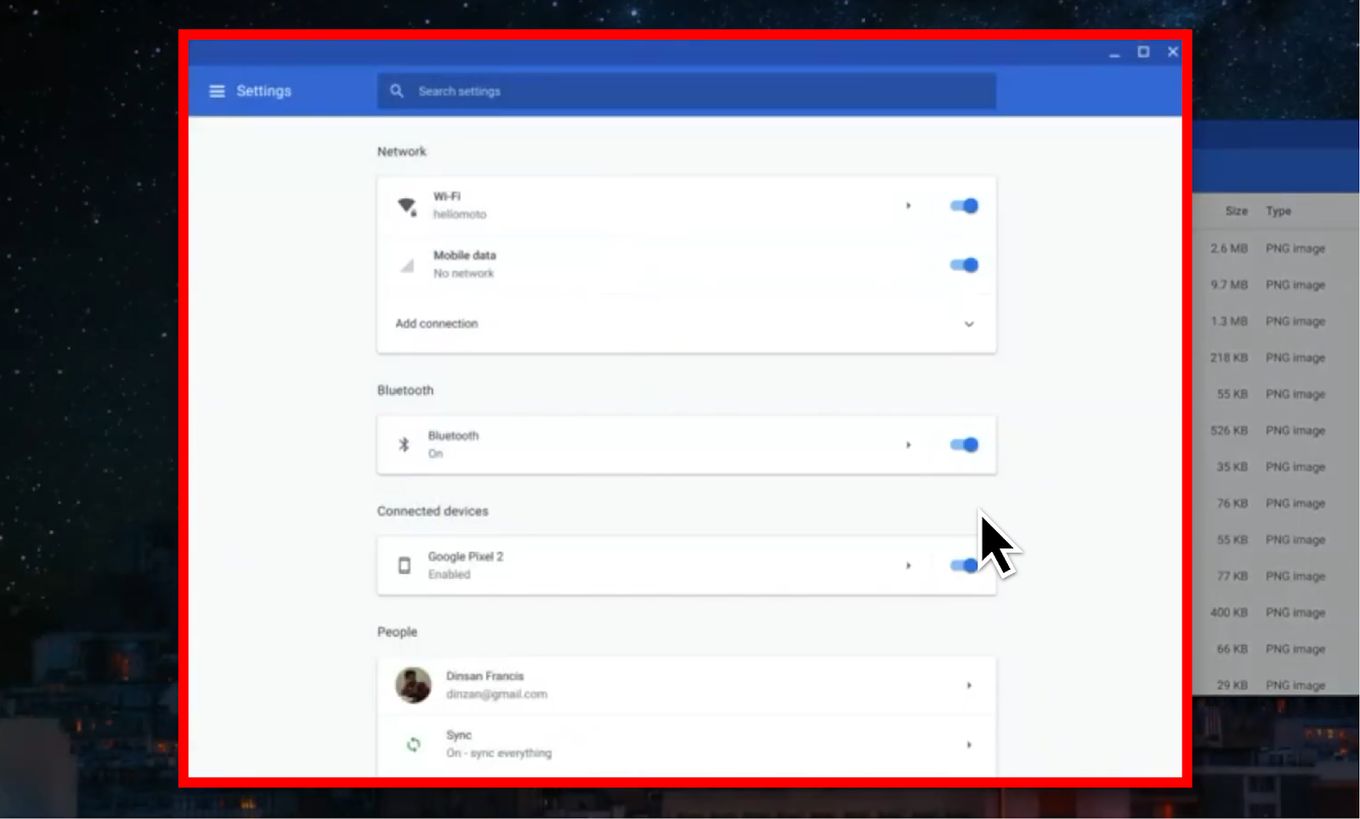
An image of the fullscreen will be taken as soon as you push these keys.

Some Chromebook keyboards may have the “F5” key instead of “Show Window”.
-
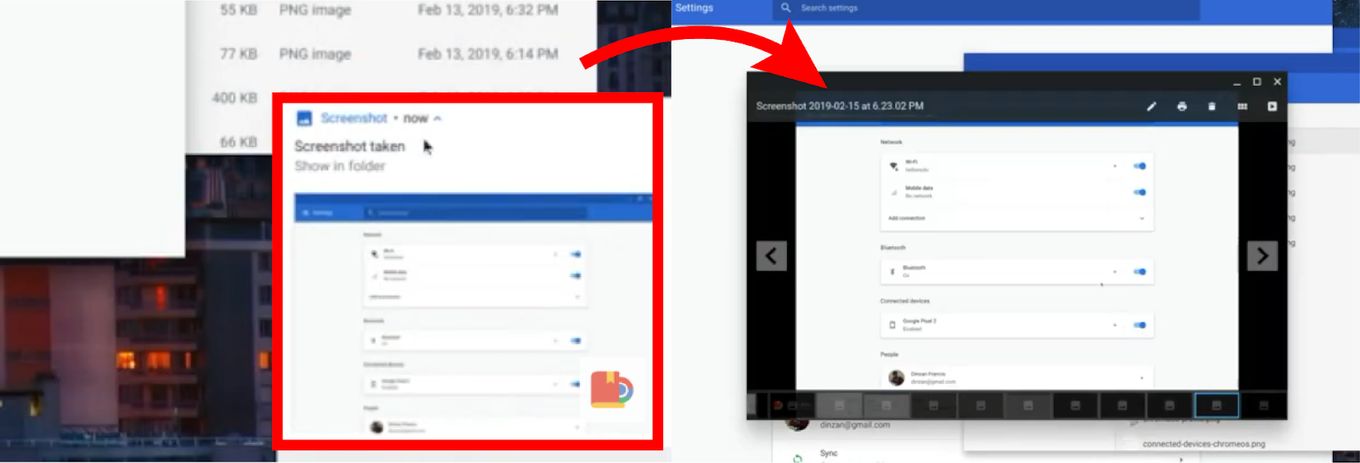
Step 2. Open the screenshot file.
A miniature image of the screenshot will appear at the bottom-right corner. Click on it to show it on the folder (“My Files > Download”) or click “Copy to clipboard”.

Take a Partial Screenshot
Here’s how to use the capture tool on a Chromebook for taking a partial screenshot:
-
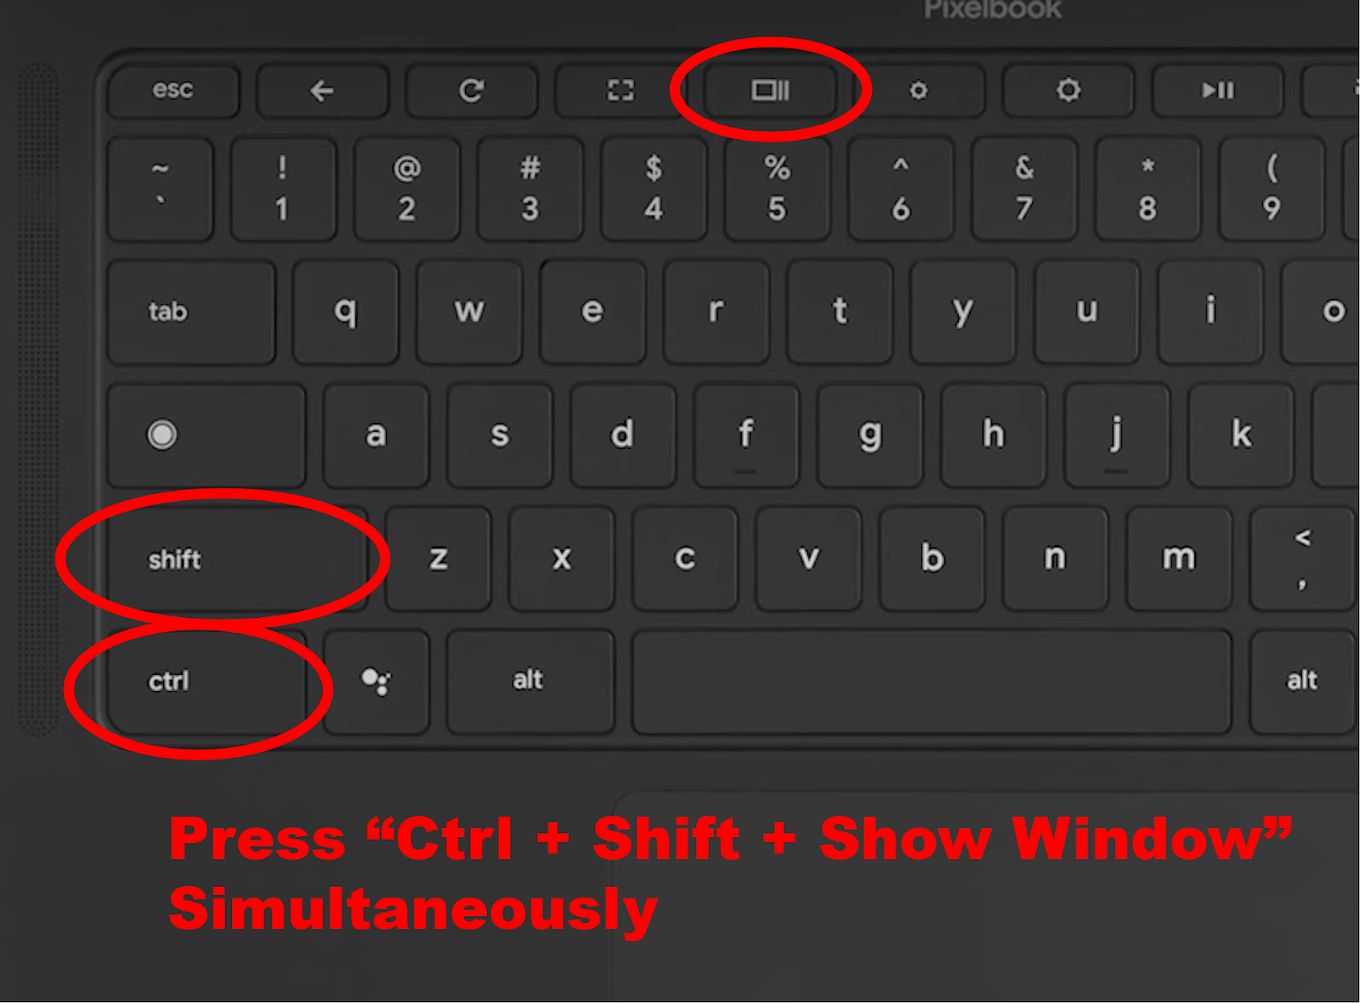
Step 1. Press “Ctrl + Shift + Show Window” simultaneously.
The cursor will temporarily turn into a cross-hair. The screen will also dim slightly. Some Chromebook keyboards may have the “F5” key instead of “Show Window”. -
Step 3. Open the screenshot file.
Click on miniature-image at the right-bottom corner to locate the image in its downloads folder.

Capture a Specific Window Screenshot
Here’s how to use the snipping tool on Chromebook for taking a screenshot of a specific window:
-
Step 1. Press “Ctrl + Alt + Show Window” simultaneously.
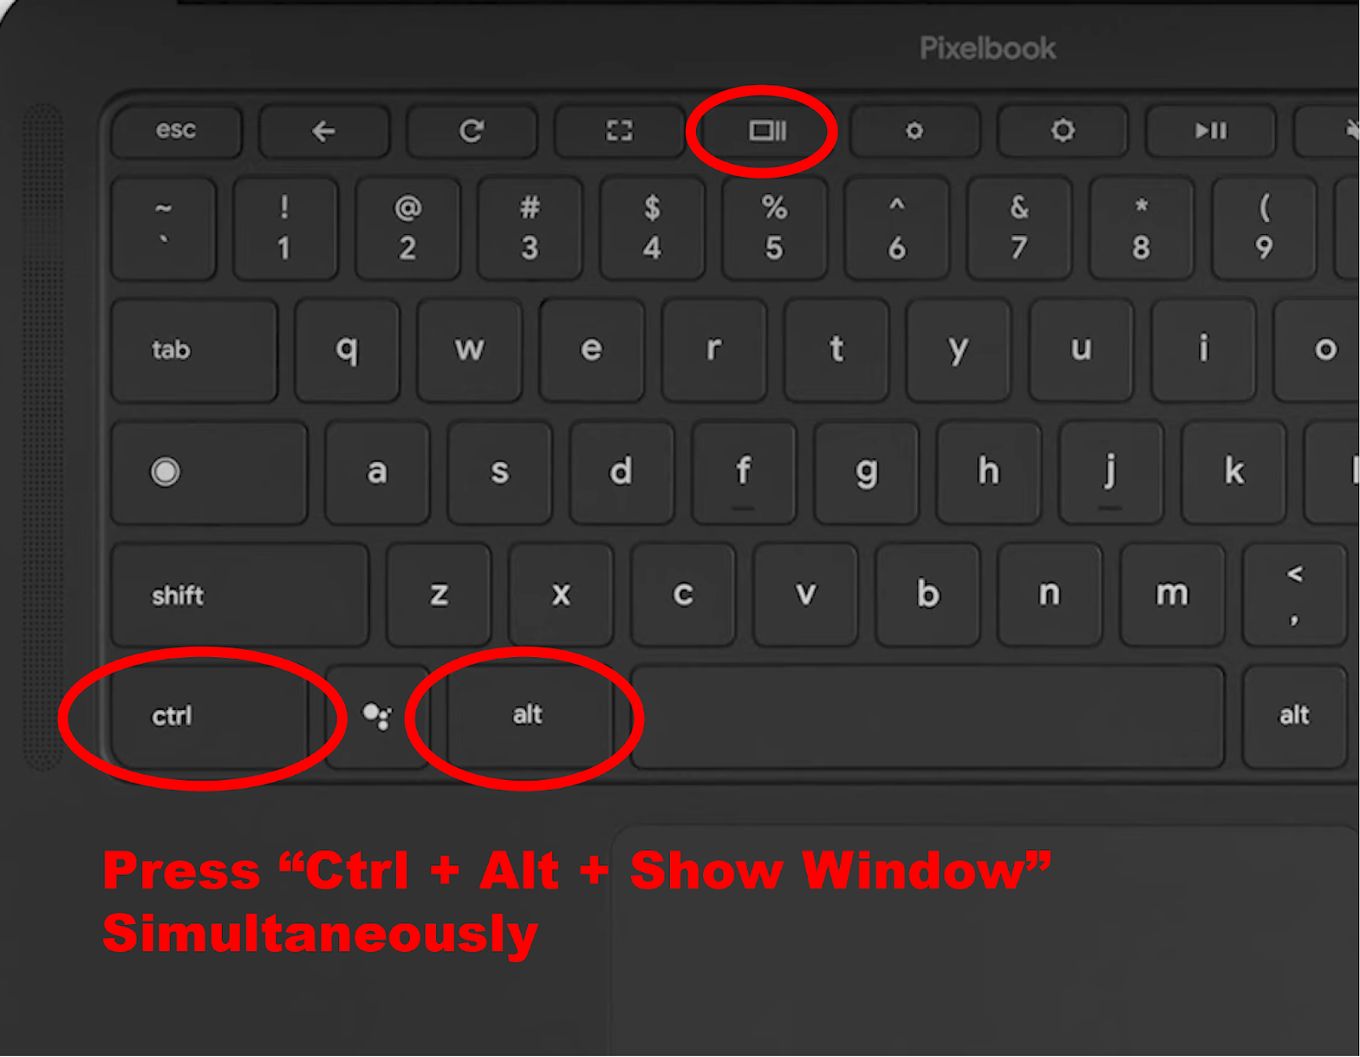
Some Chromebook keyboards may have the “F5” key instead of “Show Window”.
-
Step 2. Hover your mouse over a window & click on it.
Your laptop will take a screenshot of the window automatically. -
Step 3. Open the screenshot.
The image will be saved in the “Downloads” folder.
Trim and Sketch a Screenshot on Chromebook
You can make basic edits to the screenshots you’ve captured on your Chromebook. Here are the steps:
- Step 1. Take a screenshot with the snipping tool.
-
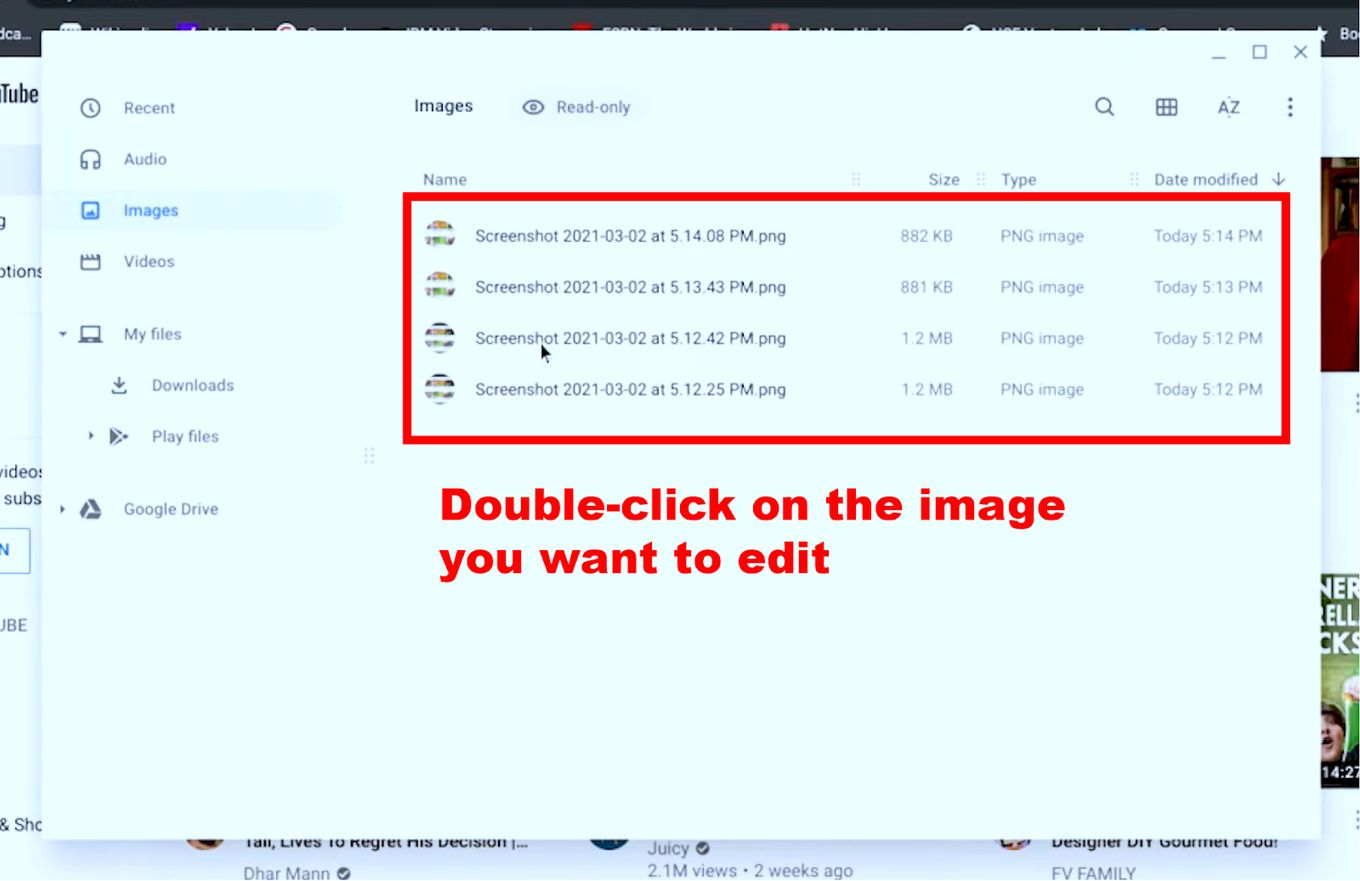
Step 2: Double-click on the image you want to edit.
-
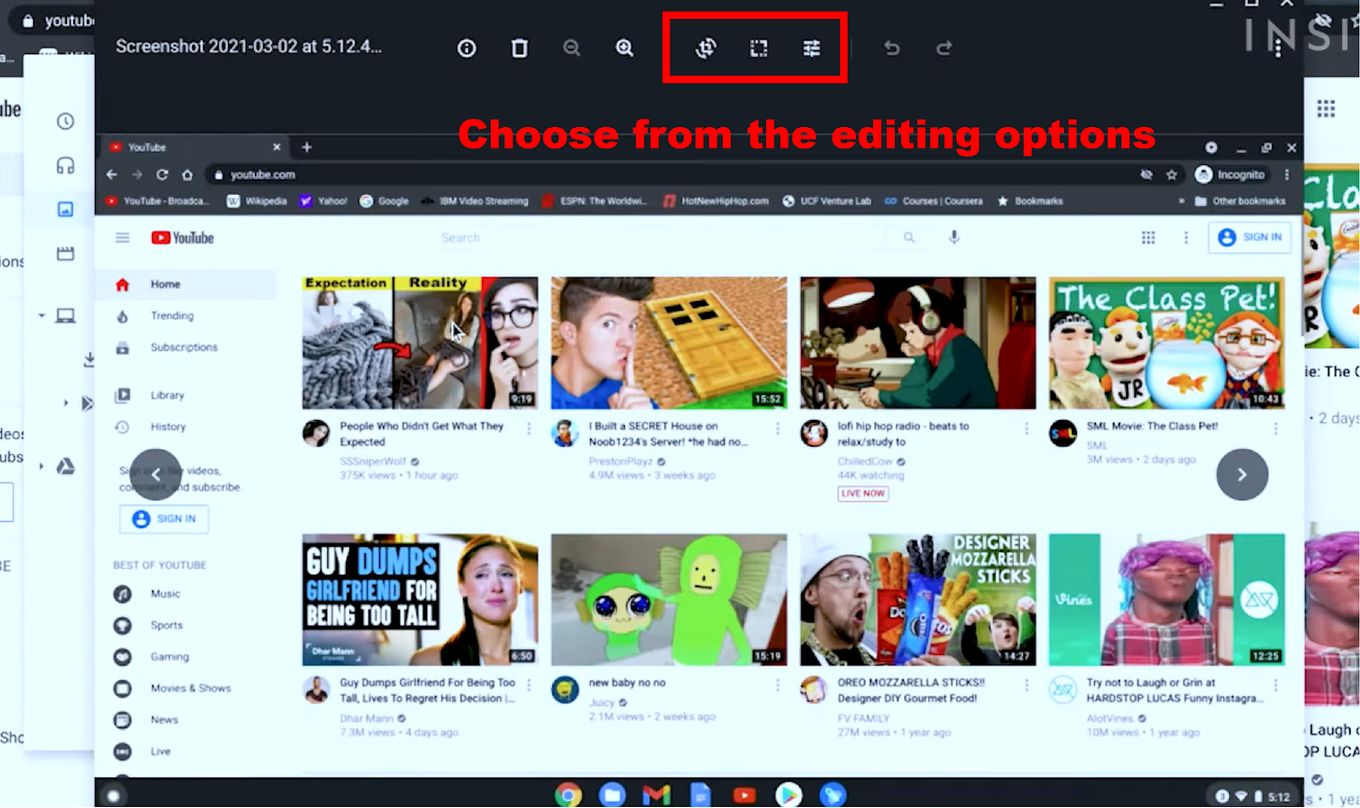
Step 3: Choose from the editing options.
-
Step 4: Click “Save”.
Where Are Screenshots Saved on a Chromebook?
Your screenshots on a Chromebook are automatically saved in the “Download” folder within “My Files” folder. You also have the option to choose where your Chromebook screenshots are saved by following these simple steps:
- Step 1: Push “Shift + Ctrl + Show Window” simultaneously
- Step 2: Choose “Settings >Select folder” (where you want to save screenshots).
Chromebook Snipping Tool: Useful and Easy to Use
The snipping tool is very useful when you are studying or working. Fortunately, it’s easy to use on your Chromebook, as you only need to press some buttons and use the mouse.
You can also choose the folder where the screenshots are located on your laptop.


