Those who have had the chance to use Chrome extensions on iPad know they can get the Windows-style convenience that comes with a powerful browser. You also probably noticed that you couldn’t get extensions the normal way you do for Safari. So, let’s figure out how to hack this.
You can learn more about Chrome iPad extensions and how to get them on your iPad right here.
What Is A Chrome Extension?
A Chrome extension is a program that enhances the functionality of the Chrome web browser. For example, there are Chrome extensions to block ads, correct grammar, copy texts from websites, etc. Once installed, a small icon appears on the top right of your Chrome web browser for each extension.
You can install a Chrome extension to customize your browser experience to meet your preferences or needs by tweaking the browser’s functionality.
Can You Install Chrome On iPad?
Yes, you can install Chrome on your iPad for free. To install Google Chrome on iPad, head to the app store, search for “Google Chrome” and click on the “Get” button. Enter your Apple ID to download and install Google Chrome on your iPad.
If you cannot download Google Chrome, it may be because your iPad is incompatible.
Update your iPad to the latest version of iOS. Most likely, your current version of iOS does not support Google Chrome, especially versions 12.2 and below.
Does Chrome Support Extensions On iPad?
No, Chrome extensions are not supported on iOS. No browser can authorize a desktop-level Chrome extension for the iPad. Apple’s policy prevents developers from including downloadable module engines in their apps, including Chrome iPad extensions.
There are multiple reasons for this limitation, primarily Apple’s security restrictions.
Also, allowing web extensions may create a loophole to bypass Apple’s means of gatekeeping through the App Store. Bypassing Apple’s gatekeeping may lead to bypassing Apple’s revenue collection.
How To Use Chrome Extension in Safari On iPad
Before using Chrome iPad extensions, you must go through a conversion process first. Since Chrome extensions are not supported on an iPad, they must first be ‘adapted’ for Safari.
You can do that with xCode and the Safari web extension converter. Here are the steps to use chrome extensions in Safari on your iPad:
You will need Xcode 12.2 to convert your Chrome extensions to Safari. You will also need Mac OS 12 (Monterey) and Safari 14.0.1 and iOS 15.
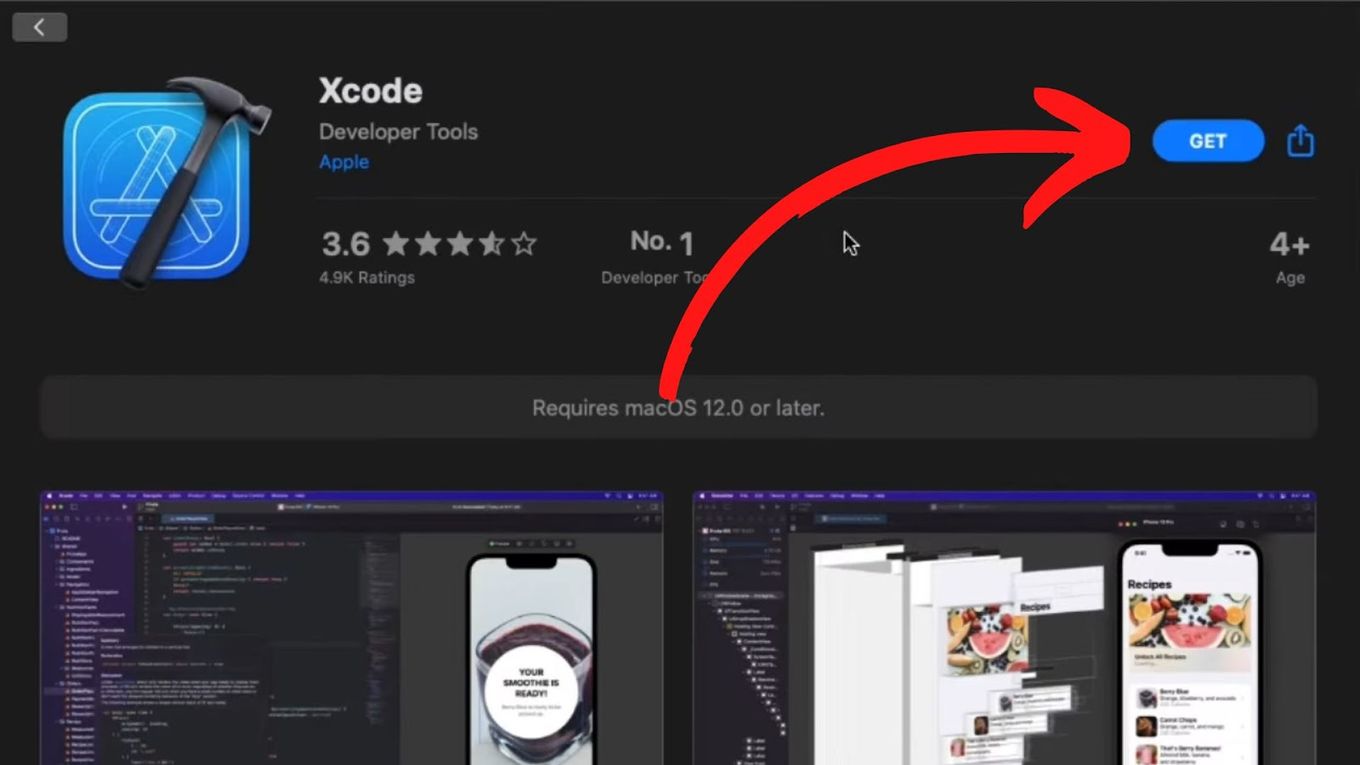
Step 1. Get Xcode On Your Mac
You can download Xcode from the App Store.
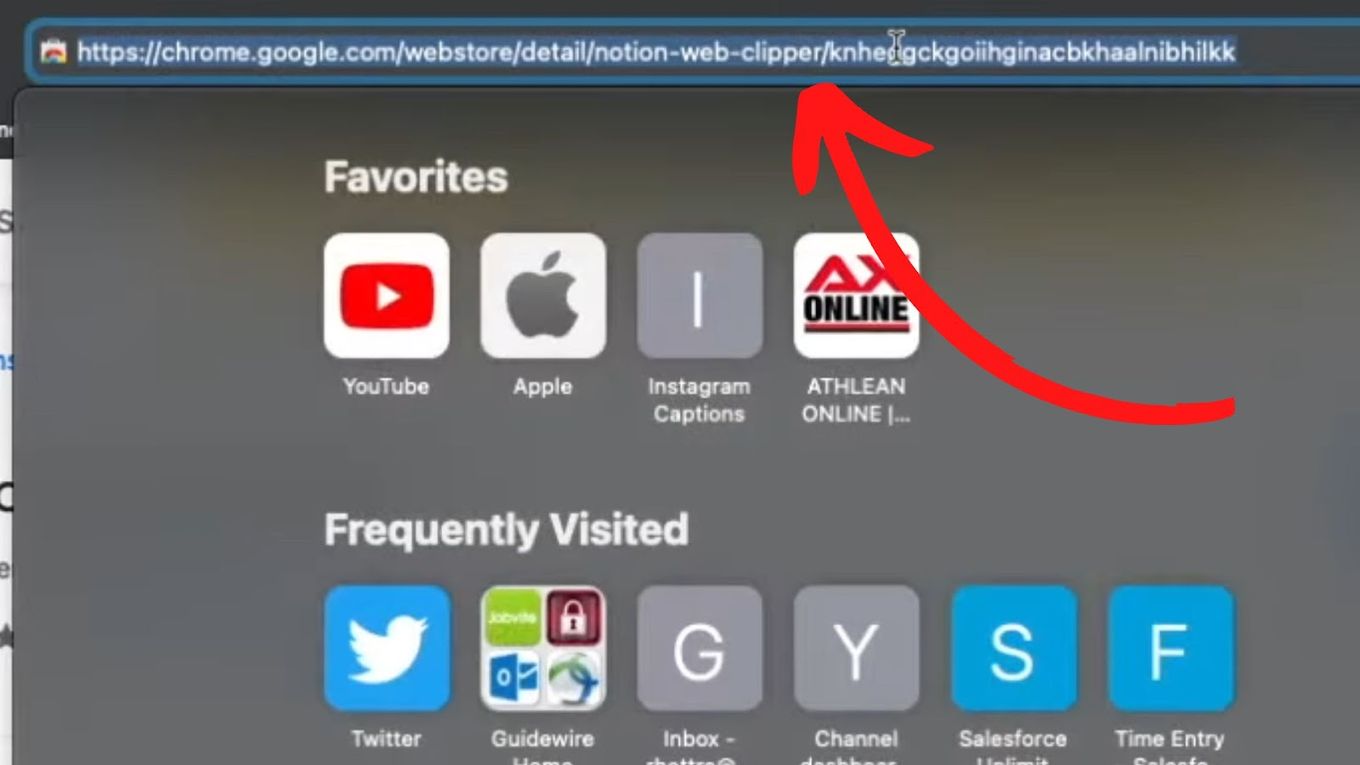
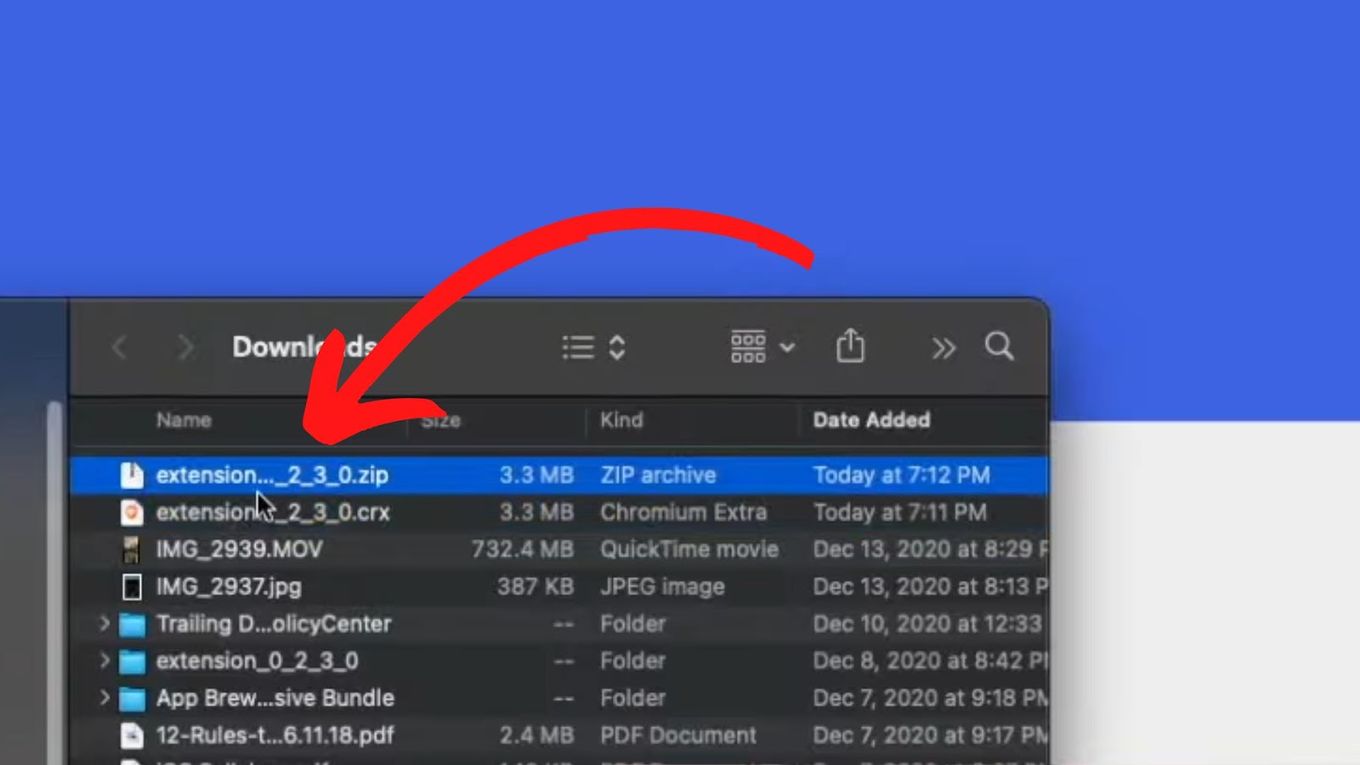
Step 2. Extract The Extension Source Code
-
Go to the desired extension website.
-
Copy the URL of the extension you want to convert.

-
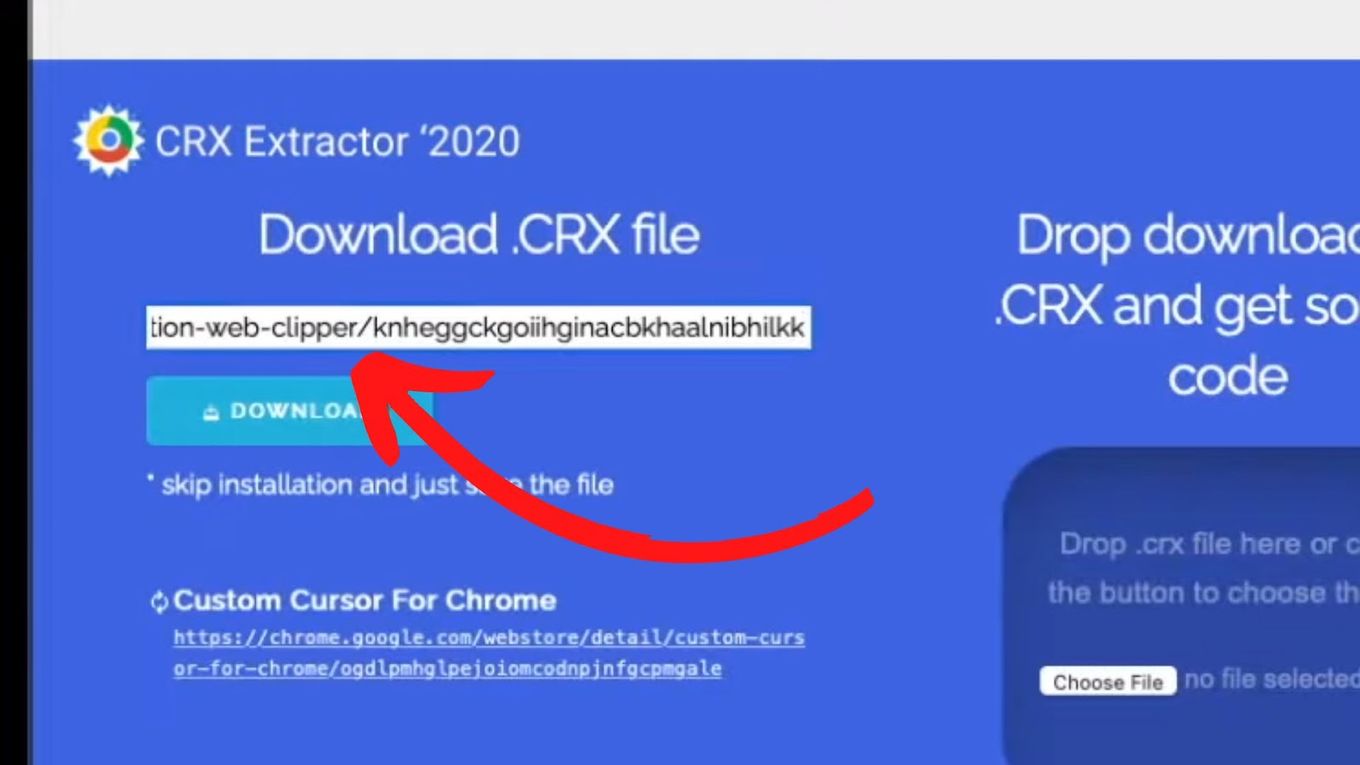
Go to crxextractor.com
You can alternatively use this CRX Extractor Chrome Extension to get the
.CRXfile and jump to the 6th step (extract .zip file) -
Paste the URL of the extension to download the
.CRXfile of your extension -
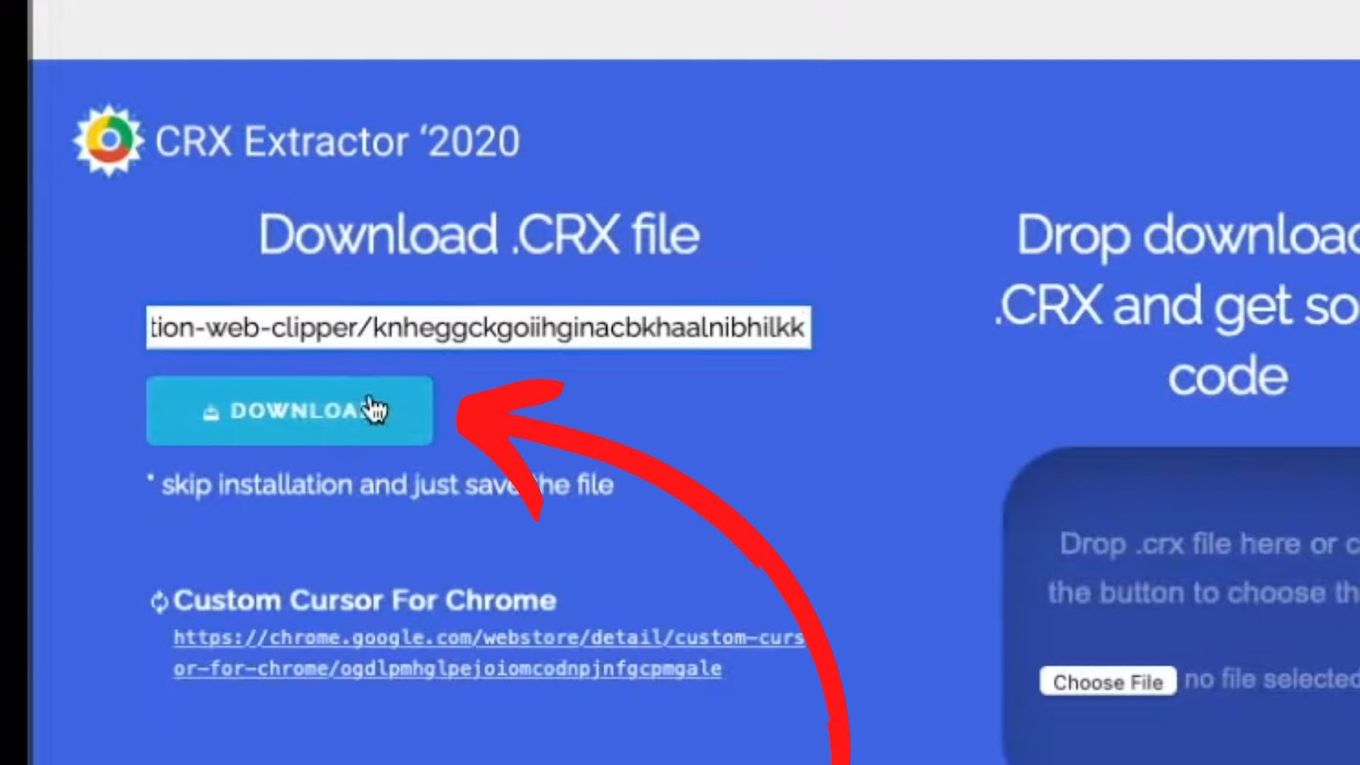
Click “Download”
-
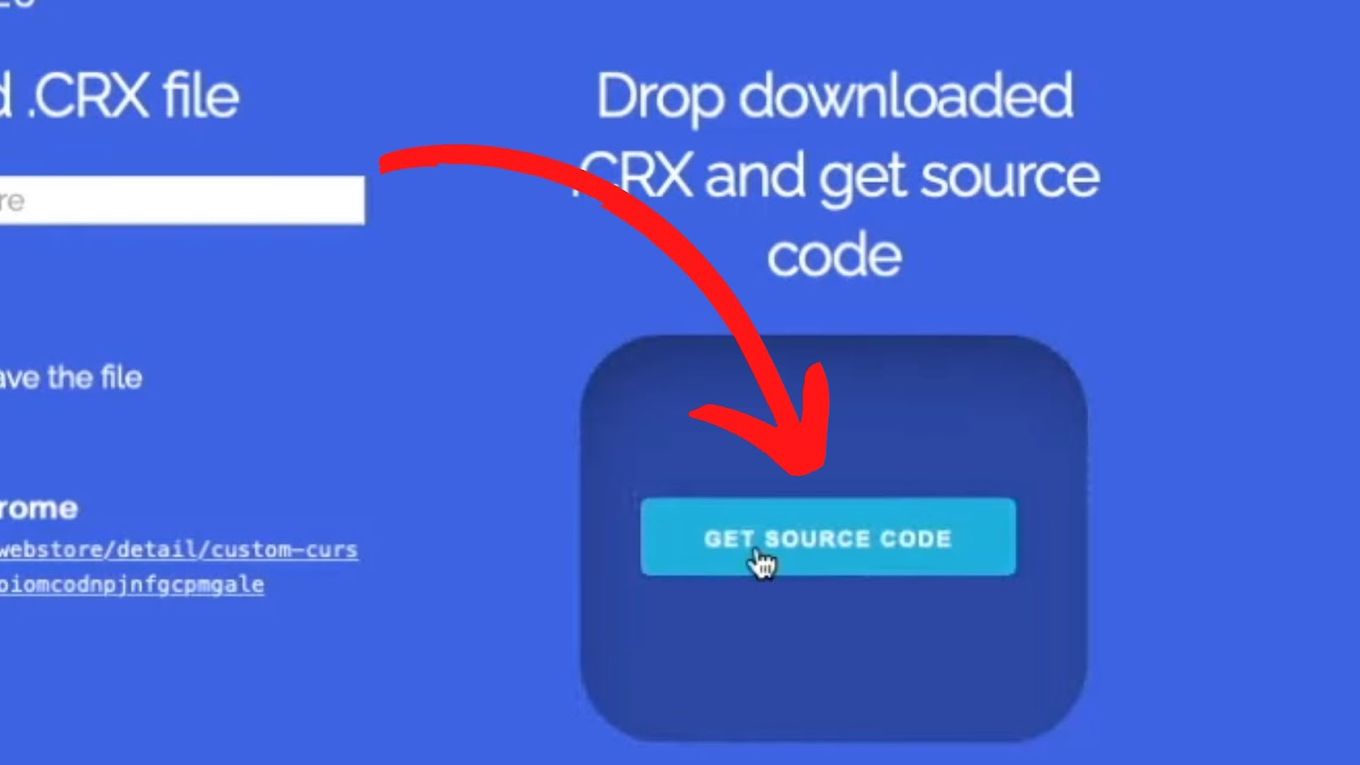
Drag and drop the downloaded
.CRXfile into the “Get Source Code” panel. -
Extract the .zip file
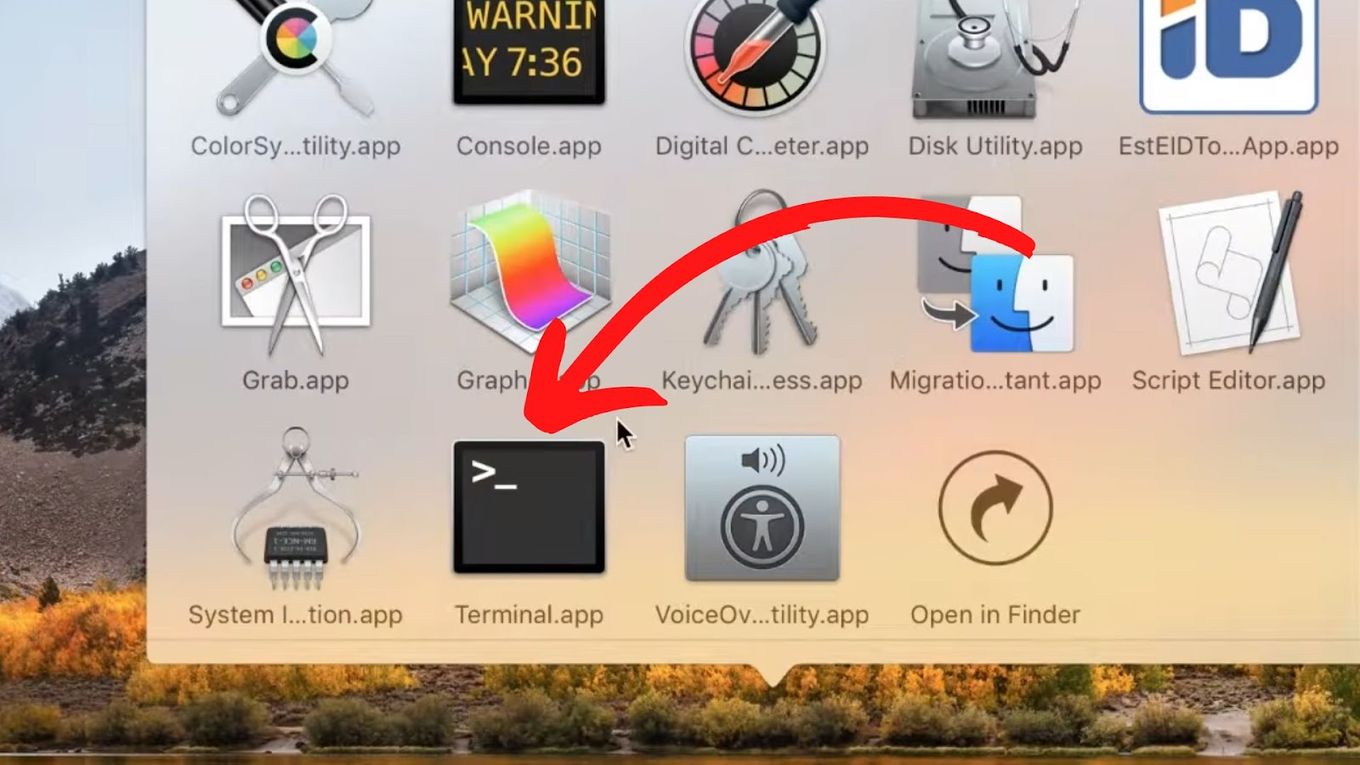
Step 3. Run Safari Web Extension Converter
This Safari Web Extension Converter will create an Xcode project, configure it with a macOS app (or iOS app in this case), and finally configure a Safari web extension with your Chrome extension files in the Xcode Project.
-
Open a Terminal
-
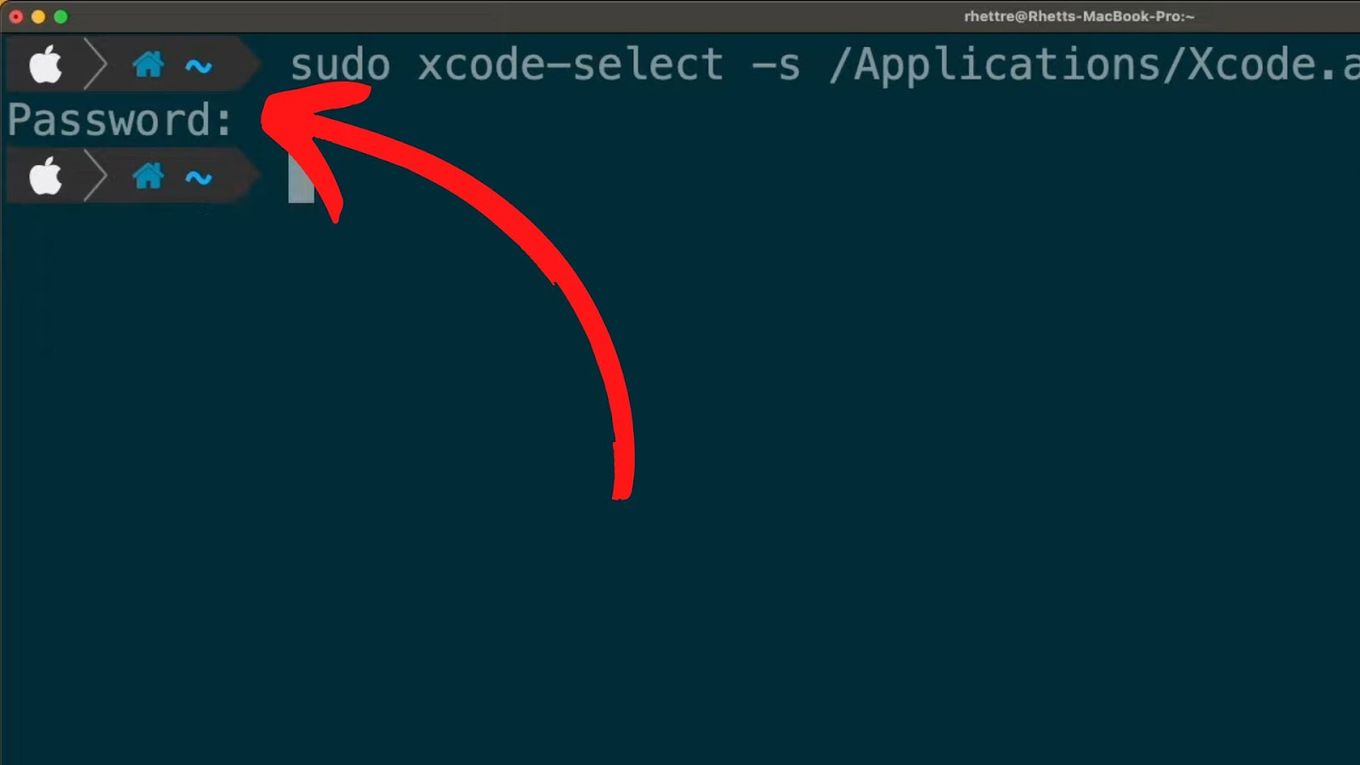
Enter the following command (change the Xcode path if it is different)
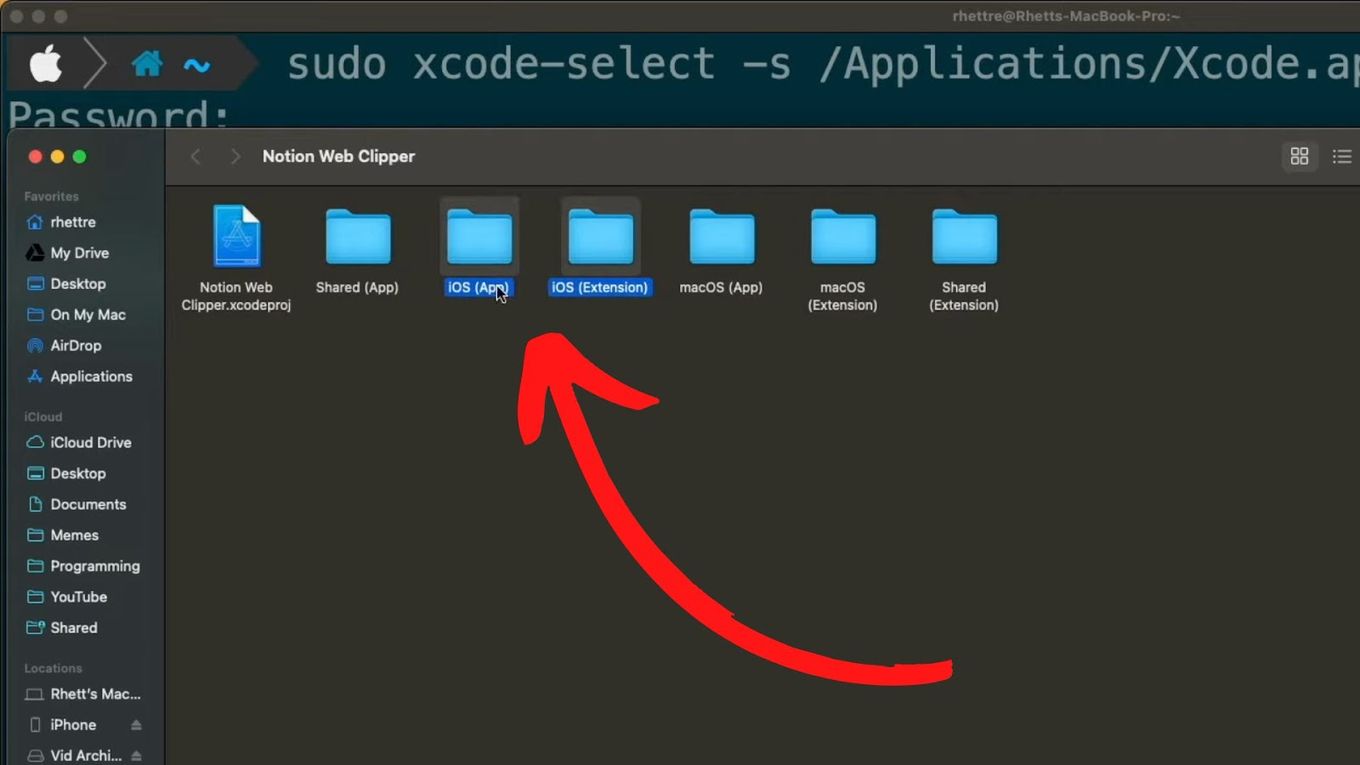
sudo xcode-select -s /Applications/Xcode.appCode language: JavaScript (javascript)Press “Enter” and enter your password.
-
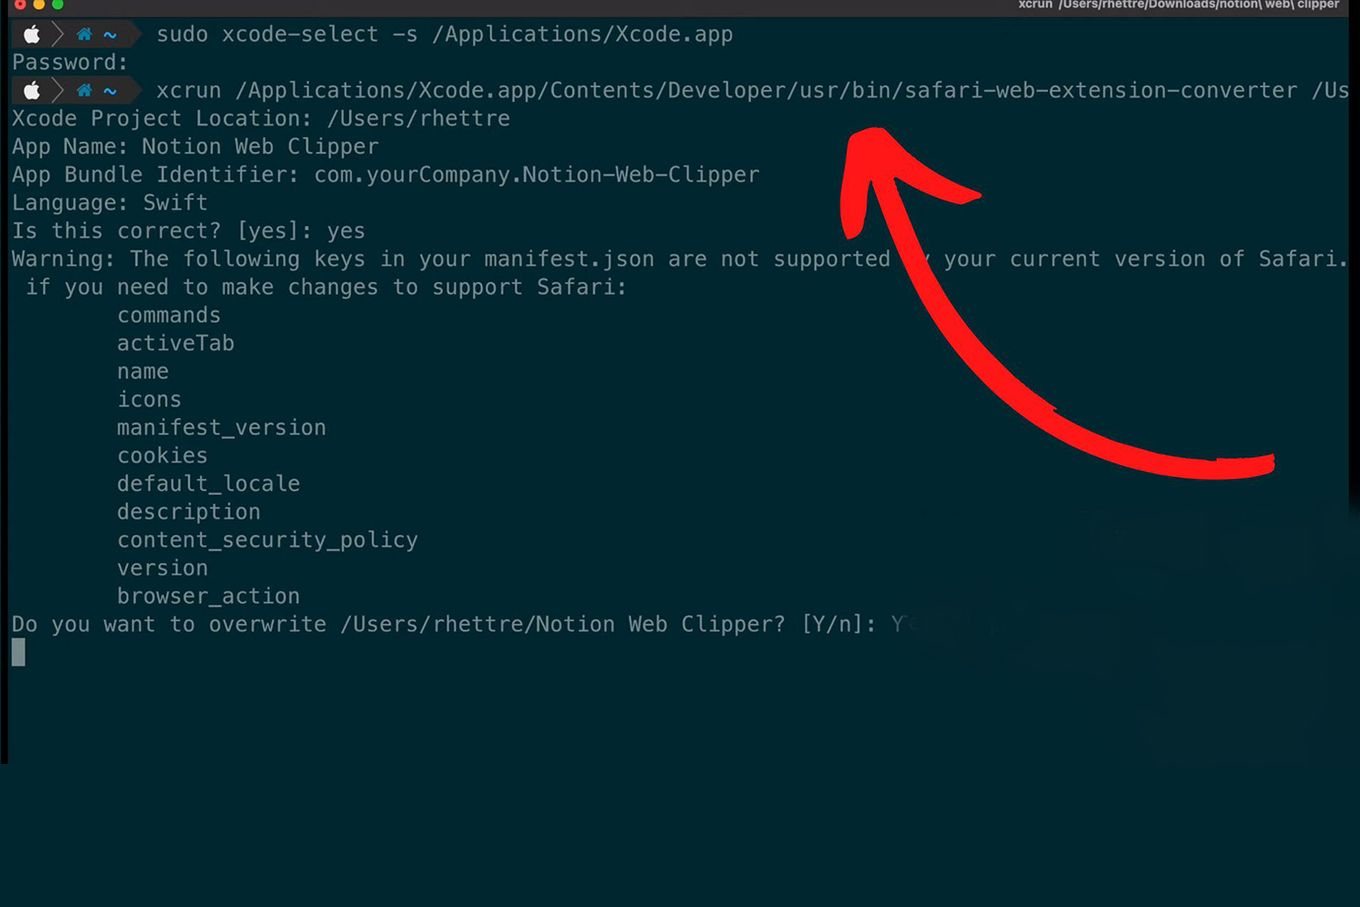
Enter the following command (change “PATH_TO_EXTENSION” for the location of the folder with the extension code that you just downloaded in step 2)
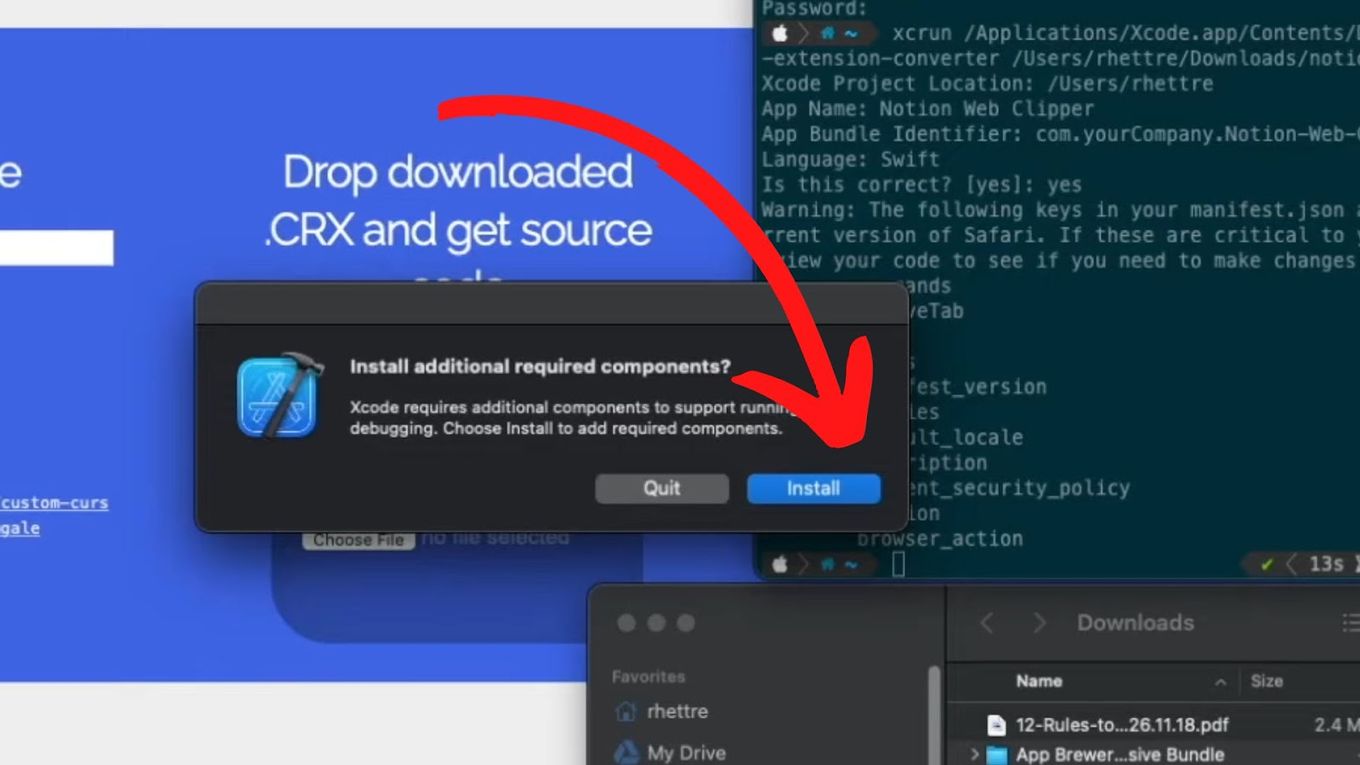
xcrun /Applications/Xcode.app/Contents/Developer/usr/bin/safari-web-extension-converter PATH_TO_EXTENSIONCode language: JavaScript (javascript)Press “Enter” and then “Y” to confirm.
-
Click “Install” to add the extra XCode components required for the conversion.
Step 4. Build Your Extension For Safari [macOS version]
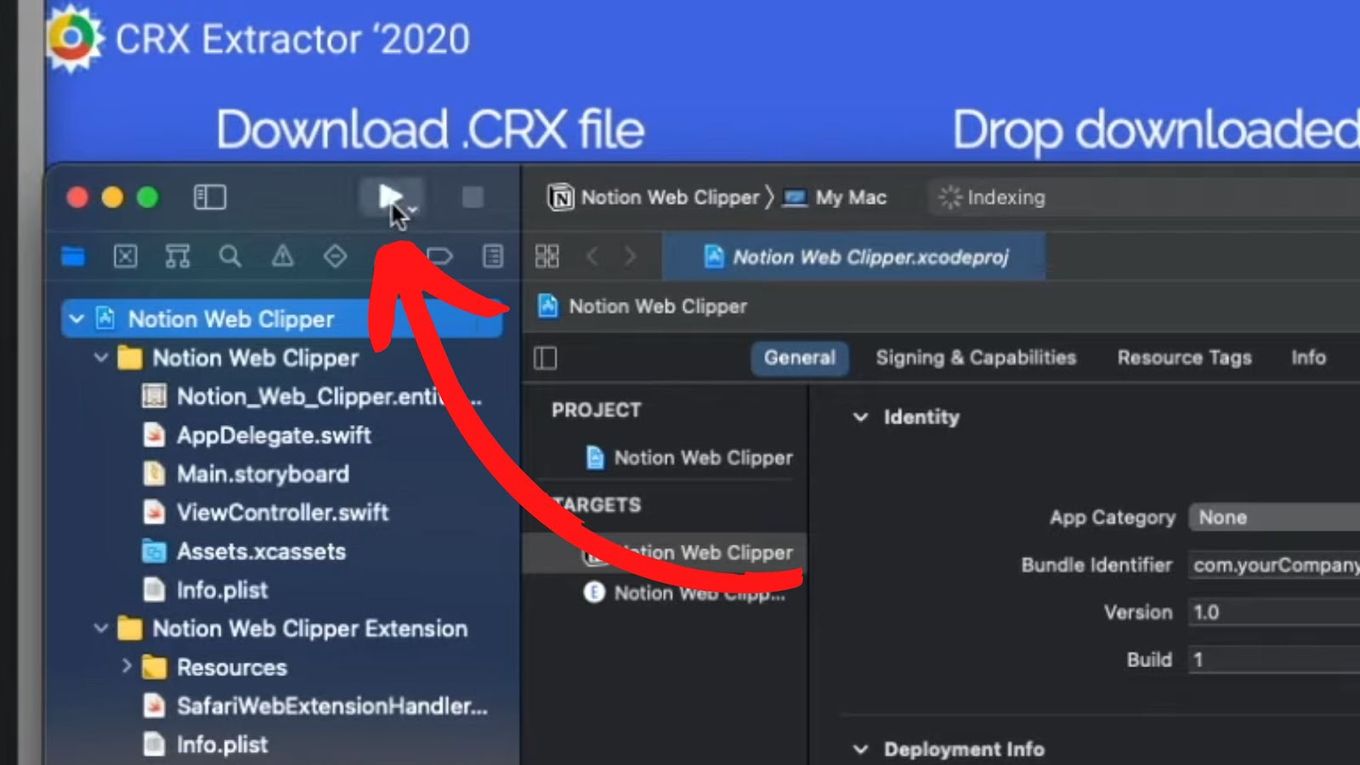
After the last step, Xcode will open automatically. Now follow these steps to build your extension for Safari on macOS:
-
Click “Play” to build your extension for Safari.
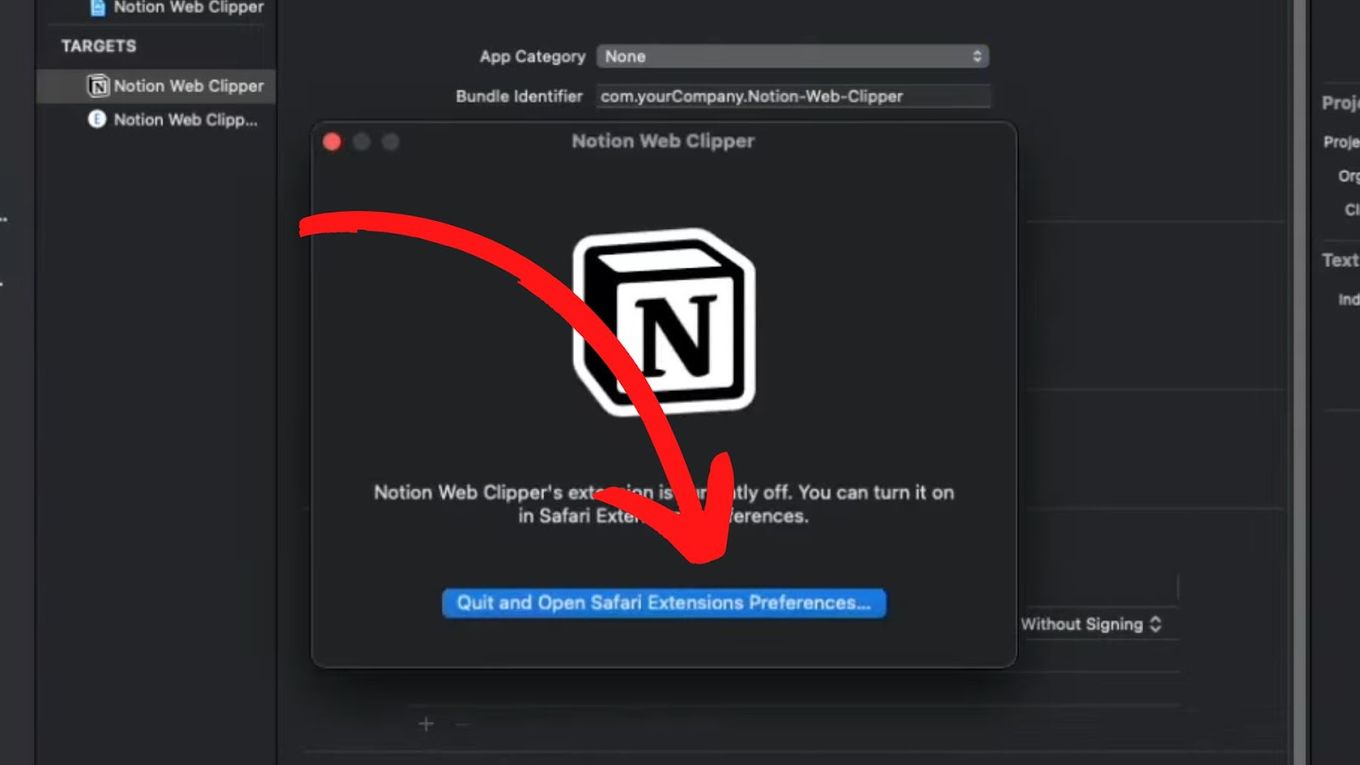
If everything goes right, a message will prompt you.
-
Click “Quit and Open Safari Extensions Preferences”
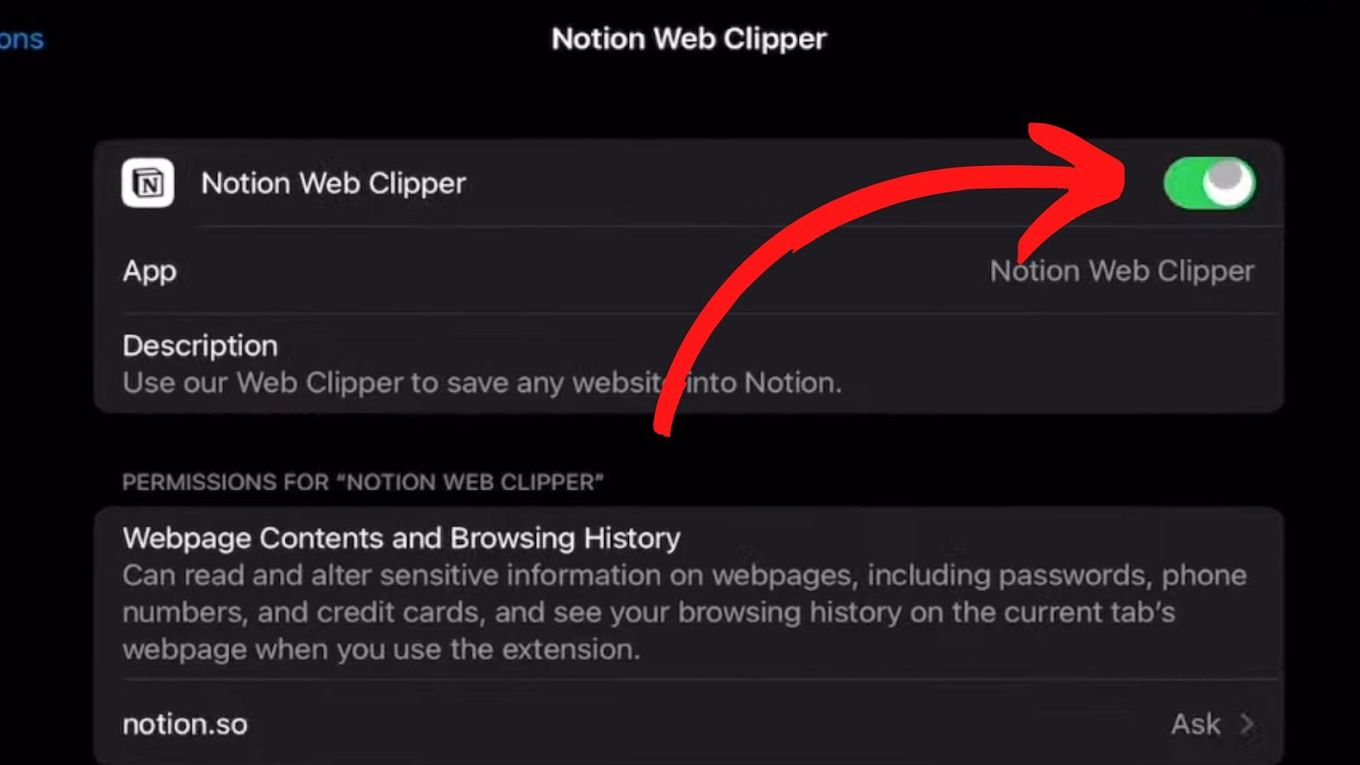
Safari extensions will open. You won’t see your extension because you would have to allow “unsigned extensions” on Safari.
However, this is not necessary for using the extension on iPads.
To allow unsigned extension on Safari, just choose “Safari > Preferences > Advanced > “Show Develop menu in menu bar” > Develop > Allow Unsigned”
Step 5. Build Your Extension for Safari [iOS version]
Your extension is ready for macOS. However, you still need to make it ready for iOS as you want to use it on your iPad. Follow these steps:
-
Open a Terminal
-
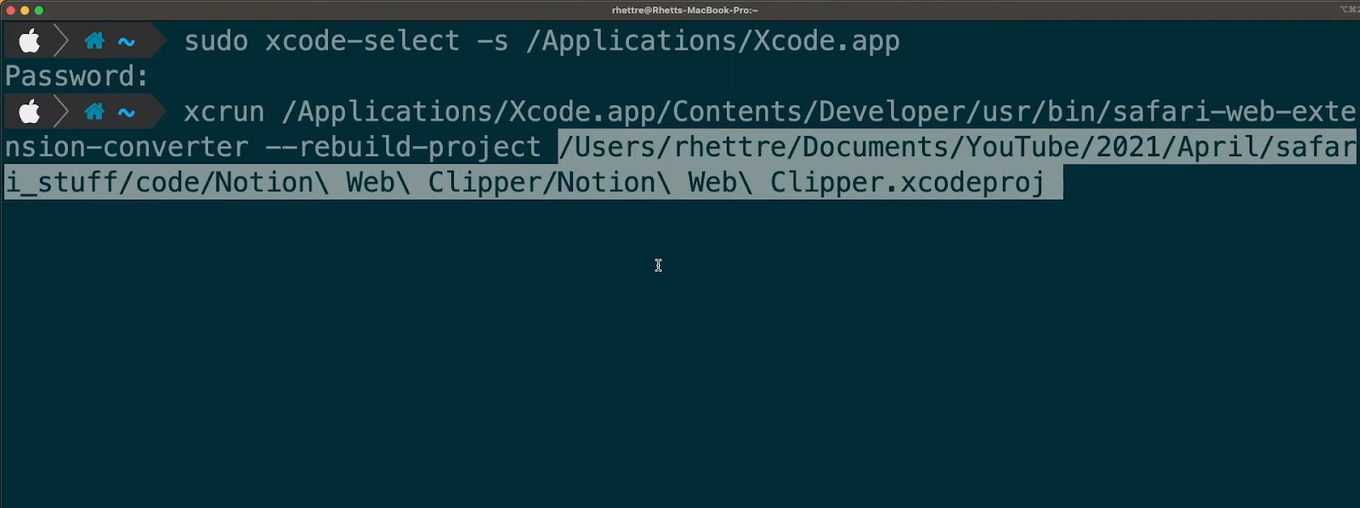
Enter the following command (change the Xcode App path if it is different)
sudo xcode-select -s /Applications/Xcode.appCode language: JavaScript (javascript)Press “Enter” and enter your password.
-
Enter the following command (change “PATH_TO_XCODEPROJECT” for the location of the folder with the Xcode Project that was created in step 4. It finishes in .xcodeproj)
xcrun /Applications/Xcode.app/Contents/Developer/usr/bin/safari-web-extension-converter --rebuild-project PATH_TO_XCODEPROJECTCode language: JavaScript (javascript)Press “Enter” and then “Y” to override the previous version.
Now new folders related to iOS should appear on your Xcode Extension Project.
Step 6. Deploy The Extension To Your iPad
-
Connect your iPad or iPhone To Your Mac
-
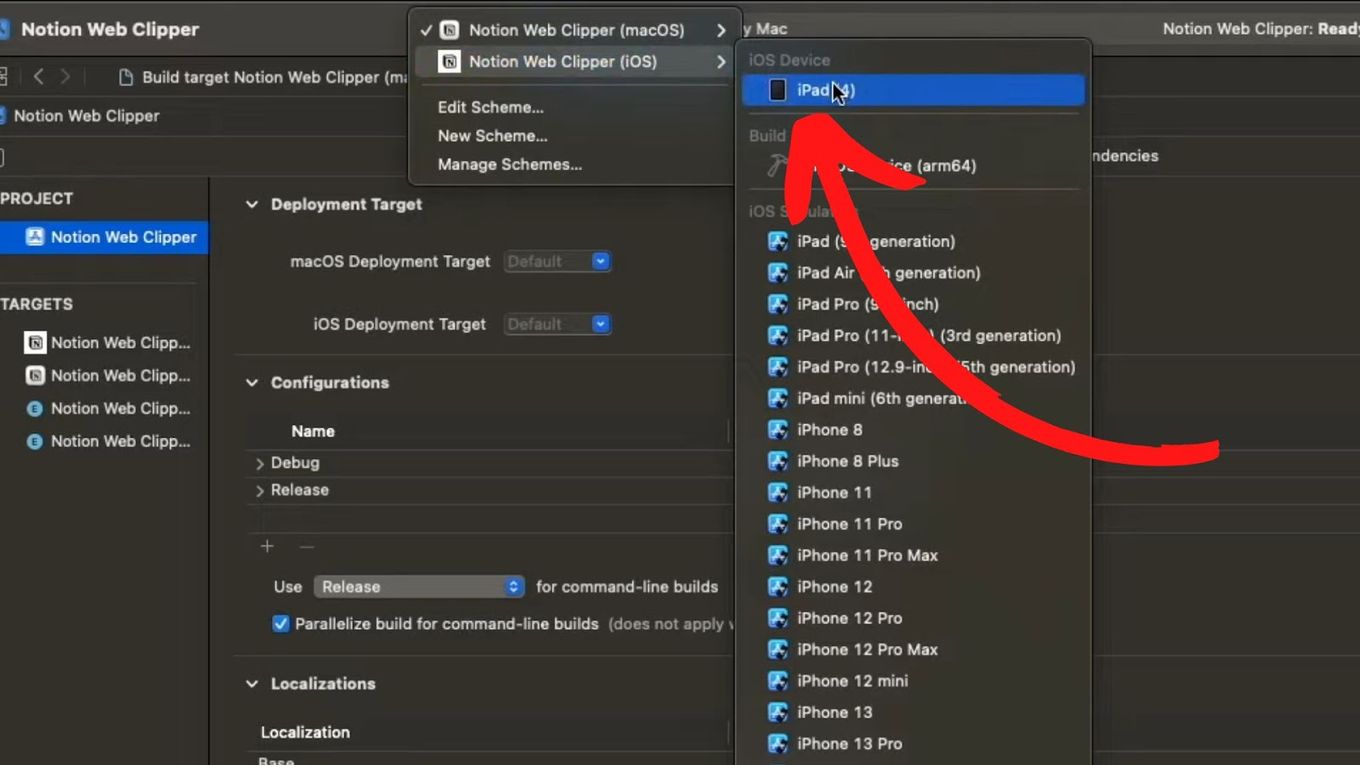
Select your iPad for your iOS Xcode Extension Project. At the top of the Xcode window, find the iOS version of your extension project and select your iPad device.
-
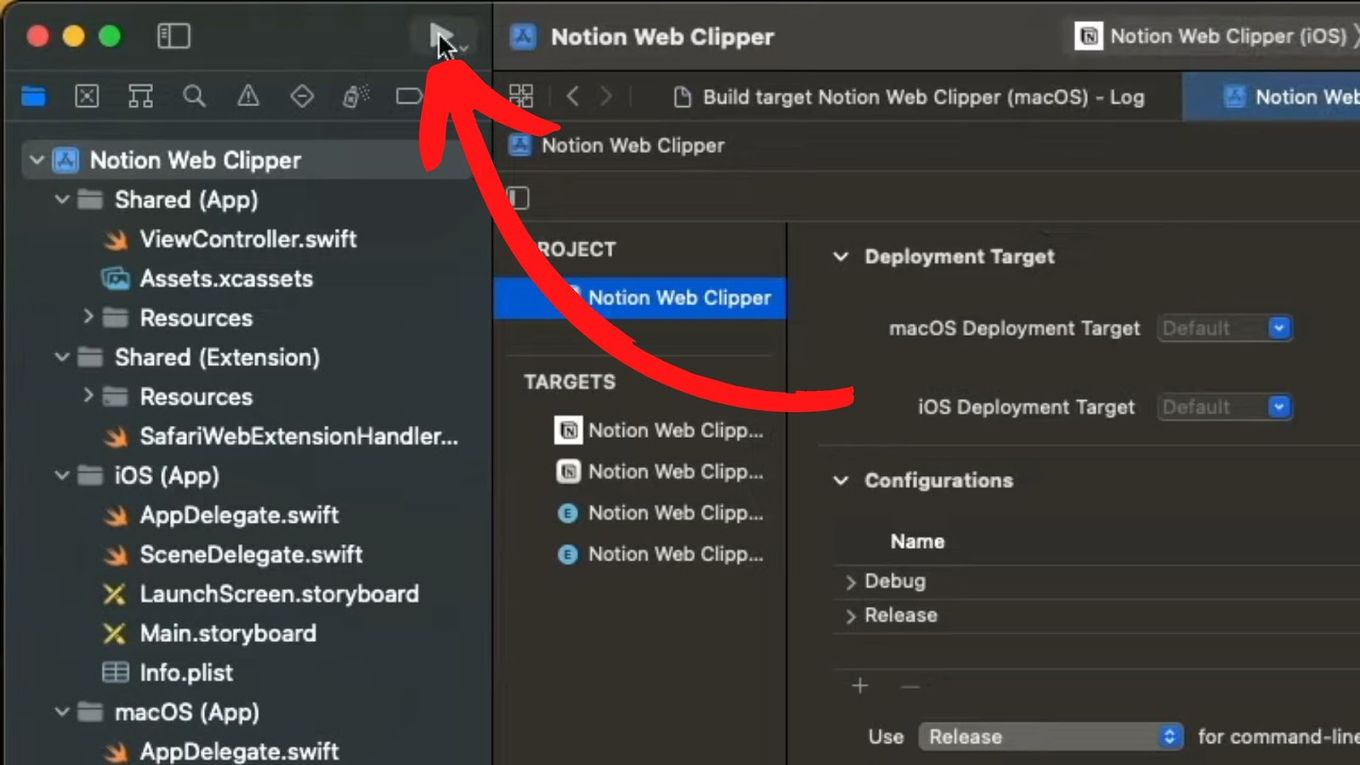
Click “Play” button to deploy your extension to your iPad
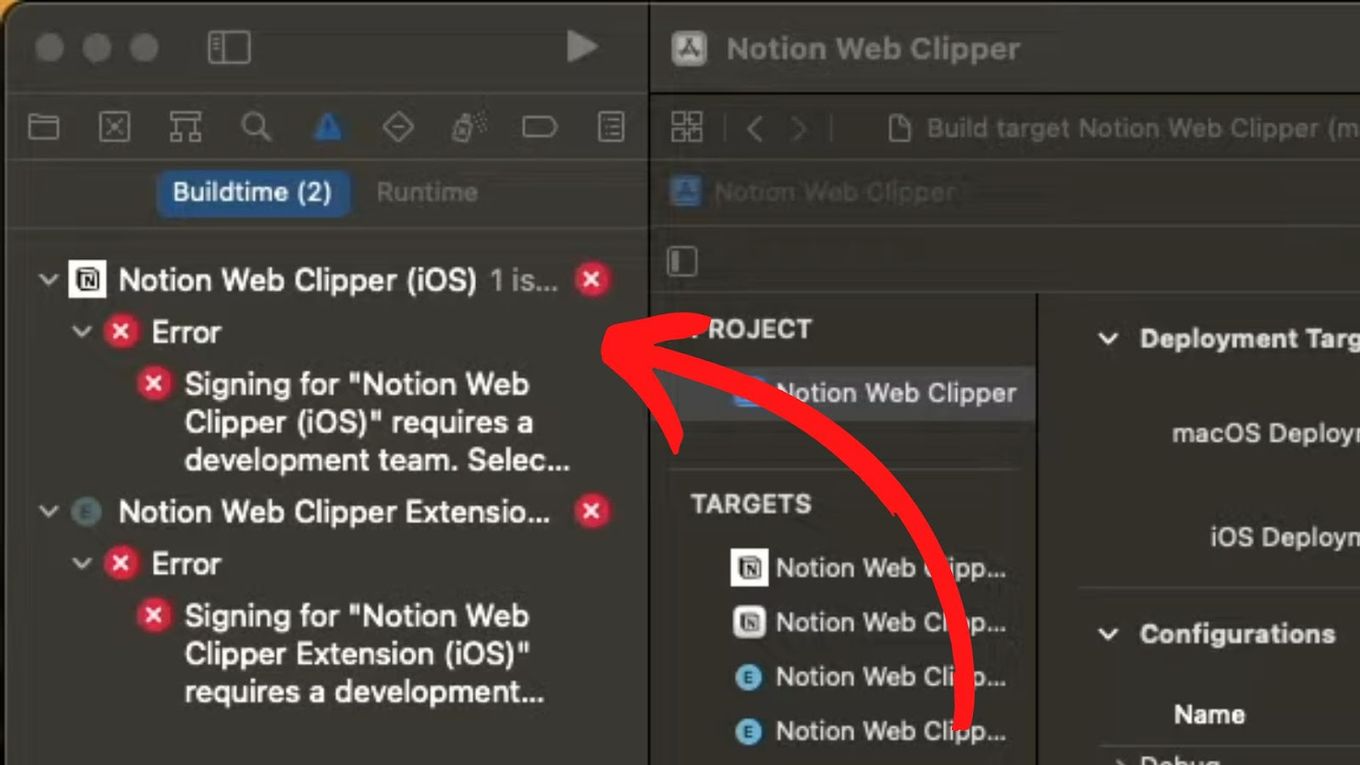
The build will fail due to signing issues. Go to the next steps to solve them.
-
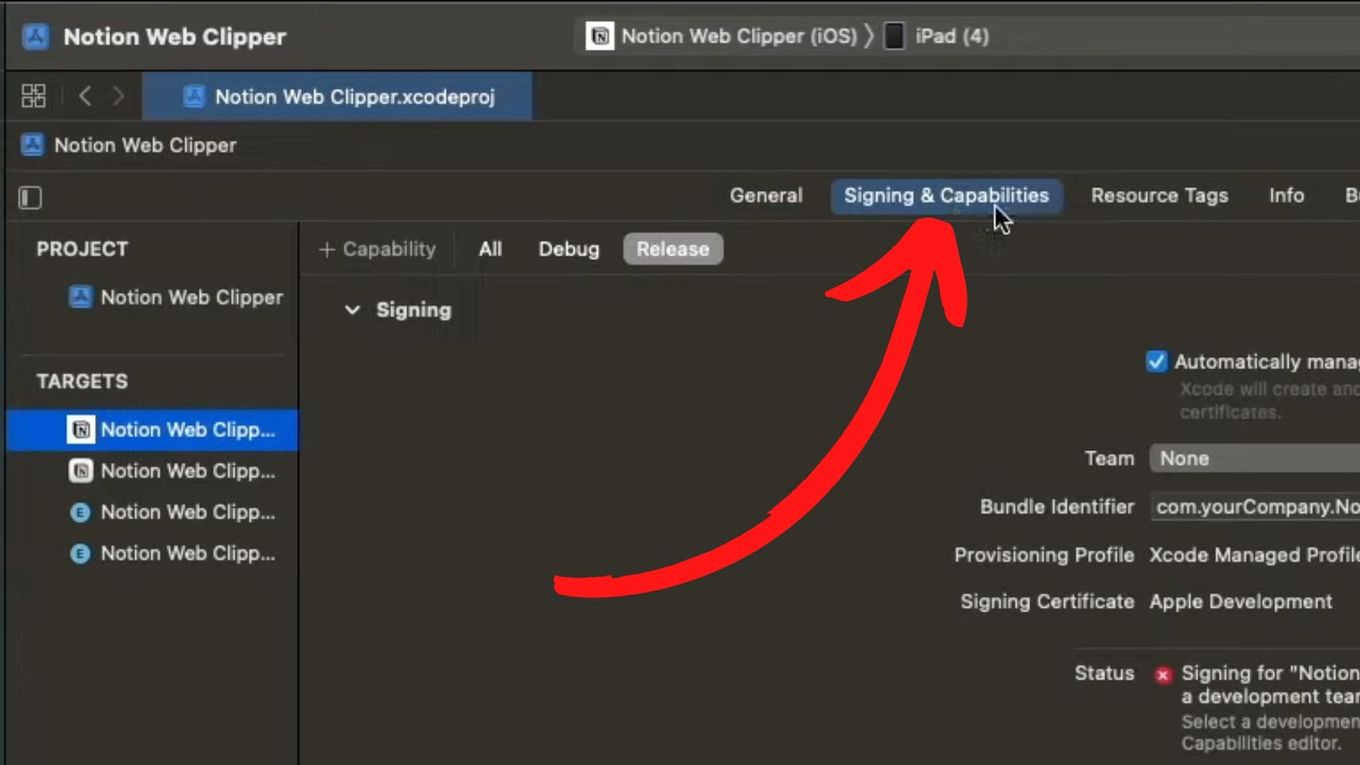
Click on “Signing and Capabilities” on the main path of your project
-
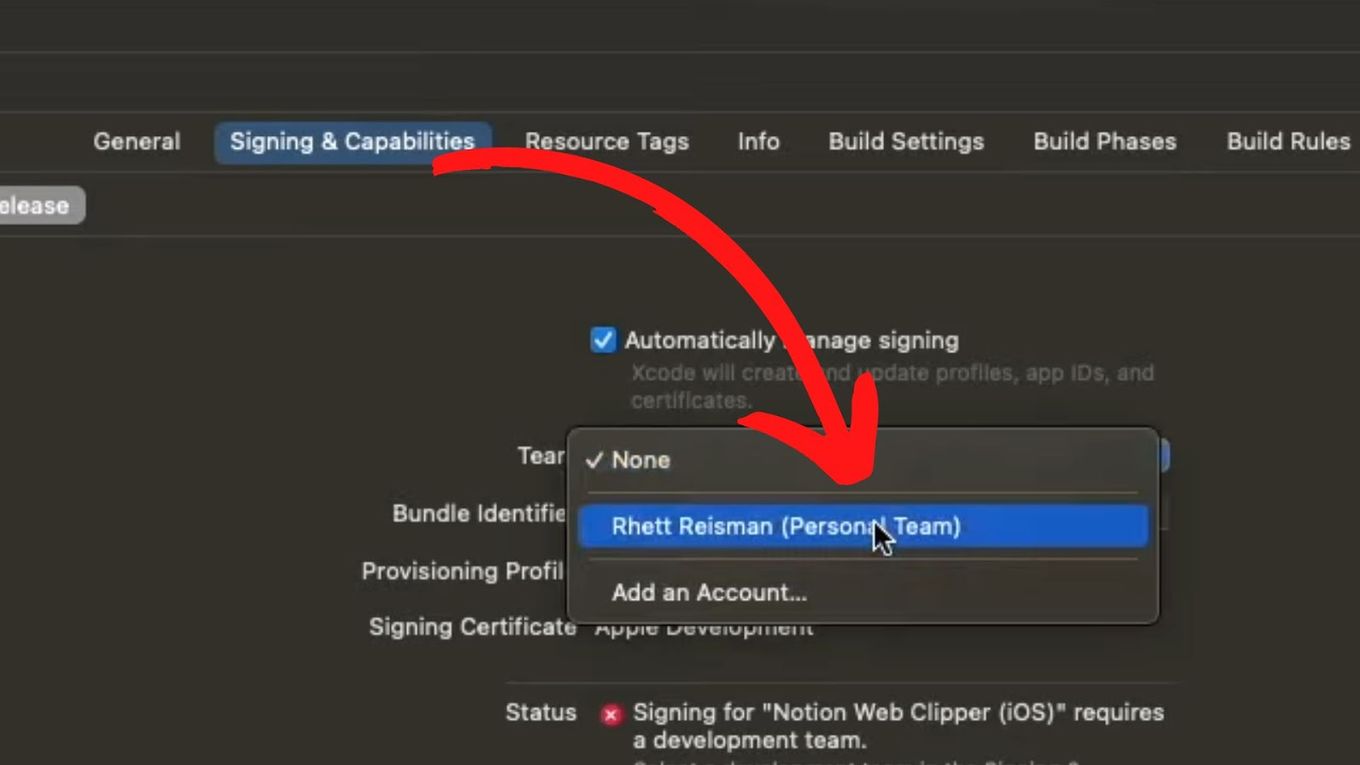
Change the “Team” from “None” to “Personal”.
If you do not have a team, click “Add an Account”. Click on the “Plus” button and add a new team.
-
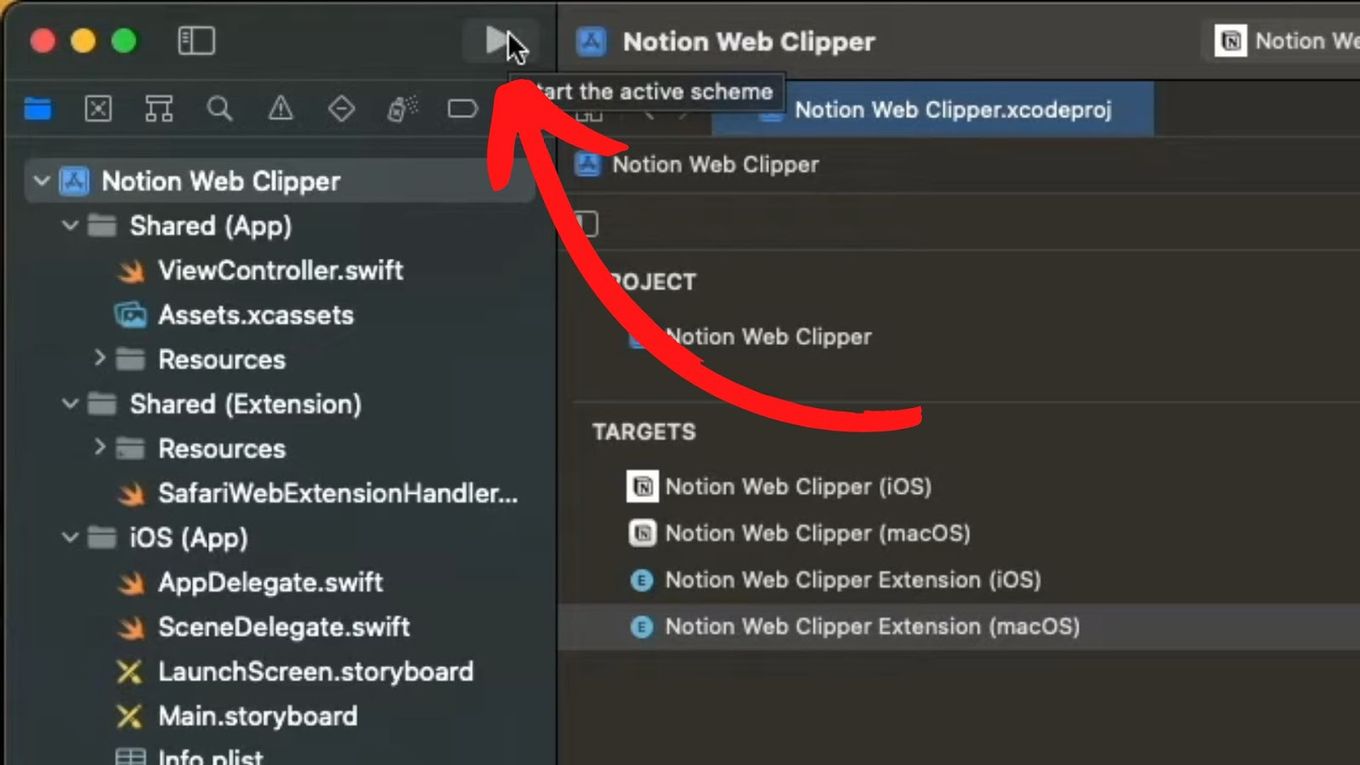
Repeat the process of adding a team with all “Targets” for both “release” and “debug” versions.
-
Click “Play” Again.
You may see some warnings, but that’s not a problem.

Related article: Fix Apple pencil not charging
Step 7. Run The Extension On Your IPad
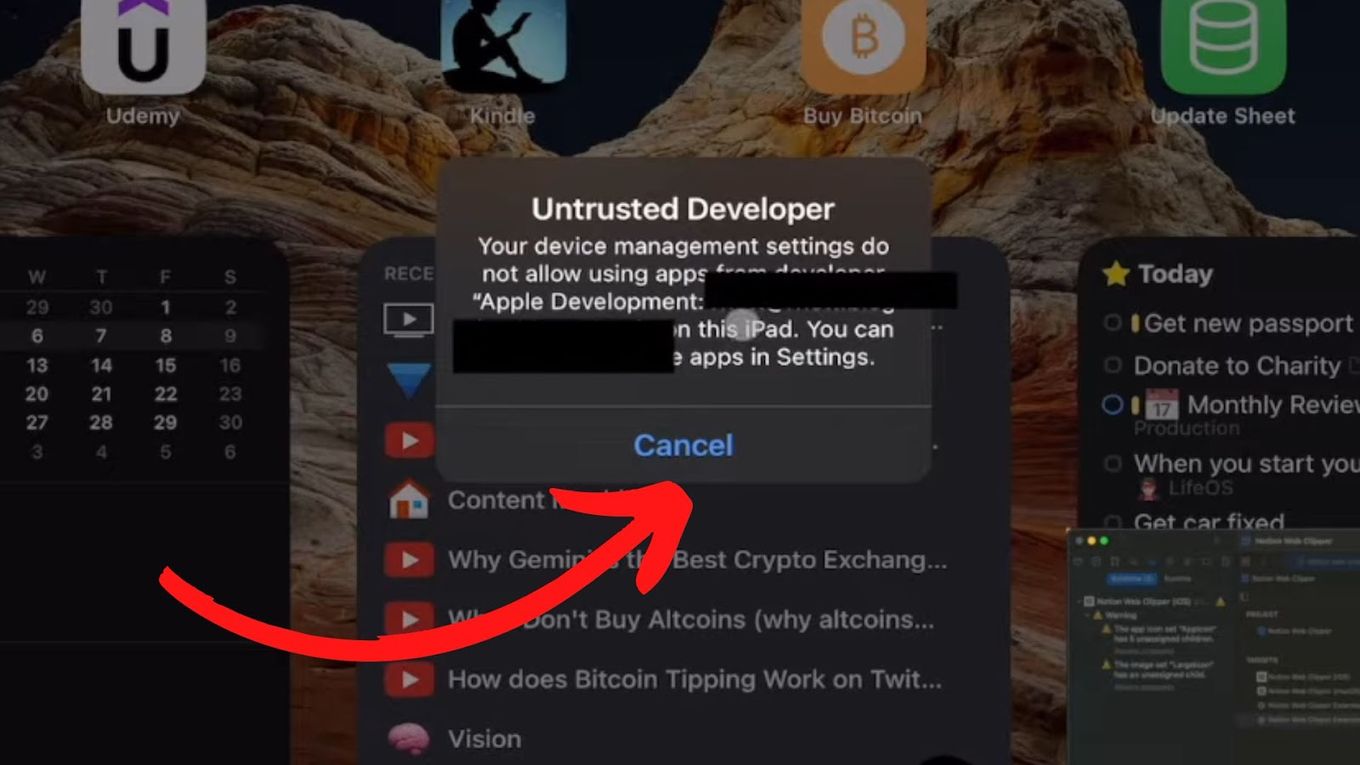
Once the extension is deployed to your device, you have to allow apps that are not “trusted” by Apple because they are not officially done for Safari following the Apple development process. Follow these steps:
-
Click “Cancel” to close the “Untrusted Developer” Warning.
-
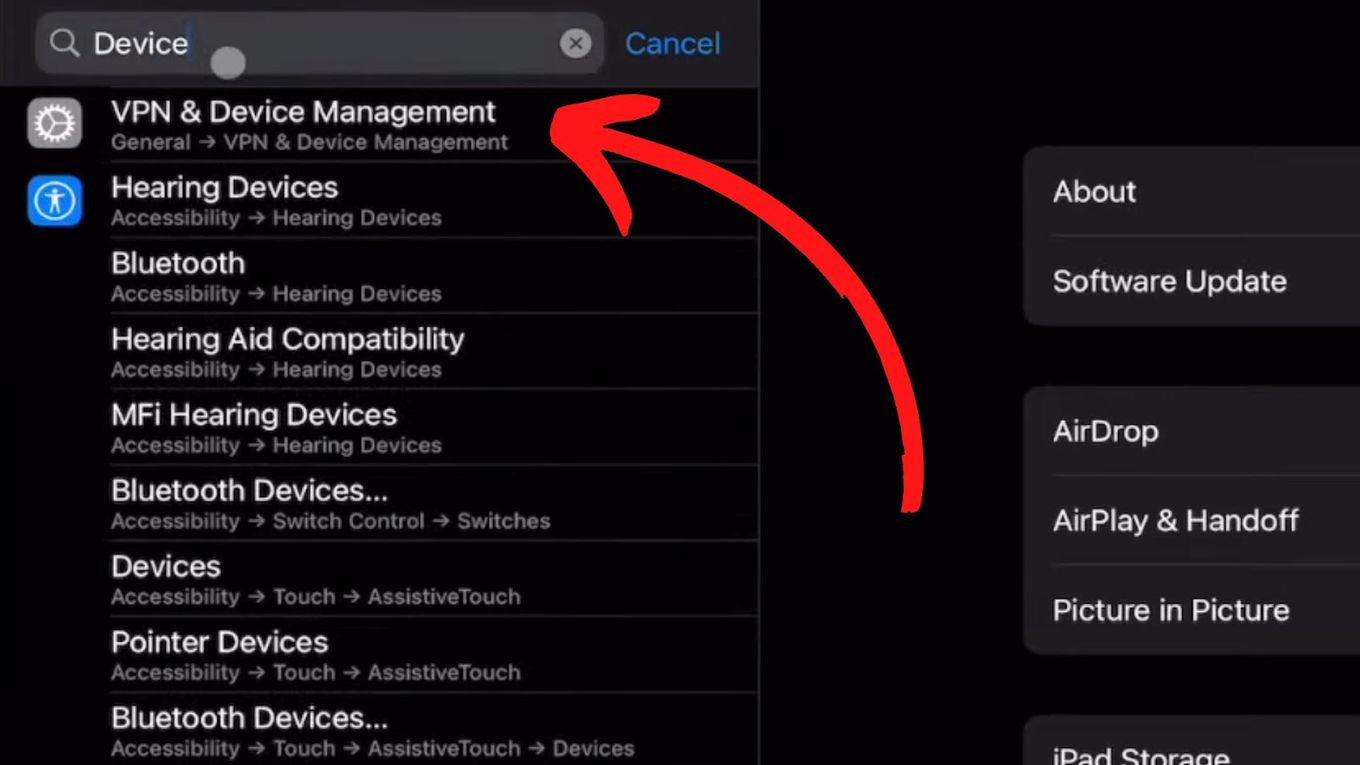
Go To “Settings > VPN & Device Management”
-
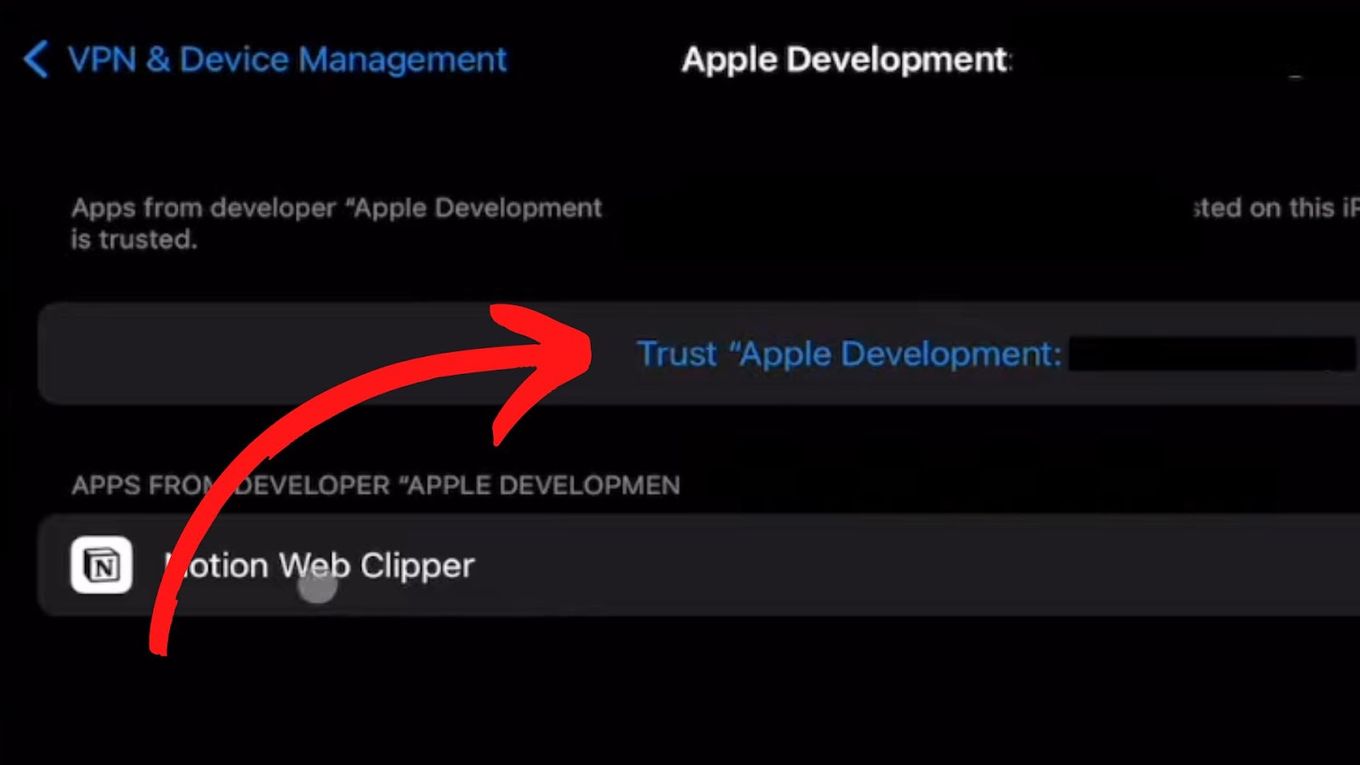
Click on the “Apple Development not trusted + Apple ID” below Developer App
-
Click “Trust Apple Development:…”
-
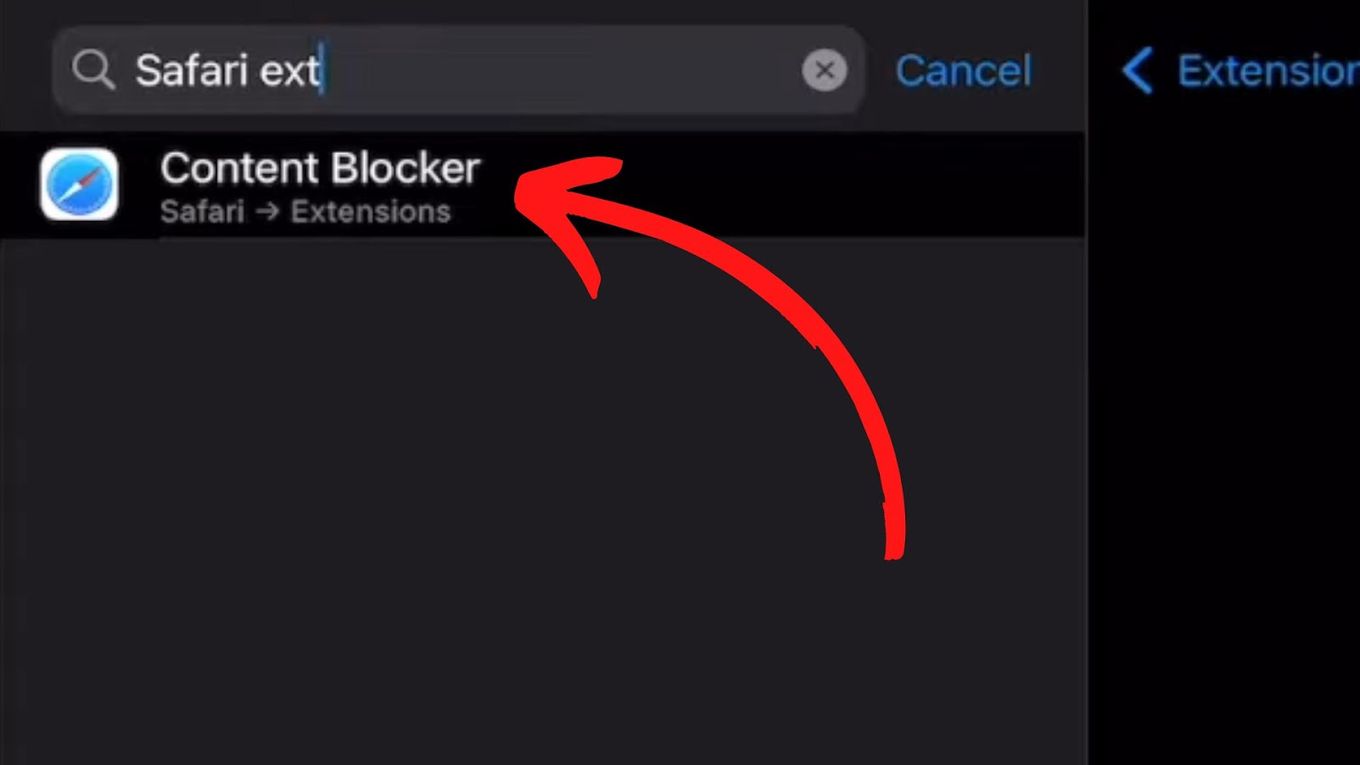
Look for “Safari Extension” and click “Content Blocker”
-
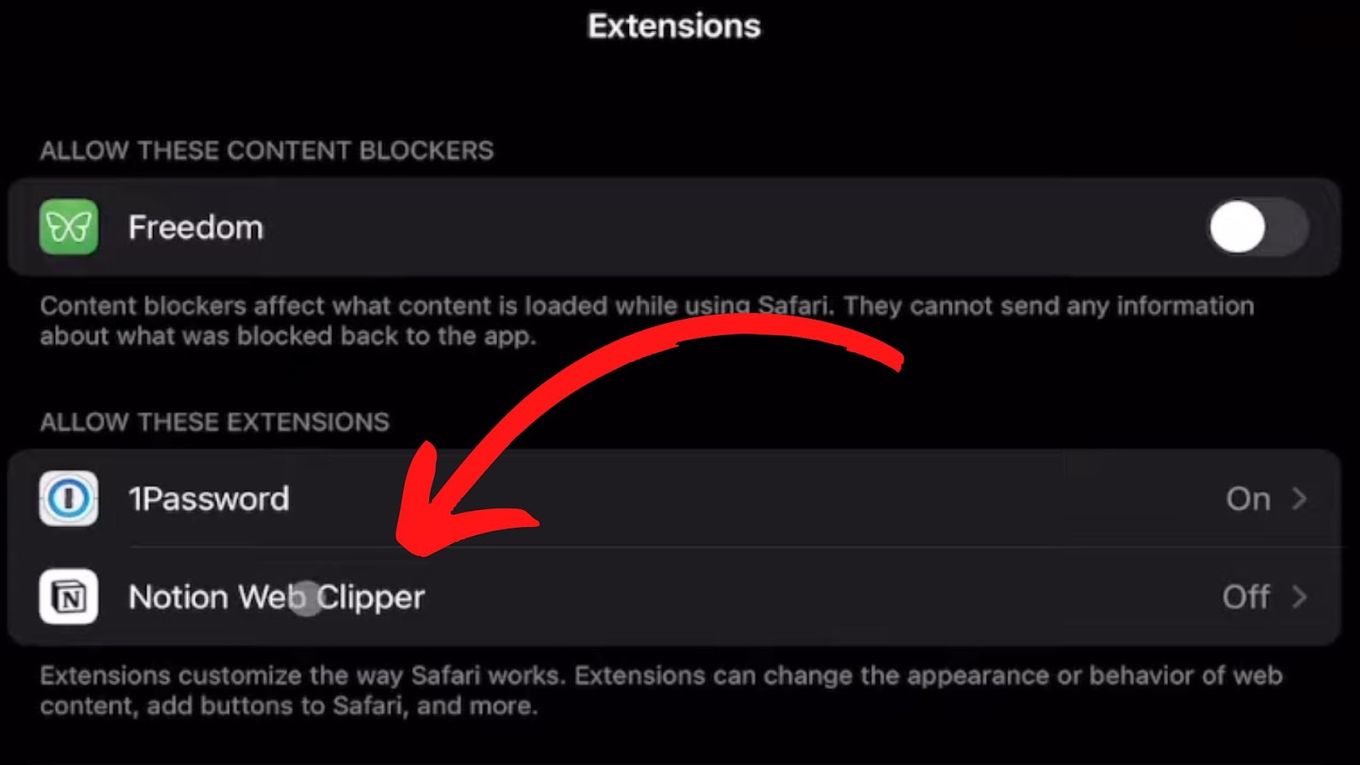
Look for your extension and click on it
-
Turn on your extension
-
Go to Safari and open the extensions panel.

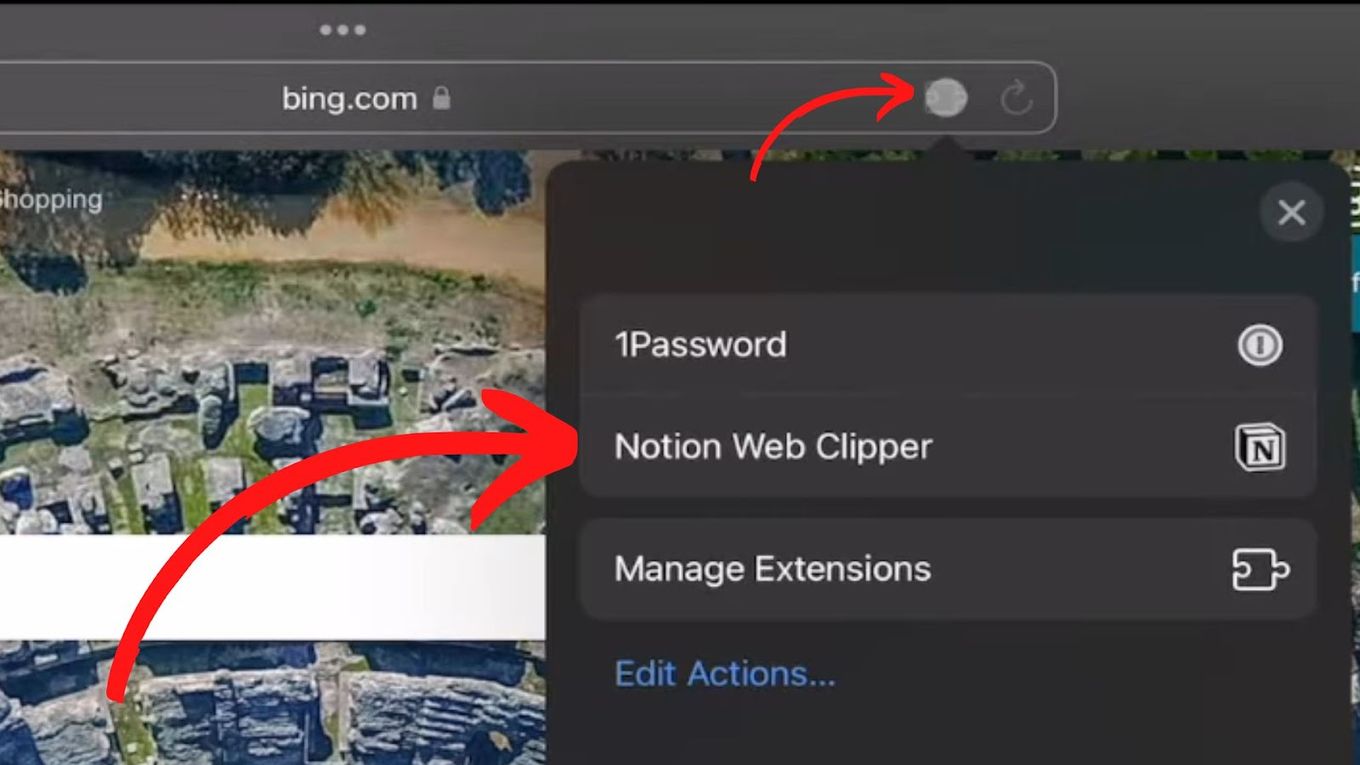
And that’s it! You can now use your desired chrome extension on iPad OS.
Use Chrome Mirroring To Use Chrome Extensions On iPad
The only other way to use Chrome extensions on iPad (without converting them) is by mirroring your computer’s Chrome.
The Chrome Remote Desktop will perform that function. Chrome Remote Desktop is an app that lets you access your desktop through your tablet, phone, or computer.
Since you are not converting anything, you can access just about every Chrome extension available. Here’s how to easily and securely connect to your desktop from your iPad:
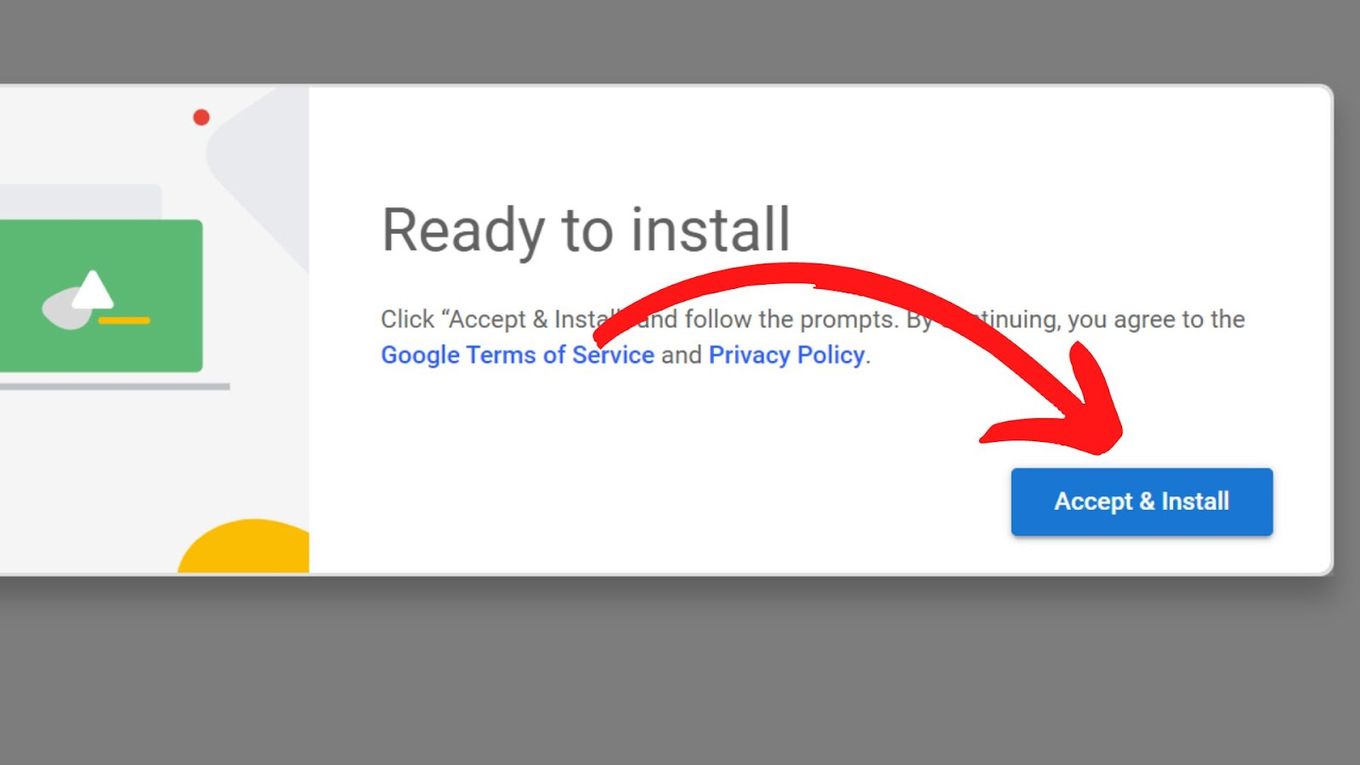
Step 1. Download & Install “Chrome Remote Desktop” On Your Computer
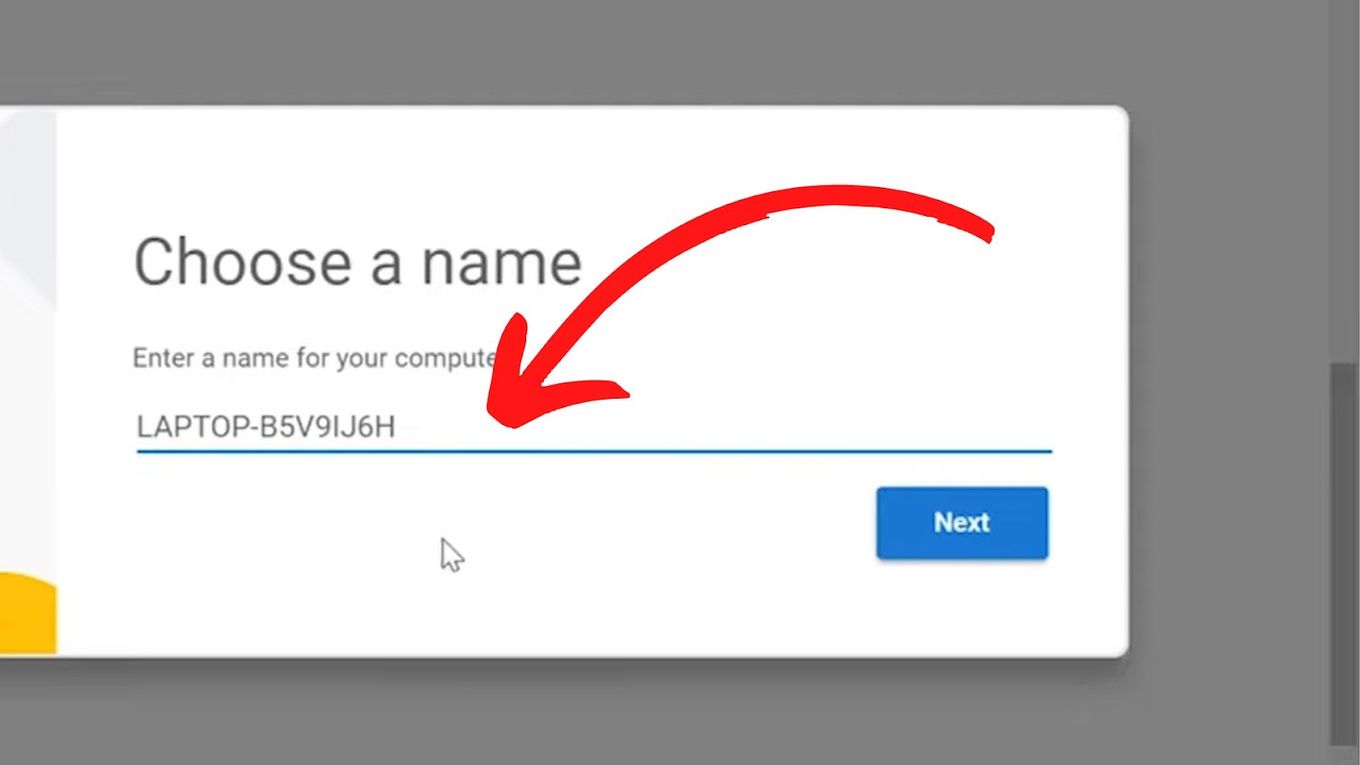
Step 2. Choose A Name For Your Computer
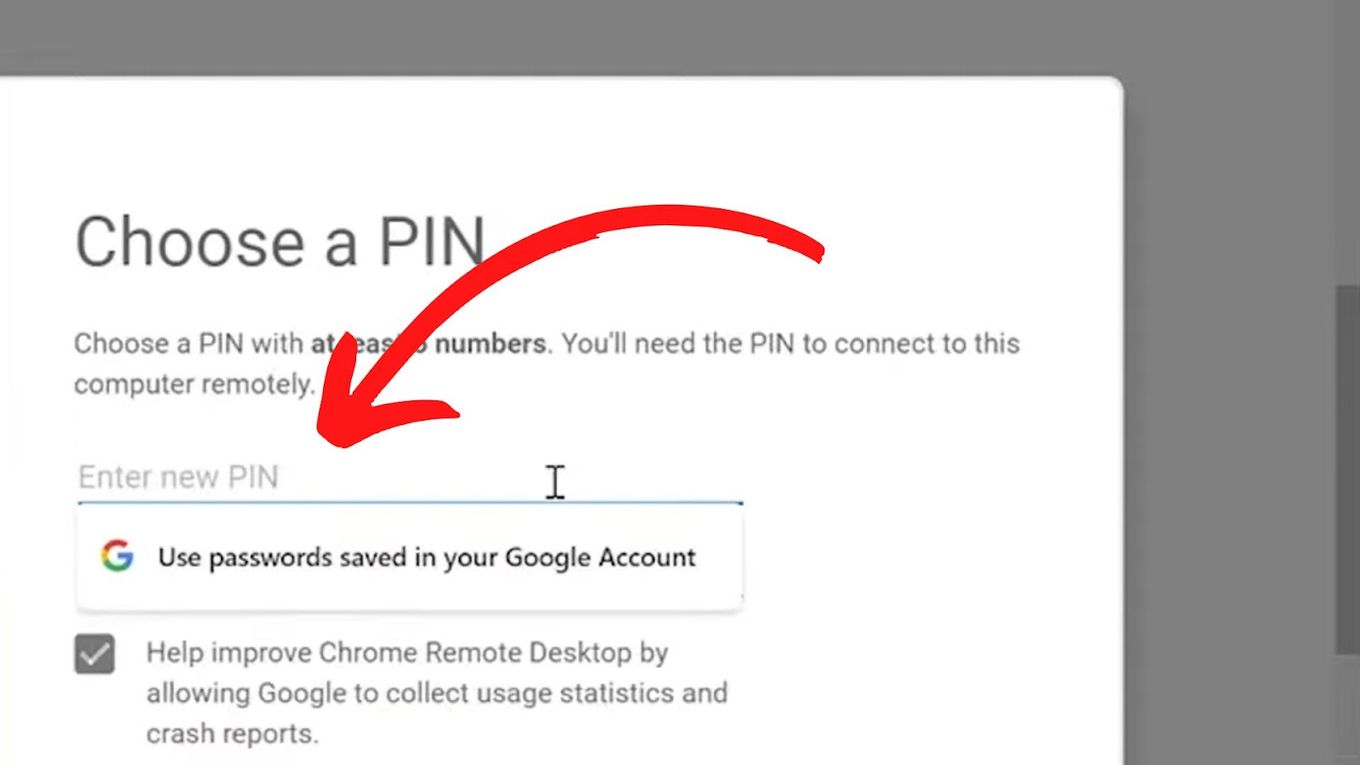
Step 3: Set A PIN & Click “Start”
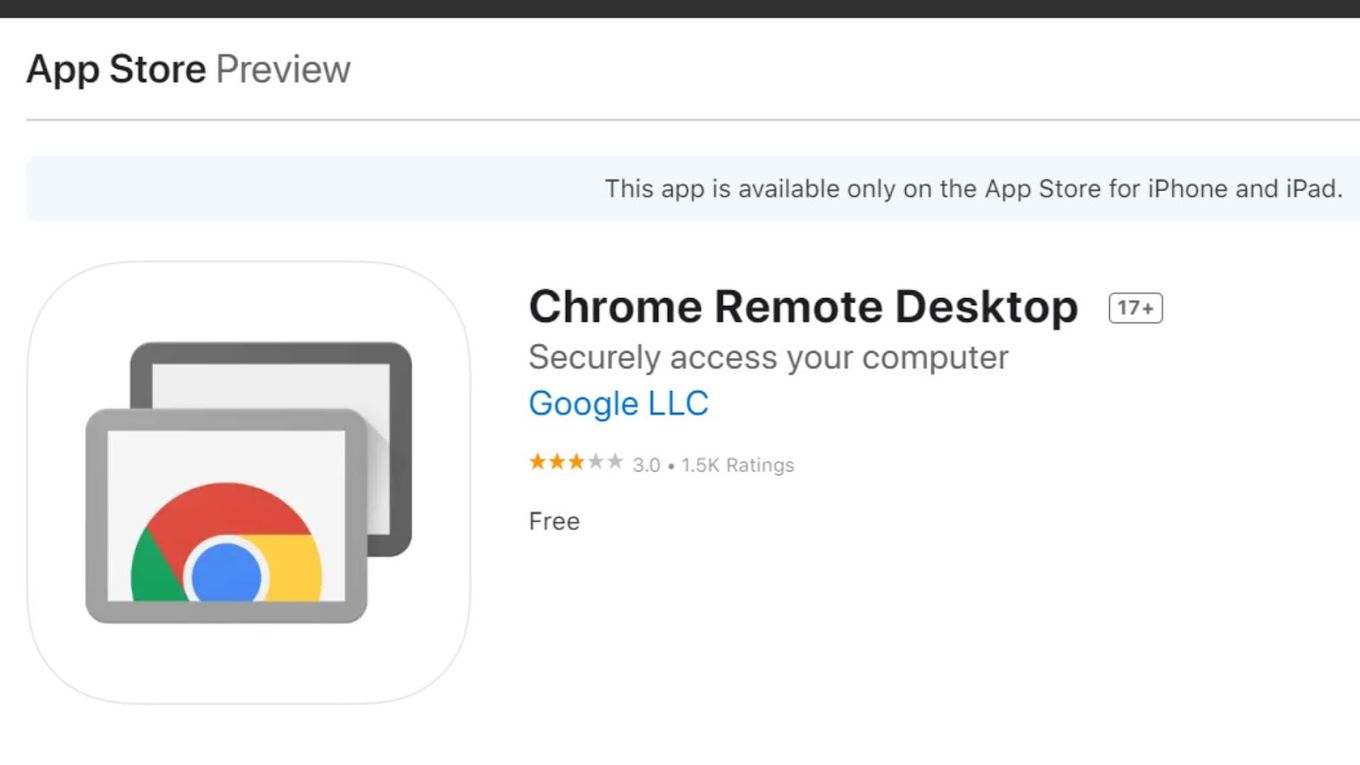
Step 4. Download “Chrome Remote Desktop” On Your iPad & Open It.
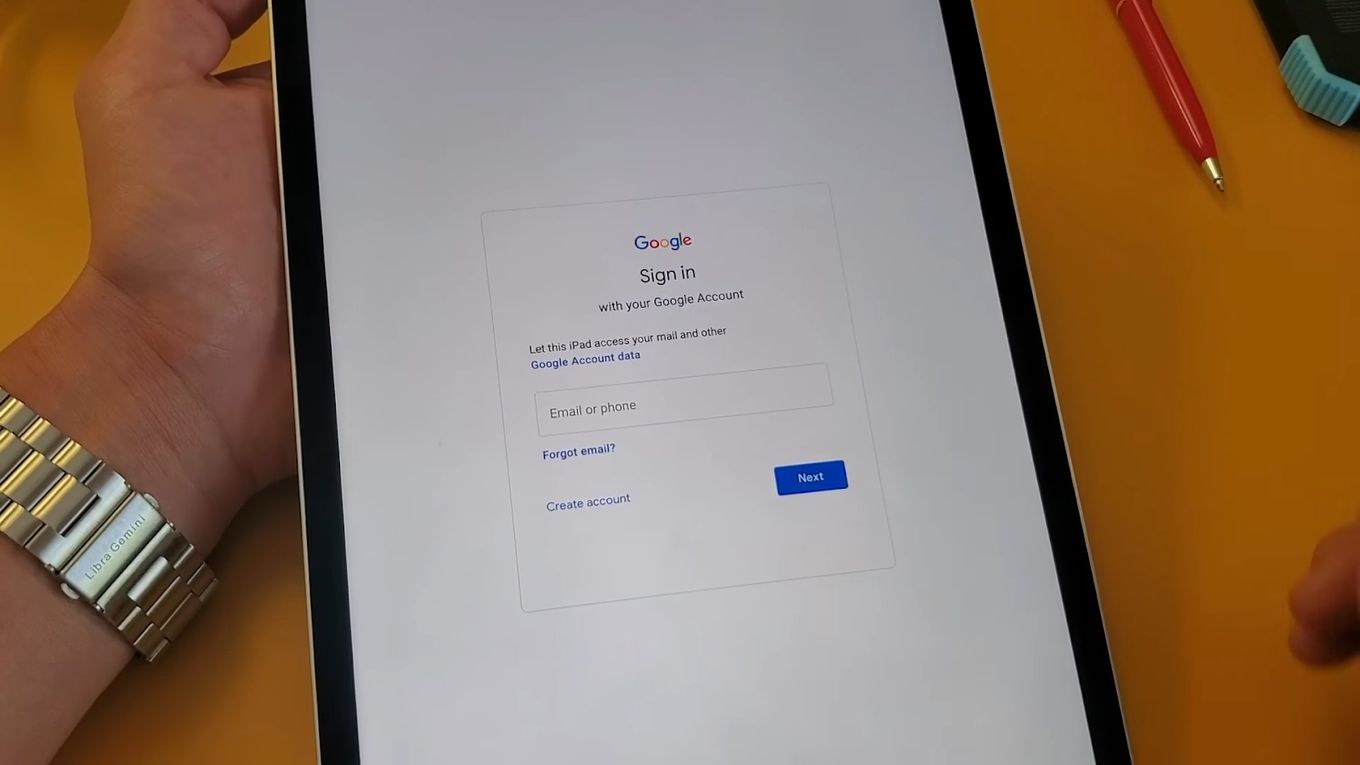
Step 5. Log In To The Same Google Account
Use the same account That You Used On Your Computer
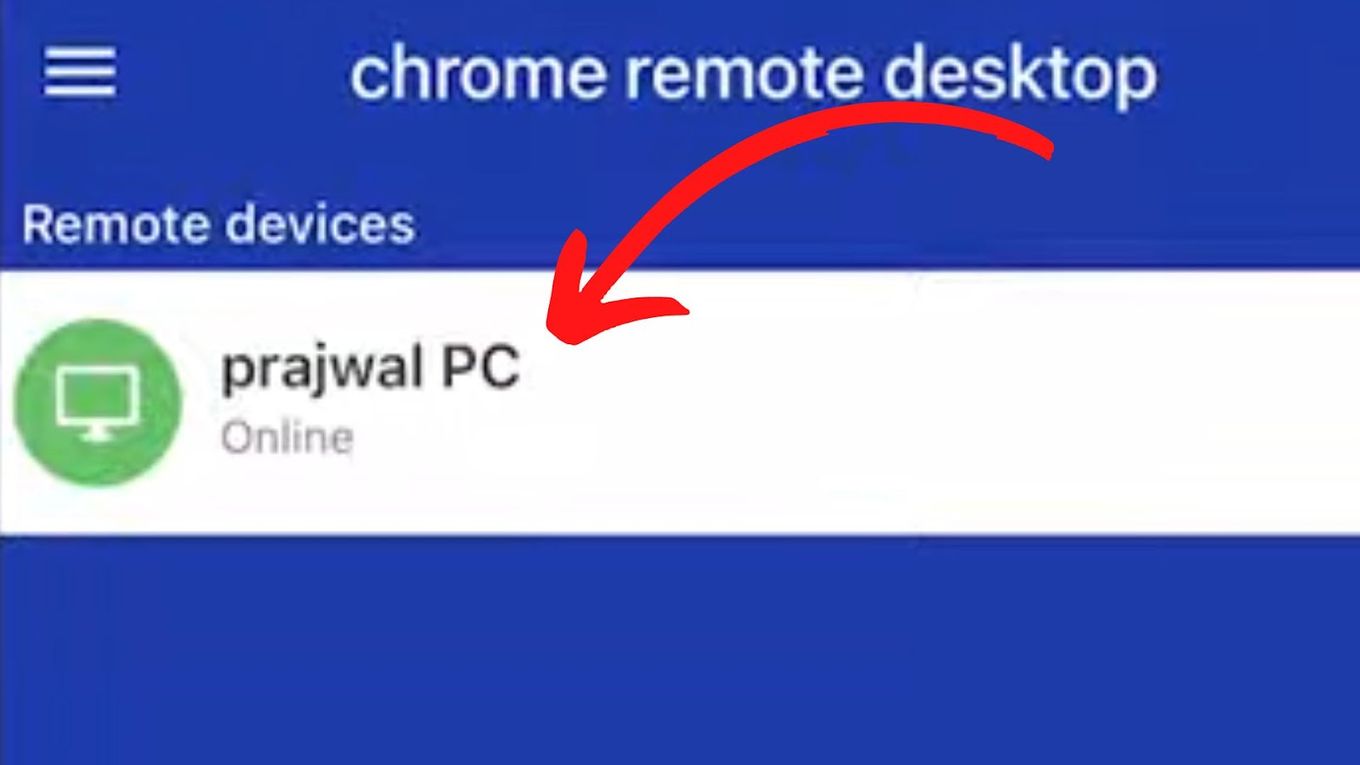
Step 6. Tap On The Name Of Your Computer
The Signed-In Computer Will Show On The List. You may be asked to enter the Pin of Step 3
Just like that, you have complete access to and control over your computer through your iPad.
You can use multiple monitors on Chrome Remote Desktop to display each screen on a different monitor or even play games like Valorant on your Chromebook!
Is It Safe To Run Chrome On iPad?
Yes, it’s safe to run Google Chrome on your iPad. Chrome is a respectable and well-known web browser with an extremely high-security level. As a rule of thumb applicable to all web browsers, make sure you don’t exchange sensitive or private details when using it.
However, it’s important to mention that certain concerns have been raised on how Chrome drives related ads after you’ve searched for specific content. While Chrome was initially packaged to offer extreme privacy, some gray areas have been causing concern.
Compared to other browsers, Chrome collects the highest volume of data. The data collected may sometimes relate to individual user information, but the majority is about your browsing habits.
If you aren’t worried about that kind of thing, though, Chrome for iPad is equal to Safari in terms of safety. To avoid other issues prevalent across all browsers, consider using a VPN for added safety.
Use Chrome And Its Extensions On Your Ipad
Often, the primary browsing app on your iPad or iPhone may have fewer features. This is why extensions always come in handy to facilitate these missing features and improve functionality. While Apple is strict on integrating app extensions, you can still enjoy some of these extensions on your iPad.
As mentioned above, accessing Chrome extensions on iPads is impossible. Fortunately, there are ways to turn things around. As explained in this piece, using the Chrome remote desktop is one of the best and easiest ways to access Chrome extensions on your iPad and even iPhone.
Using Google Chrome on your iPad is okay, provided you are not handling sensitive information. While Chrome adds some protection layers, it’s highly recommended that you use an alternative, more secure browser when handling important data that you would want to avoid landing in the wrong hands.


