Do you have many open apps on your Chromebook? If you’re in a rush, finding the tab you need can be overwhelming. In this case, you will likely wish for a feature that allows you to view all your open apps on a single page.

Google Chrome seems to be aware of this dilemma. So, it added an “Overview” key on the Chromebook to make handling tabs easier. But what exactly is the “Overview” key on your Chromebook? What does it do? Find out the answer in this article.
What Is the Overview Key on the Chromebook?
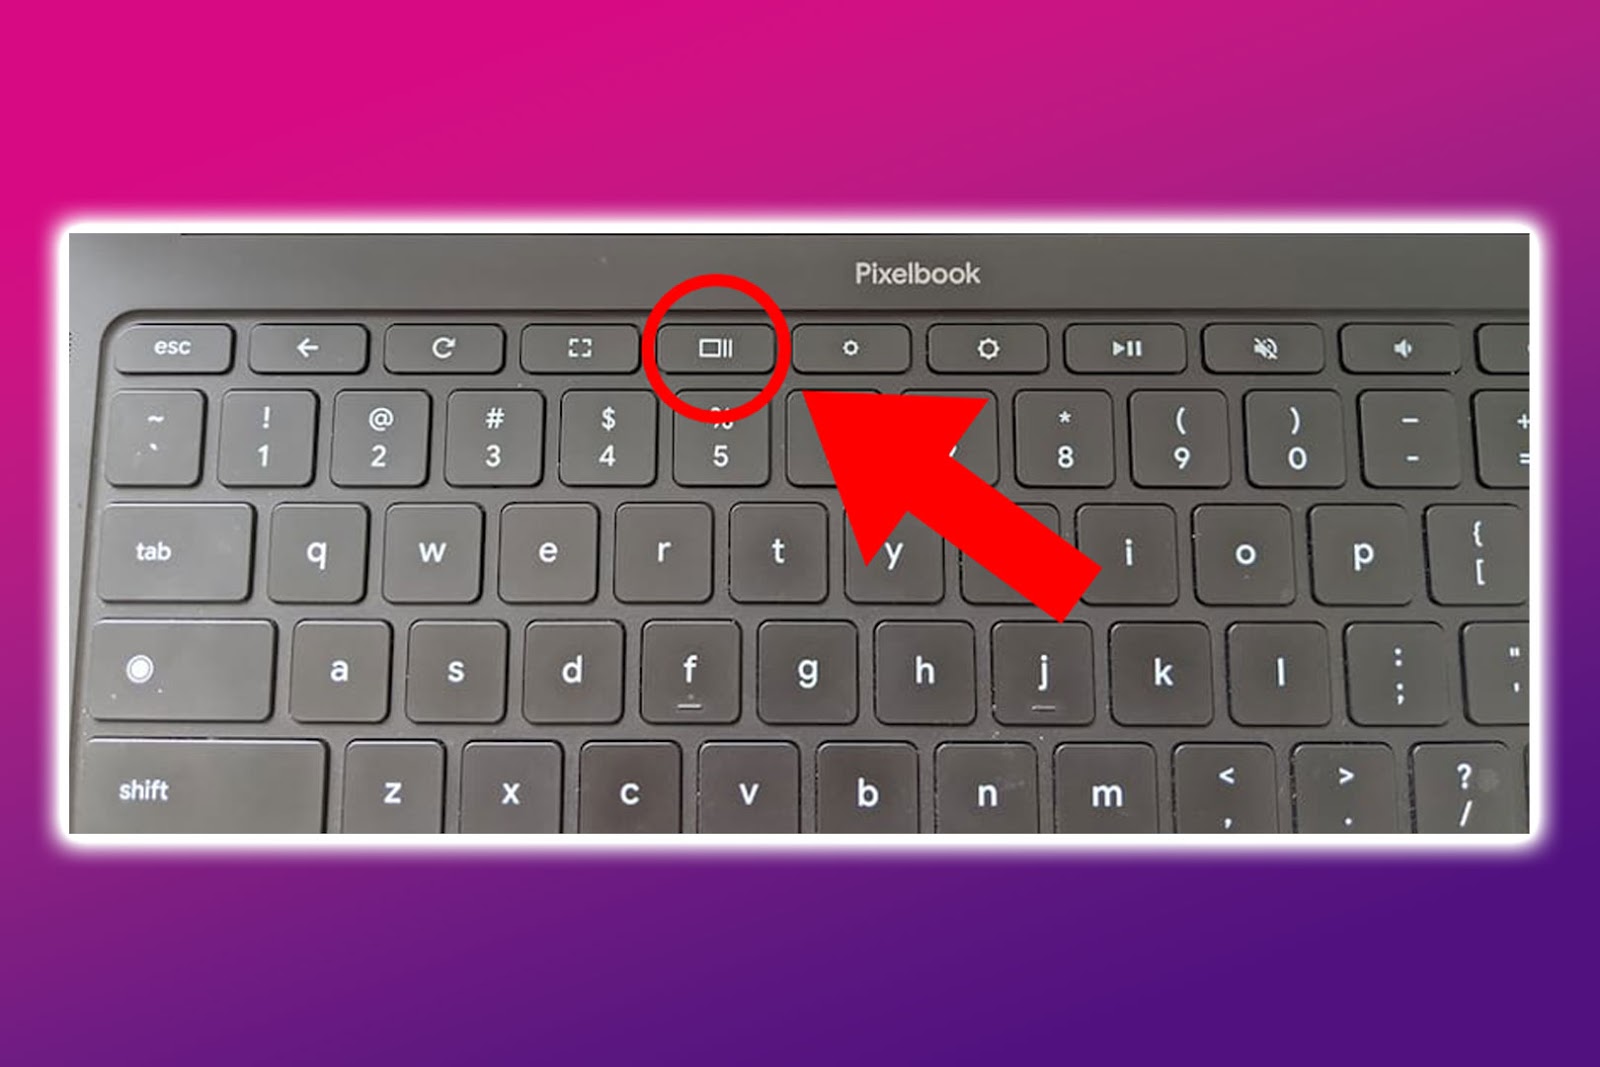
The “Overview” key on the Chromebook is a button that shows all the running apps and windows on your device. Represented by a rectangle with two parallel lines at the right, it is the “F5” key counterpart on a Windows computer.
This Chromebook key allows you to find the tab you need with ease. It is more convenient and saves more time than hitting “Alt + Tab” multiple times.
Pressing the “Esc” or “Overview” key again closes the “Overview” window.
Did you know you can type Pi on your Chromebook? Check out this article to find out how.
Where Is the Overview Key on a Chromebook?
The “Overview” key is at the top row of a typical Chromebook keyboard. It is the fifth key from the left of your keyboard if you start counting from the “Esc” key.
If the “Overview” button on your Chromebook is missing, there is an alternative. To open your running tabs on a single screen, swipe up on your touchpad with three fingers. Then, swipe down to close it.
Find other uses of your Chromebook’s touchpad in Google Support.
6 Other Useful Keyboard Shortcuts on Your Chromebook
Apart from the “Overview” key on your Chromebook, there are other keyboard shortcuts that you can use to make things more convenient.
Here are the other Chromebook keyboard shortcuts that you need to know about:
- “Search + Alt”.
This keyboard combination turns Caps Lock on and off on your Chromebook. Note that a magnifying glass icon represents the “Search” key. - “Ctrl + Overview”.
You can take a screenshot using this shortcut. If you need to take a partial screenshot, press “Shift + Ctrl + Overview”. - “Ctrl + Shift + i”.
If you need to access the Developer Tools panel, pressing these keys will let you open and close it. - “Ctrl + Shift + Space”.
This allows you to switch between the keyboard languages you have set for your Chromebook. - “Search + Shift + Space”.
This keyboard shortcut lets you insert emojis into messages and documents. Alternatively, you can use the “Launcher + Shift + Space” keyboard combination. - “Ctrl + Search +m”.
Pressing these keys magnifies your Chromebook’s screen for easier viewing and reading. - “Alt + =” and “Alt + –”.
Maximizes and minimizes your windows, respectively. - “At + ^”.
This allows you to scroll up on a page without dragging your touchpad manually. If you need to scroll down, simply replace the “Arrow Up” button with the “Arrow Down”.
Google Support has a list of all the Chromebook keyboard shortcuts that will make navigation a lot easier.
The Overview Key on the Chromebook Makes Things More Convenient
No more hitting the “Alt + Tab” keyboard shortcut multiple times to reach your desired running app! Now that the Chromebook has an “Overview” key, looking for the window you need only requires one tap on the keyboard and another on your touchpad.
Moreover, there are numerous keyboard shortcuts available to make operating your Chromebook easier.
Aside from the ones listed above, Google Help lists all the keyboard combinations you will benefit from. Or you can press “Ctrl + Search” and your Chromebook will open a list of all the keyboard shortcuts you can use.


