You own a Chromebook and another machine, such as a Mac or a PC. Now, you need an extra screen to boost your productivity, and you’re wondering if it’s possible to use your Chromebook as a second monitor. This piece is for you.
In this article, we explain how to use a Chromebook as a monitor using several different methods. We will also explain why you can’t use a Chromebook as a monitor with an HDMI cable.
With the right software and setup, your Google notebook can double as a second screen for your needs.
Here are four free ways to use a Chromebook as a second monitor:
1. Using the “Duet Display” App
The following steps explain how to use a Chromebook as a monitor using the Duet Display app:
Step 1: Download & Set Up “Duet Display”
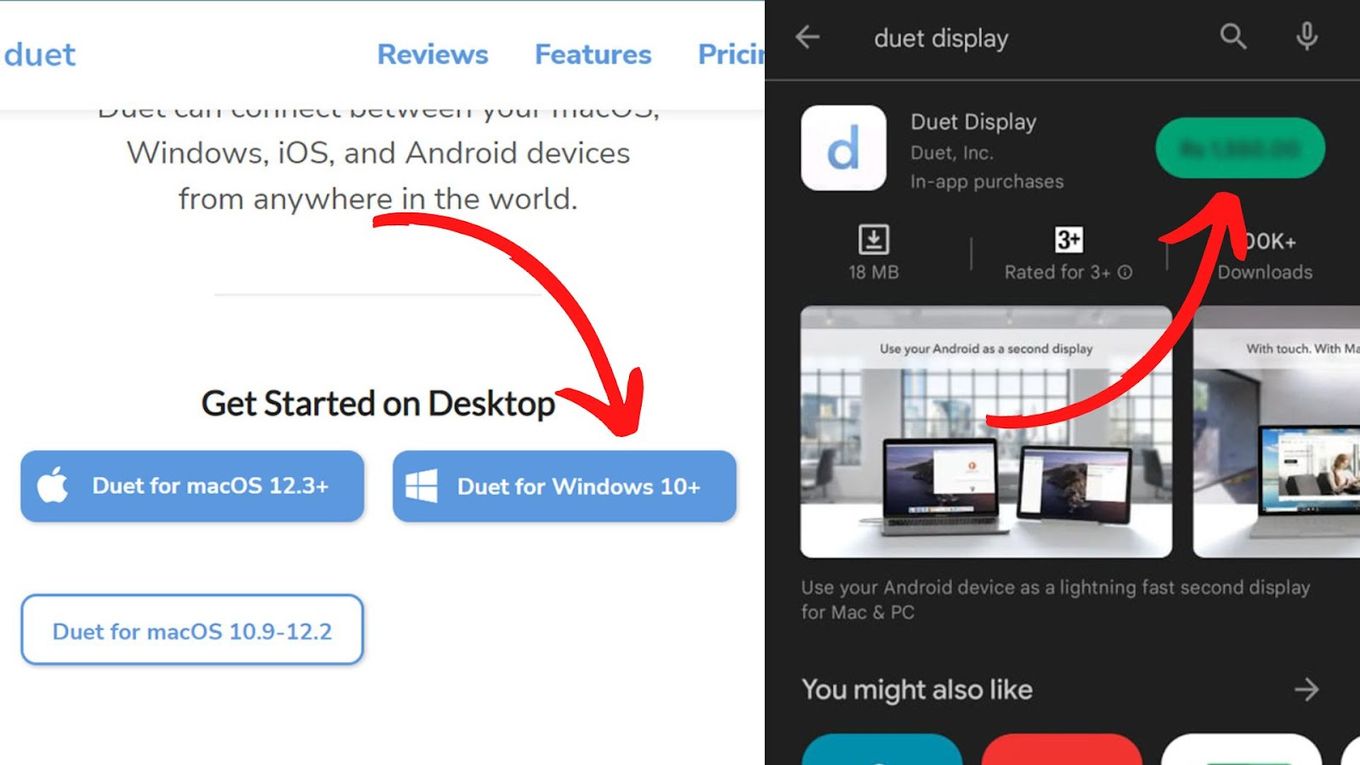
- Download and set up Duet Display software for your primary computer.
- Download and set up Duet Display in the Play Store for your Chromebook.
- Create a Duet Account to complete the setup and installation. Ensure that you use the same account for both.
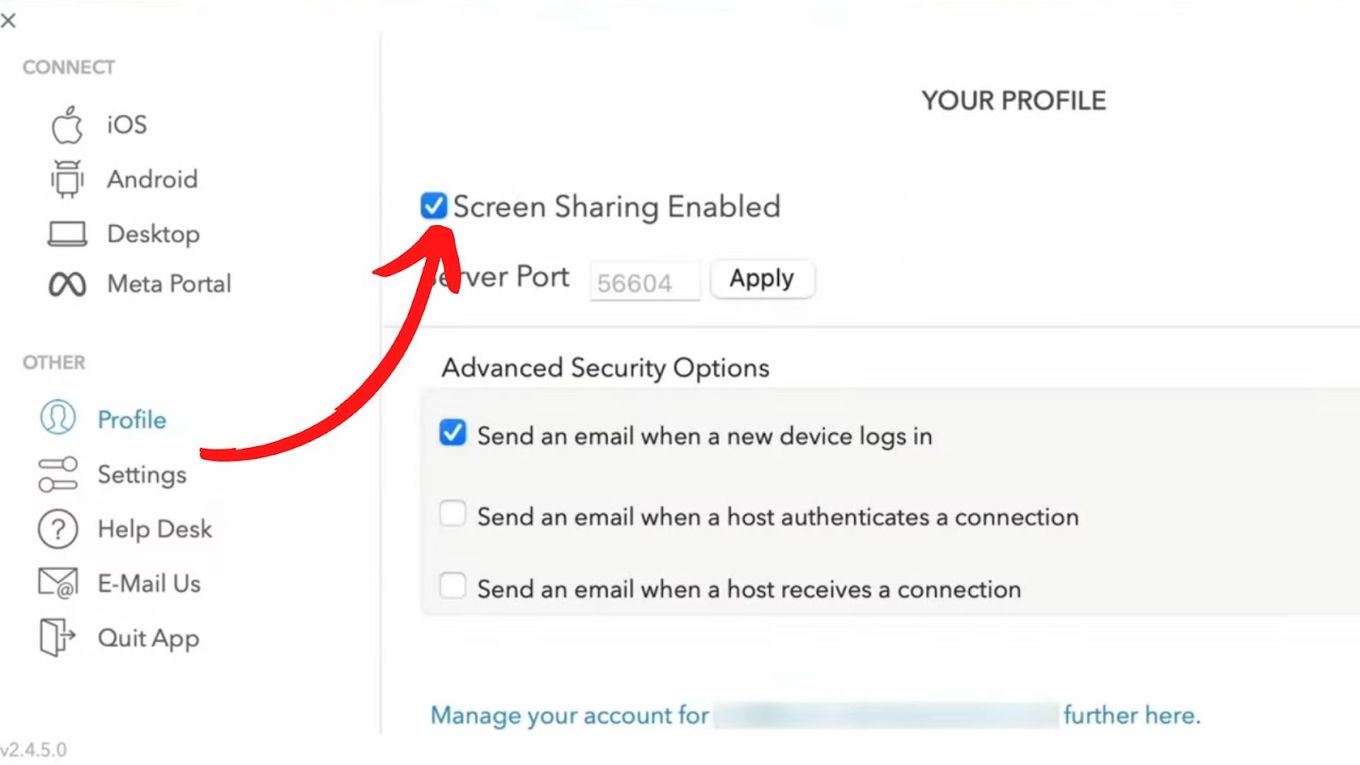
Step 2: Enable Screen Sharing
- Click “Profile”
- Check the box next to “Screen Sharing Enabled”
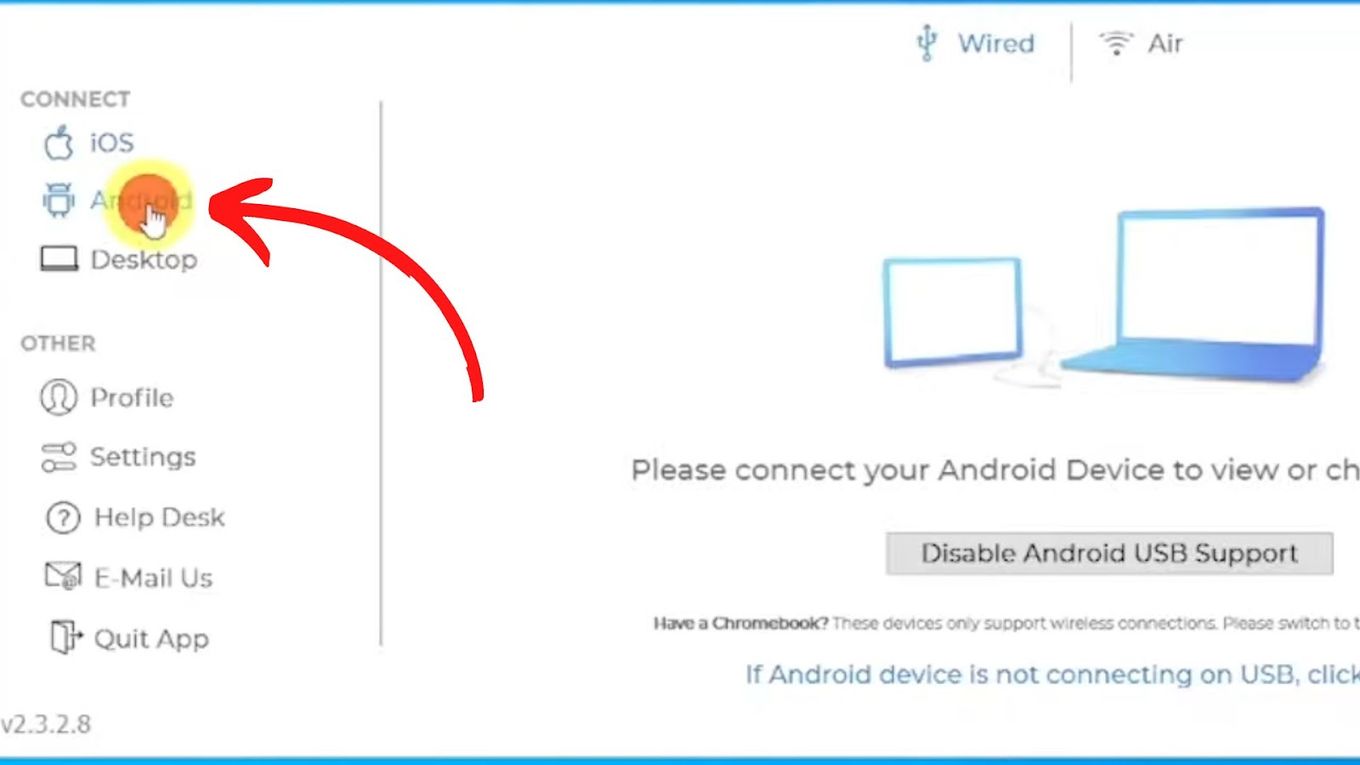
Step 3: Connect Your Computer & Your Chromebook
-
Connect your main computer and your Chromebook to the same wi-fi.
-
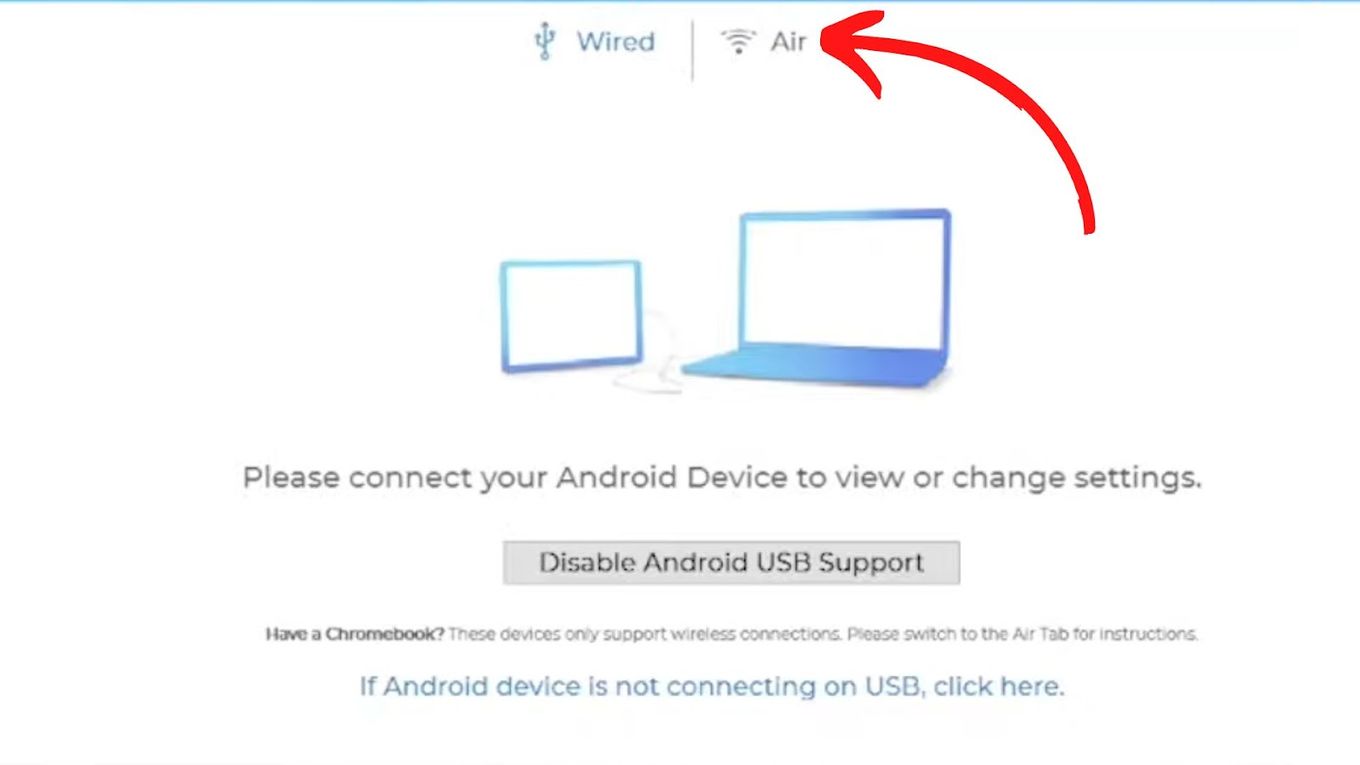
Click “Android” in the Duet window on your computer.

-
Click “Air” to connect wirelessly to your Chromebook.
This is found at the top bar of the Duet Display Window.
-
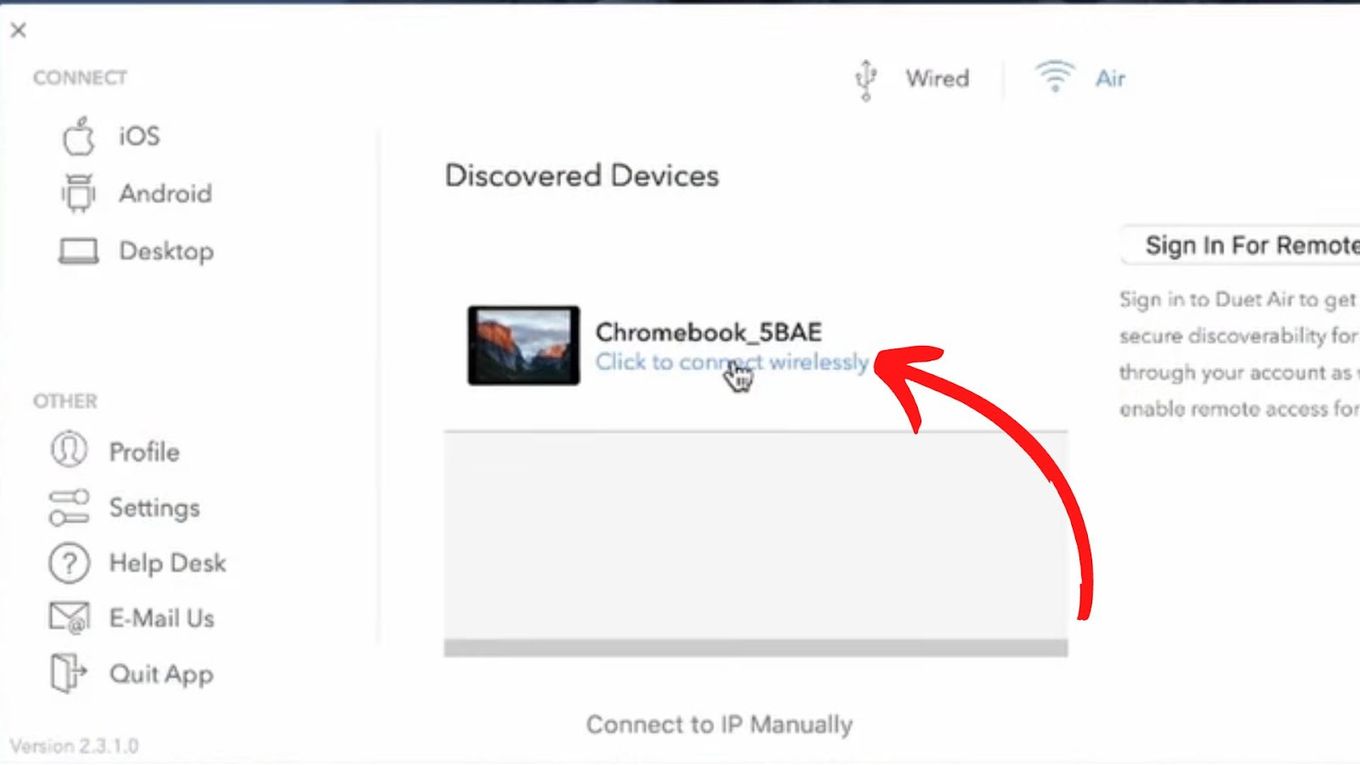
Click on your Chromebook’s IP address (or ID) once it appears on the “Discovered Devices” list.
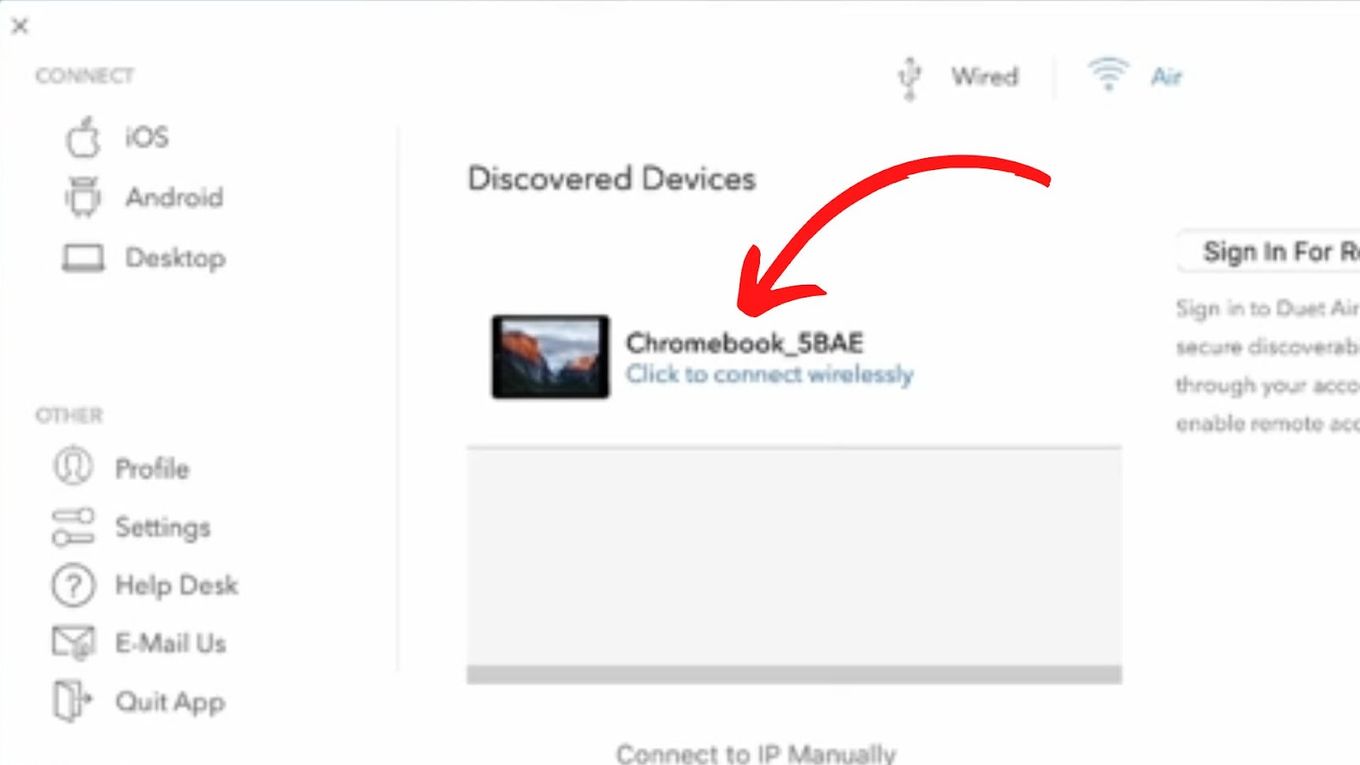
When your computer connects to your Chromebook, its screen will be displayed through an Android window on your laptop.
Step 4: Adjust Screen Settings (Optional)
You can either ‘mirror’ your principal display or ‘extend’ it on your Chromebook. To mirror means to display the duplicate content on both screens, while to extend means to make the Chromebook’s screen an extension of the principal screen, allowing you to drop and drag items onto it.
To fine-tune these settings, do the following:
-
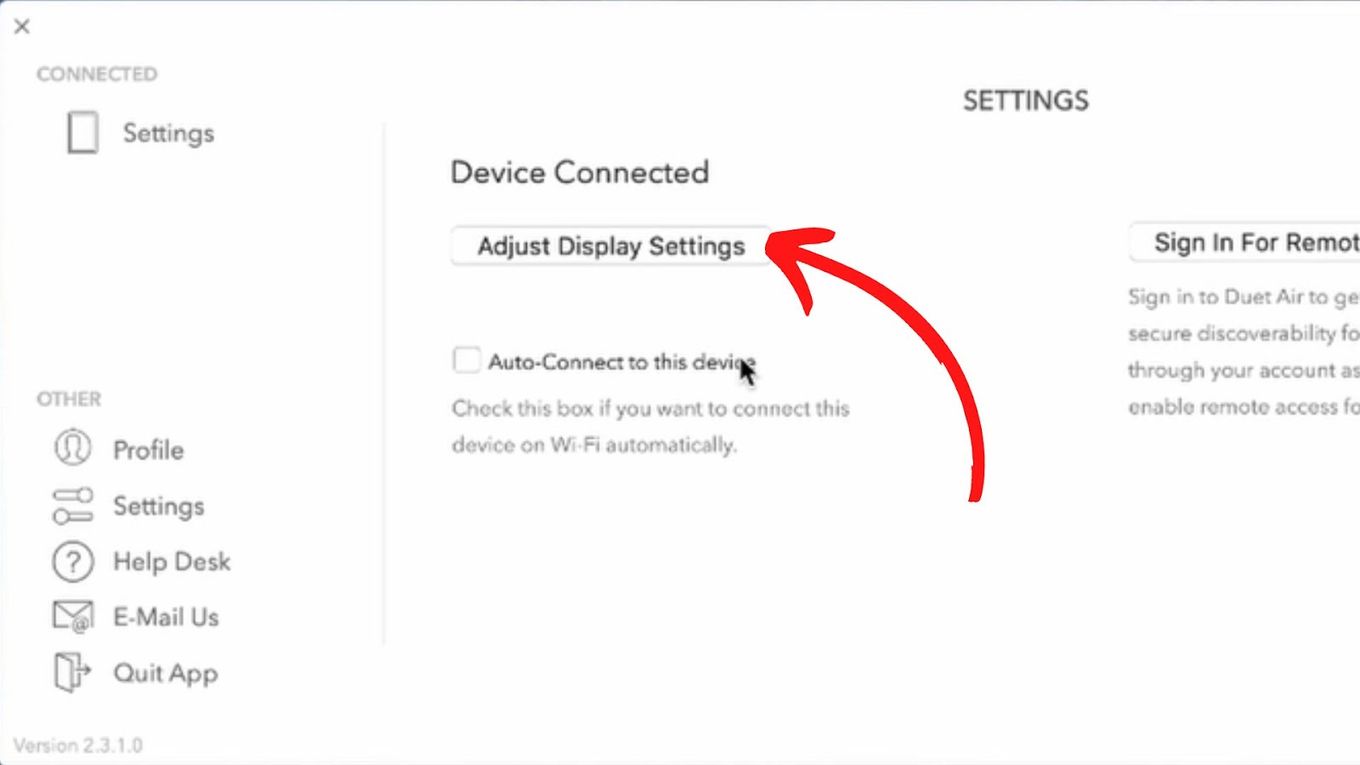
Click on the connected device
-
Click “Adjust Display Settings” under “Device Connected”
-
Click to check the box next to “Mirror Display” to mirror or leave it unchecked to expand.
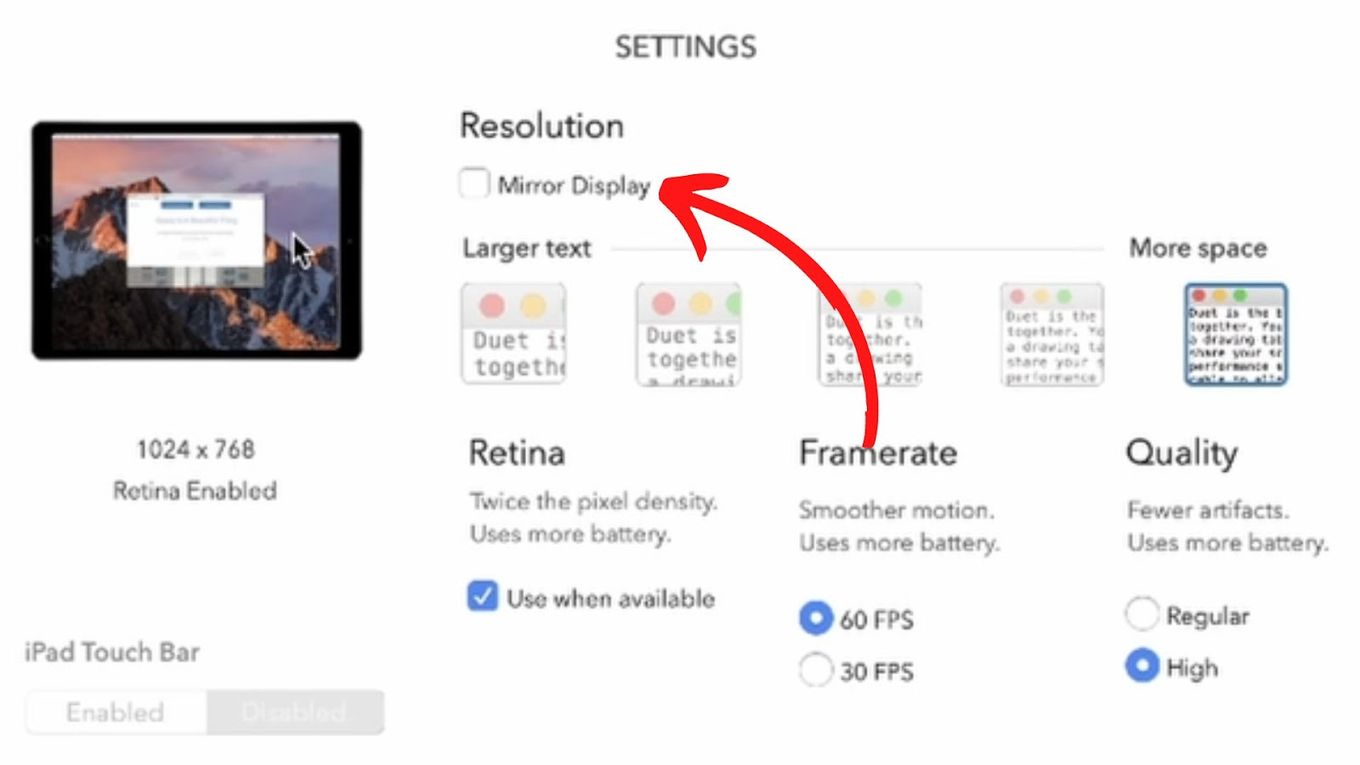
You will also find a list of preferences that you can adapt to suit your needs. You can change the Framerate, Aspect ratio, and Retina display (for Mac only)
Check out how to use airplay on Chromebook to stream content to it or from it cables.
2. Using “Splashtop Wired XDisplay”
Splashtop Wired XDisplay is available for free. It requires a USB cable to connect your notebook to your primary computer. It has all the features of “Duet” except that it doesn’t support a wireless connection.
The following steps describe how to use a Chromebook as a second monitor via Splashtop Wired XDisplay.
Learn how to invert colors on a Chromebook using the keyboard? and why it can be a good option.
Step 1: Download Splashtop
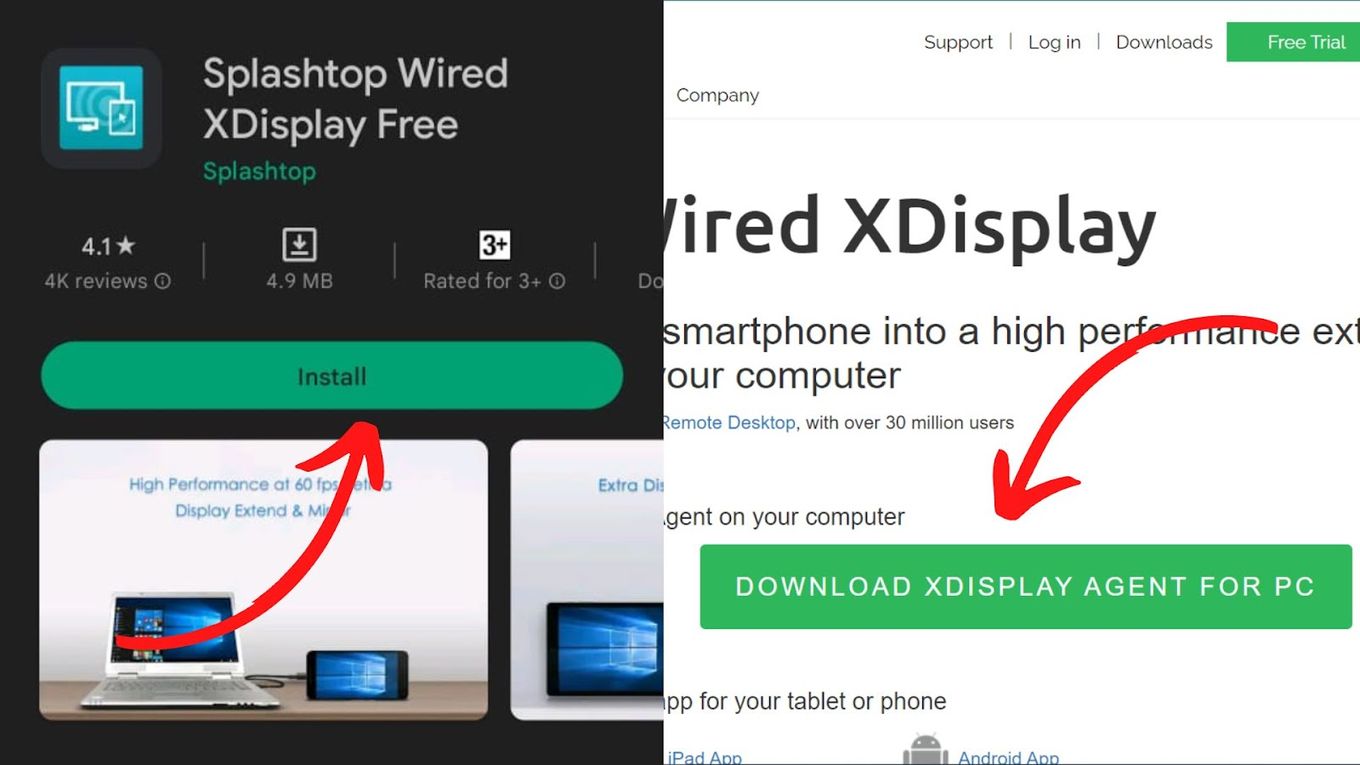
- Download the software for your main gadget from the Splashtop website. It can work on Mac or Windows.
- Download Splashtop Wired XDisplay for your Chromebook.
- Install the software by clicking on the installation file and following the prompt.
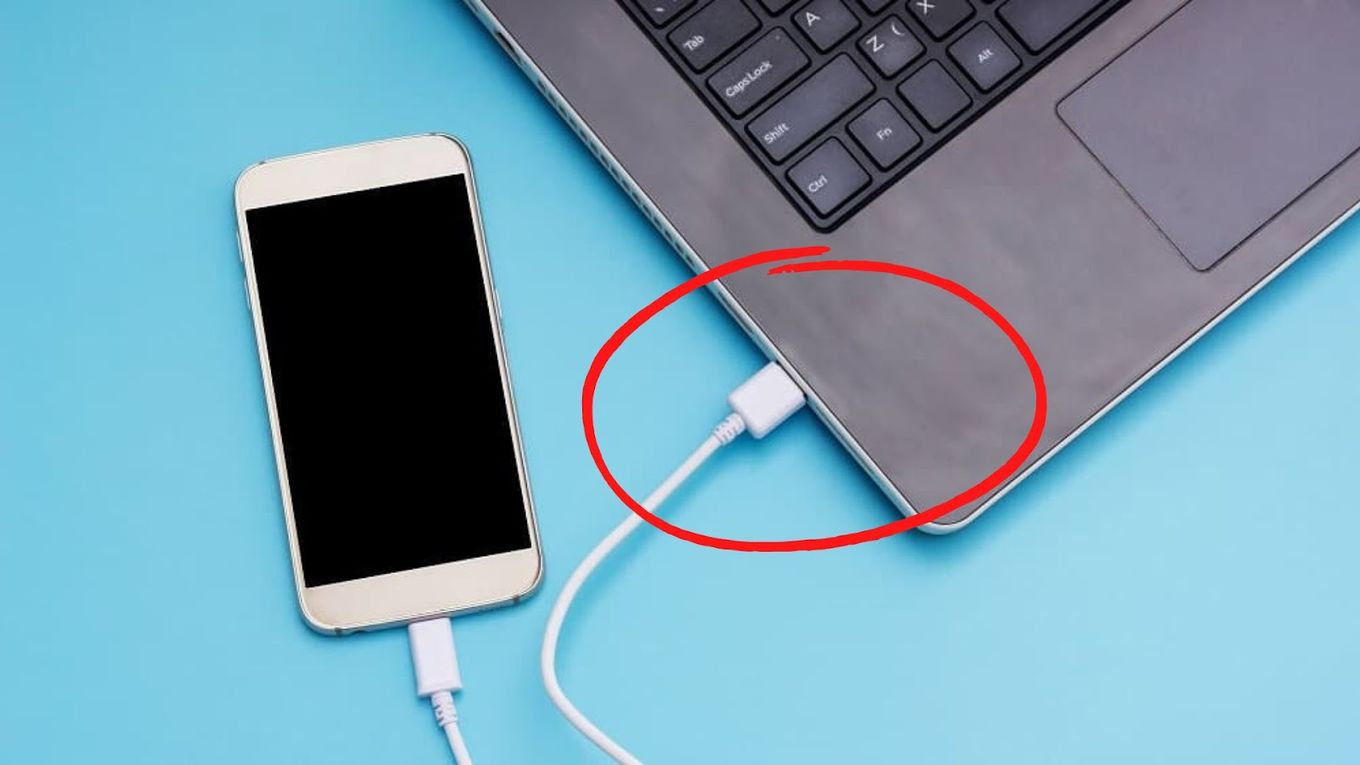
Step 2: Connect Both Gadgets With A USB Cable
Step 3: Launch The App On Both Devices
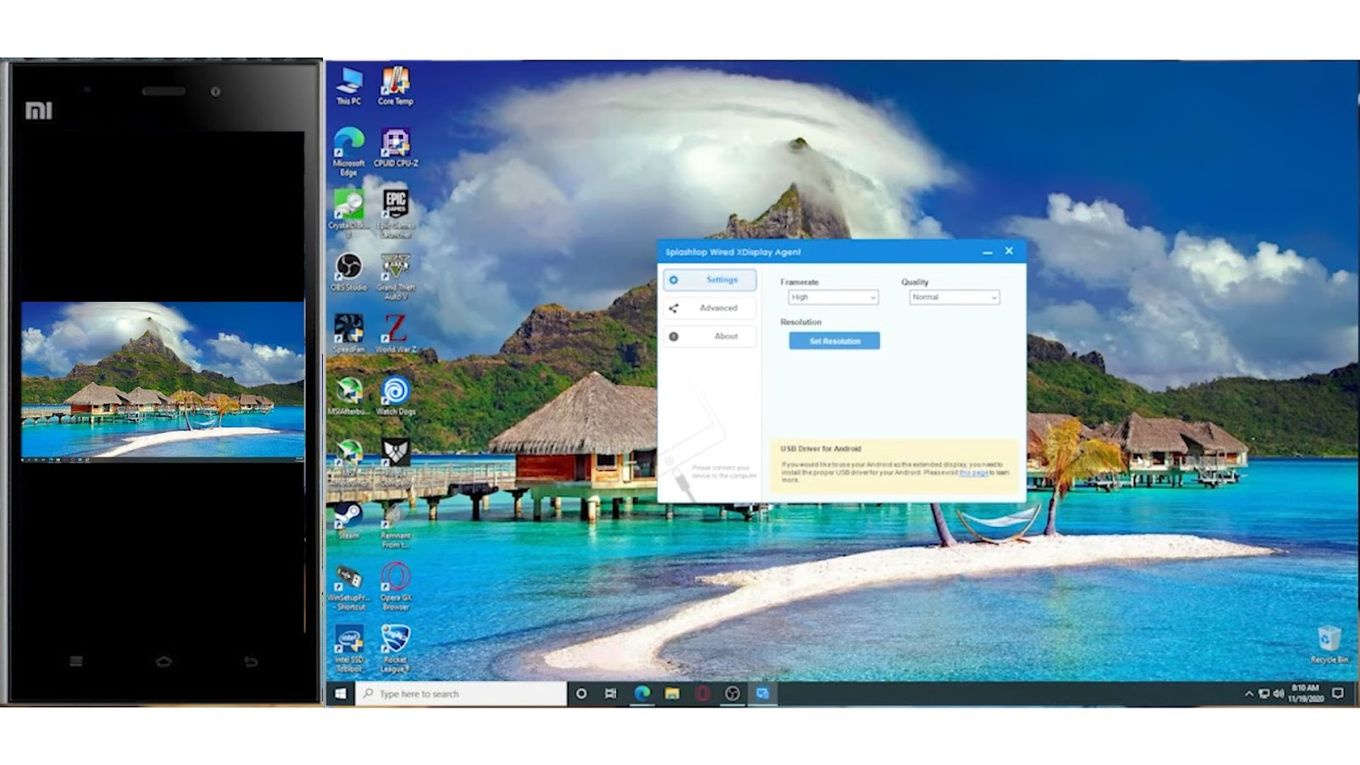
The app detects your ChromeBook within seconds and starts sharing the screens.
Step 4: Mirror or Expand your Screen
Mirroring your screen is enabled by default. Thus, both screens display the same thing. To extend your screen or use Chromebook as a secondary monitor, do this if you use Windows or Mac:
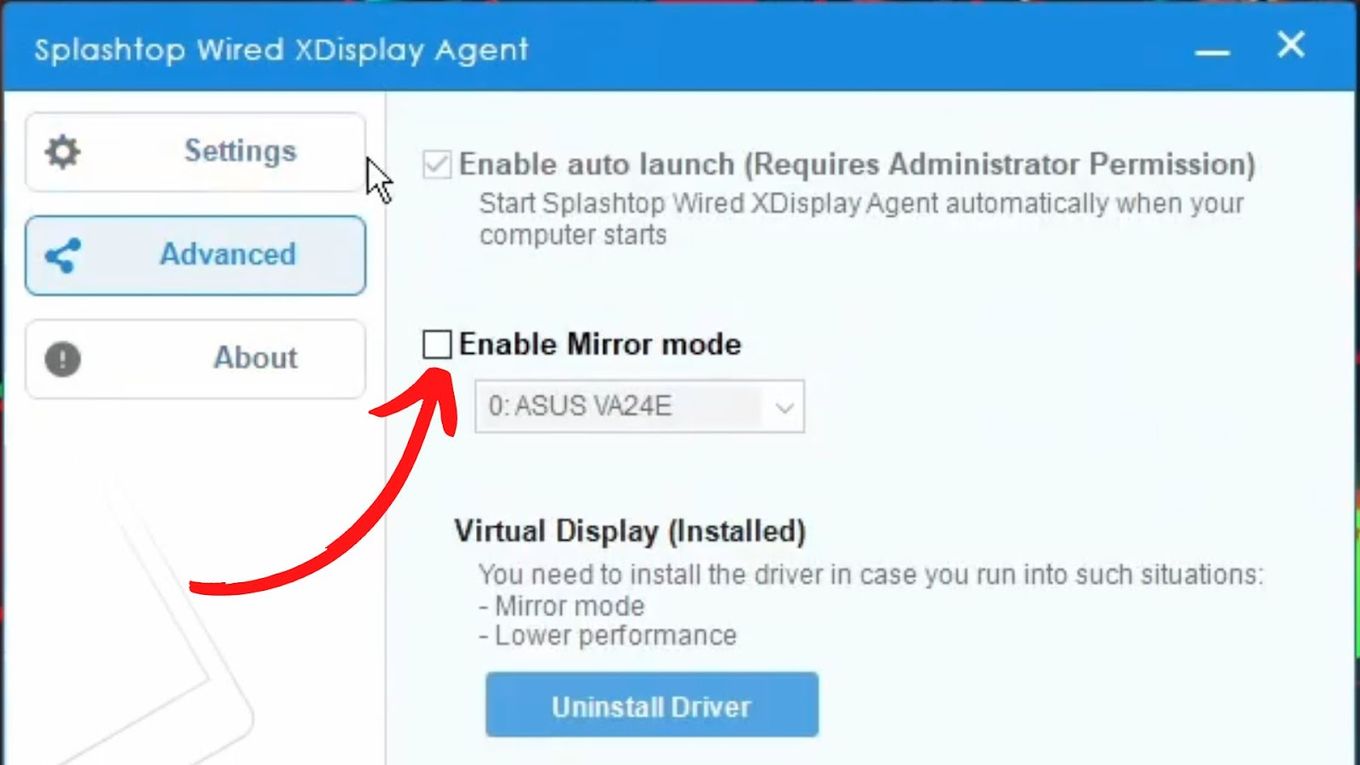
Windows Instructions
-
Click on the “Advanced” tab on the Splashtop Window.
-
Uncheck “Enable Mirror” option.
Mac’s Instructions
- Navigate to the “App Menu” by clicking on the WiredXDisplay on the menu bar
- Click on “Preferences > Arrangement”
- Uncheck the “Mirror Display” item.
3. Using “Spacedesk”
Spacedesk is another free app that allows you to turn your Chromebook into a second display. It supports Windows, Android, and Chromebooks.
Here are the steps to use your Chromebook as a monitor with the Spacedesk app:
Step 1: Download & Install Spacedesk
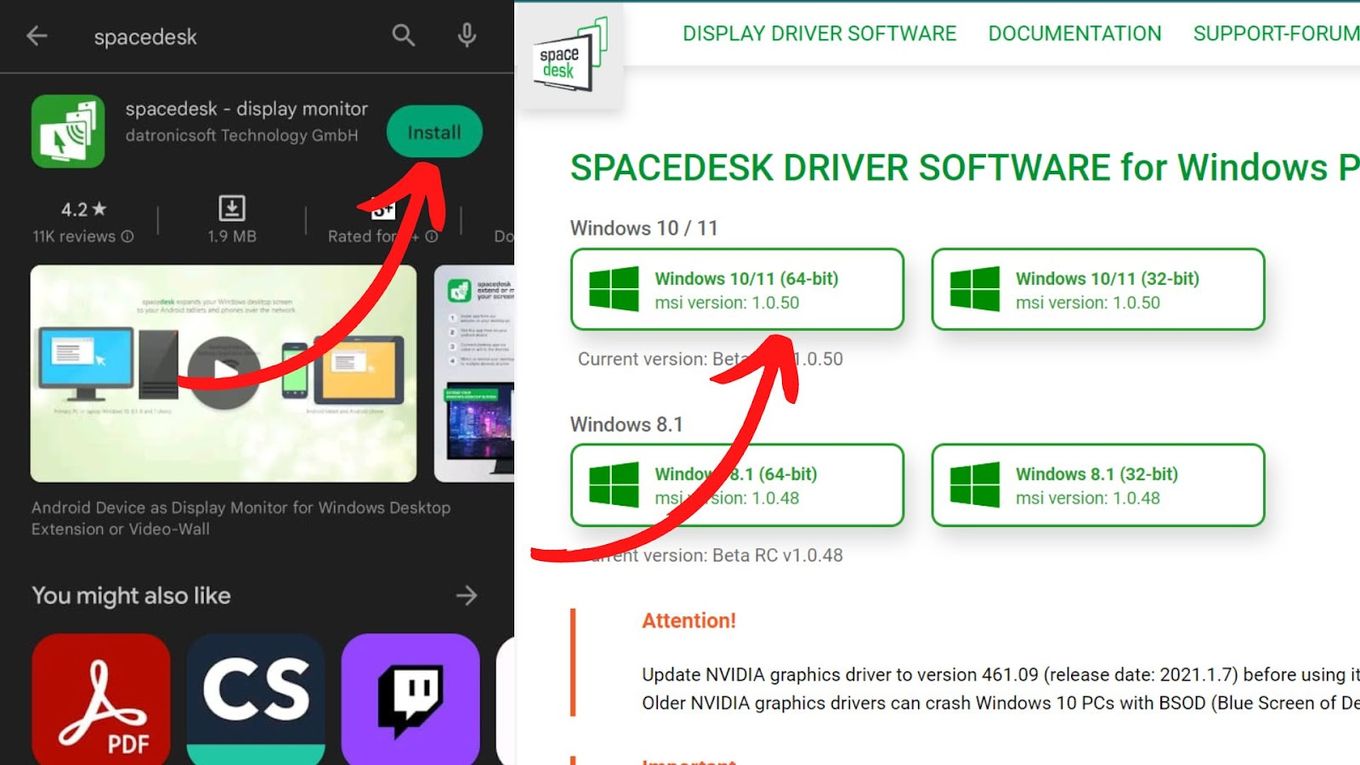
- Download Spacedesk for your Windows computer from the Spacedesk website.
- Download Spacedesk for your Chromebook via the Google Play store.
- Install the software on both gadgets.
If your Chrome OS laptop doesn’t support android Apps, skip to step 4.
Step 2: Start the App on Both Devices
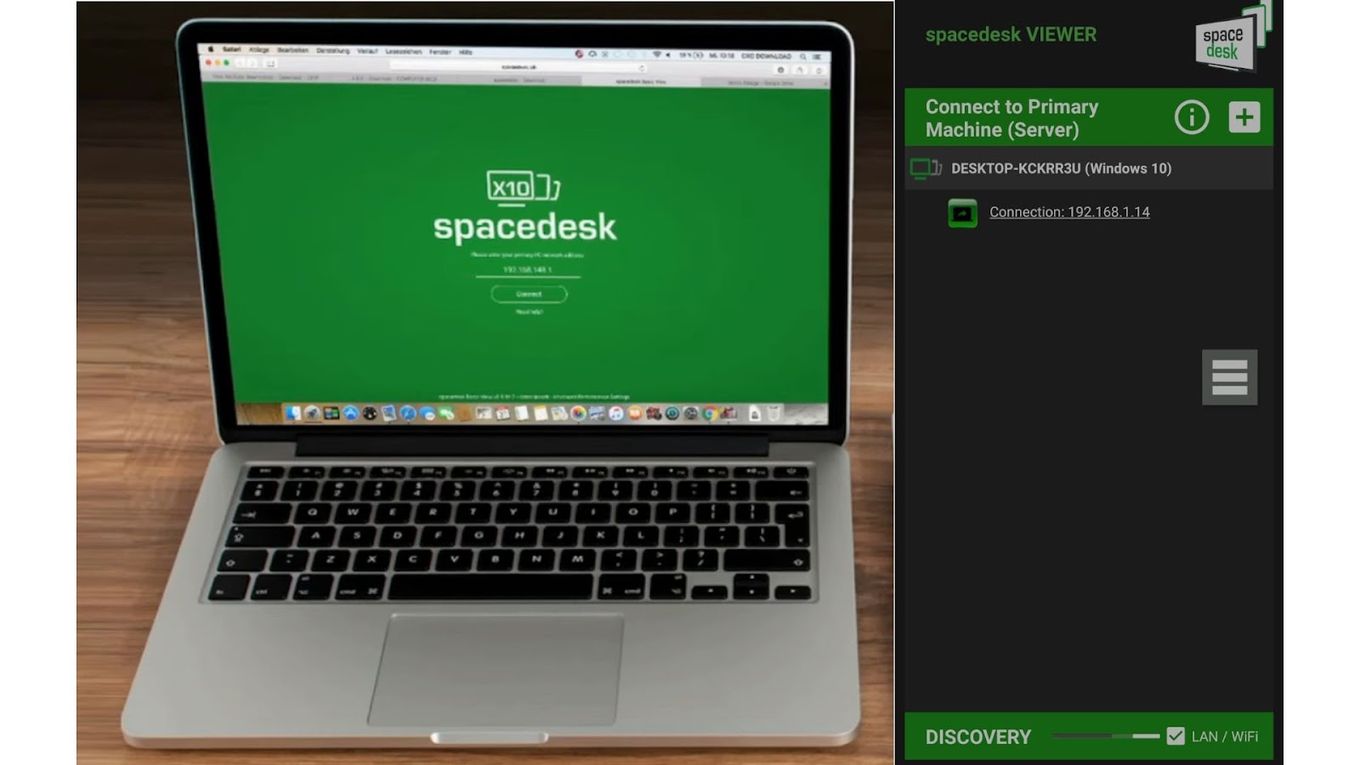
Better if you are connected to the same network on both computers.
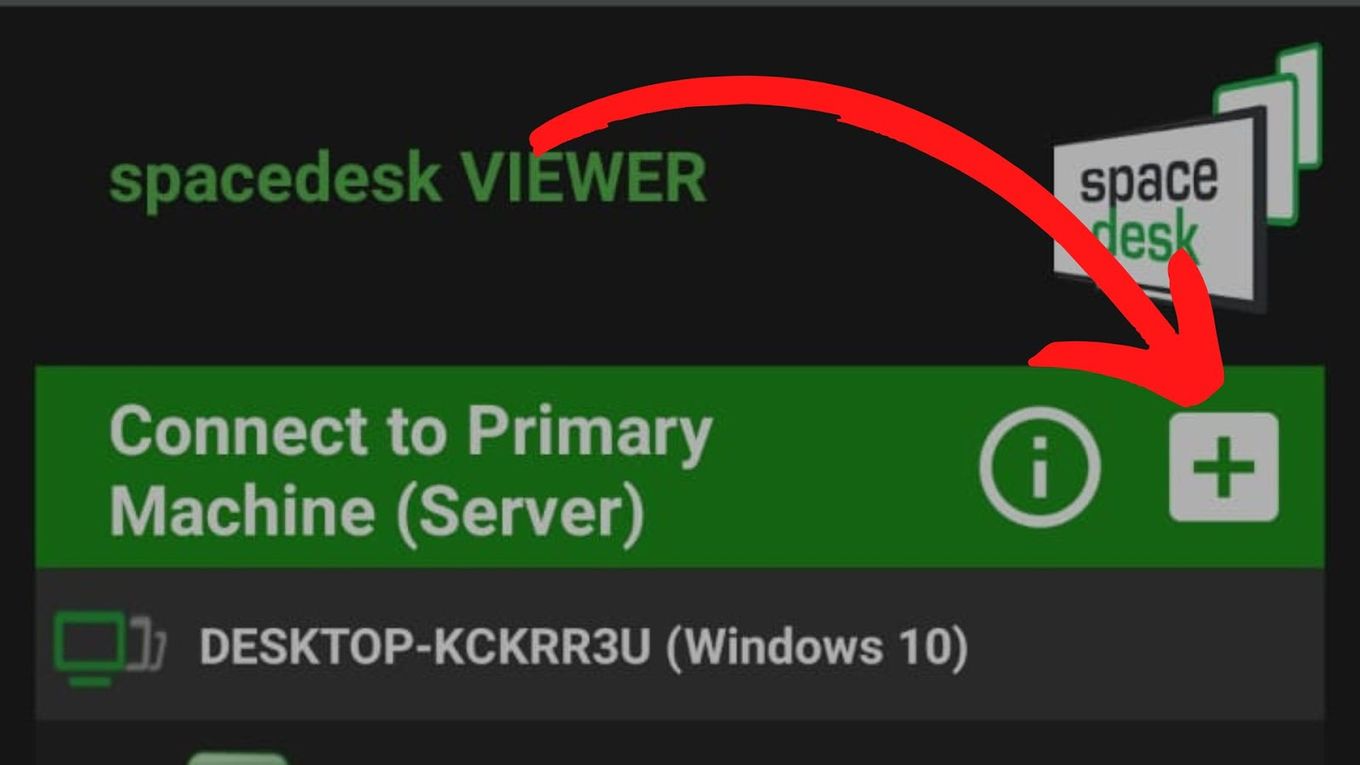
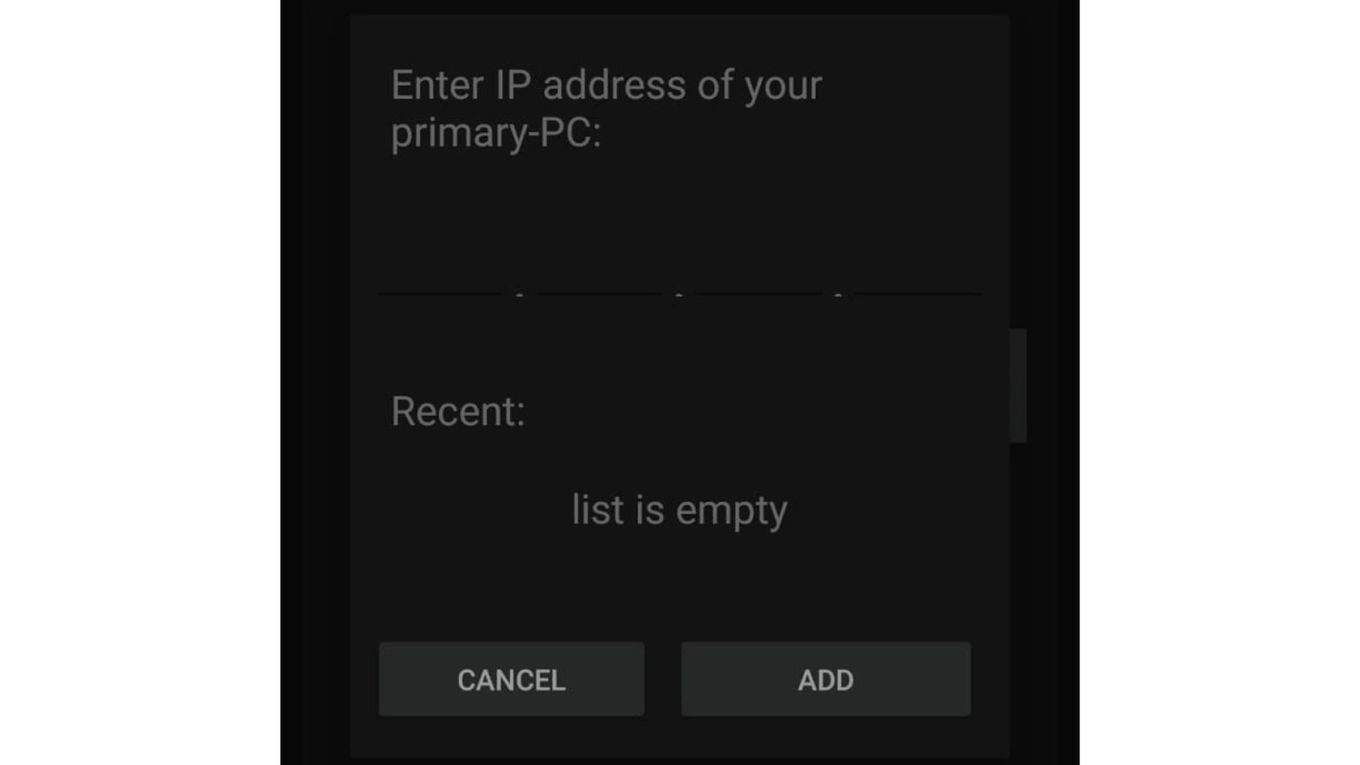
Step 3: Click on the ‘+’ on the Chromebook App.
The plus sign is next to the text “Connect To A Primary Machine (Server)” on your screen display.
Step 4: Enter Your Windows Computer’s IP address
Now connect to the IP manually. When both connect, your Windows computer may flicker or lag. This is because it is trying to adapt the desktop layout and screen resolution to match the new screen it has detected.
If your Chromebook doesn’t support Android apps, you’ll have to use the SpaceDesk HTML5 viewer website. Open that link on your Chromebook, and then enter your computer’s IP address. Your Chromebook needs internet access to access the viewer website.
Step 5: Adjust Screen Sharing Method
By default, your Windows screen is mirrored onto your Chromebook.
This means that both screens display the same information. However, if you want to expand your screen, that is, make your Google notebook a secondary display, do this:
-
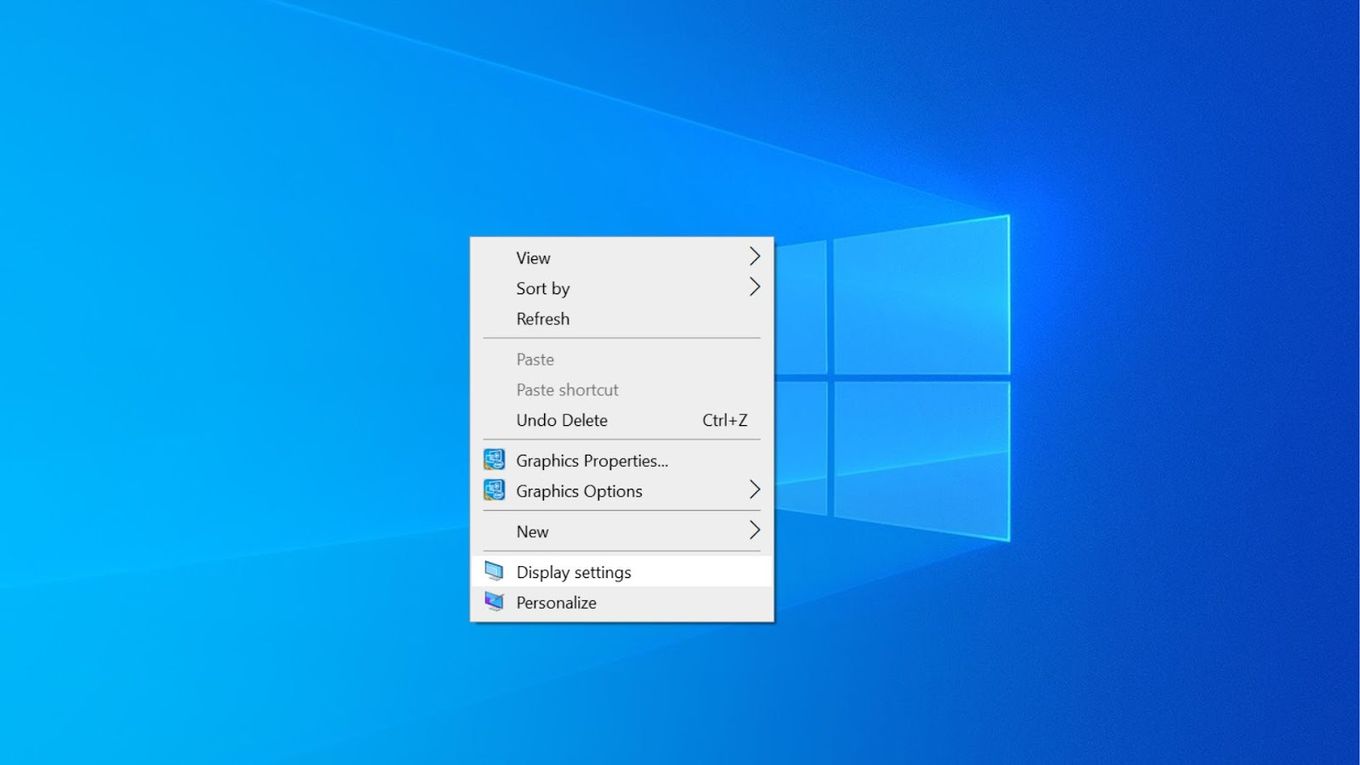
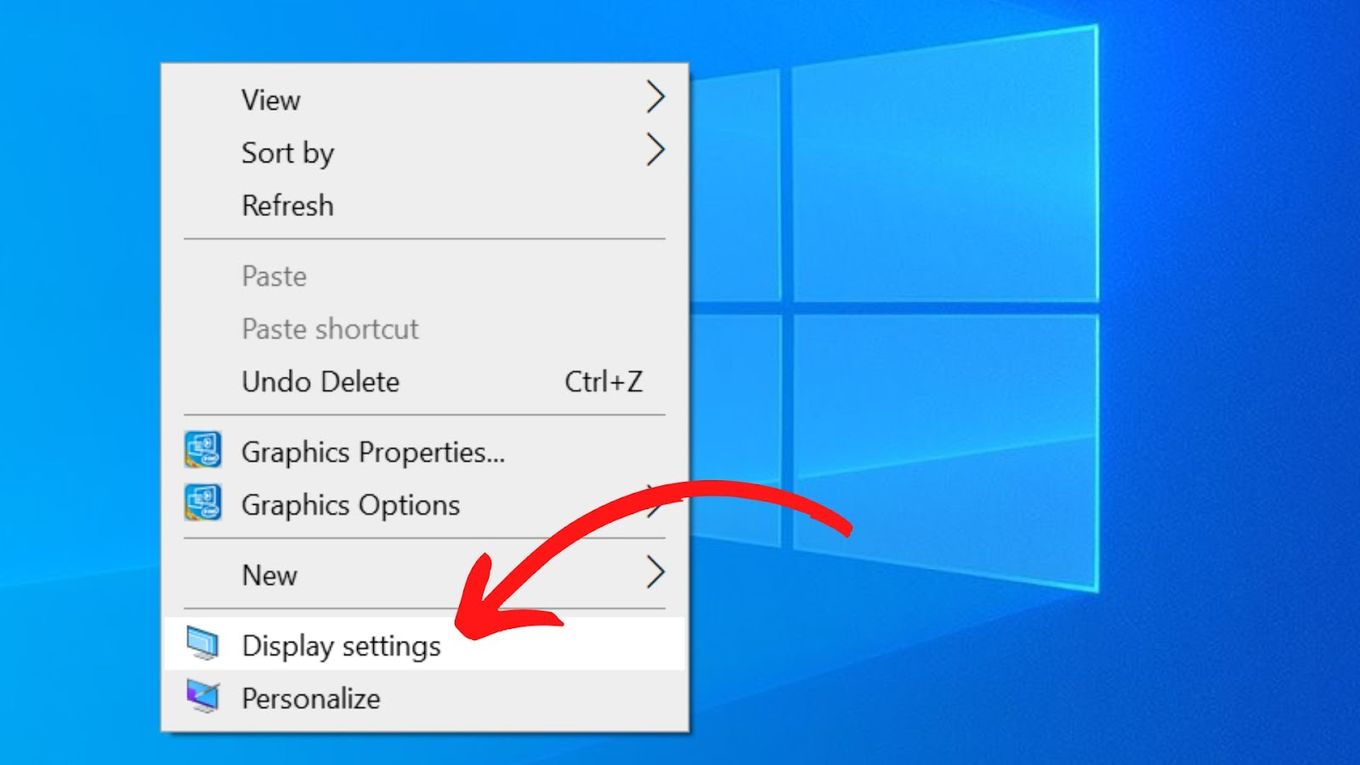
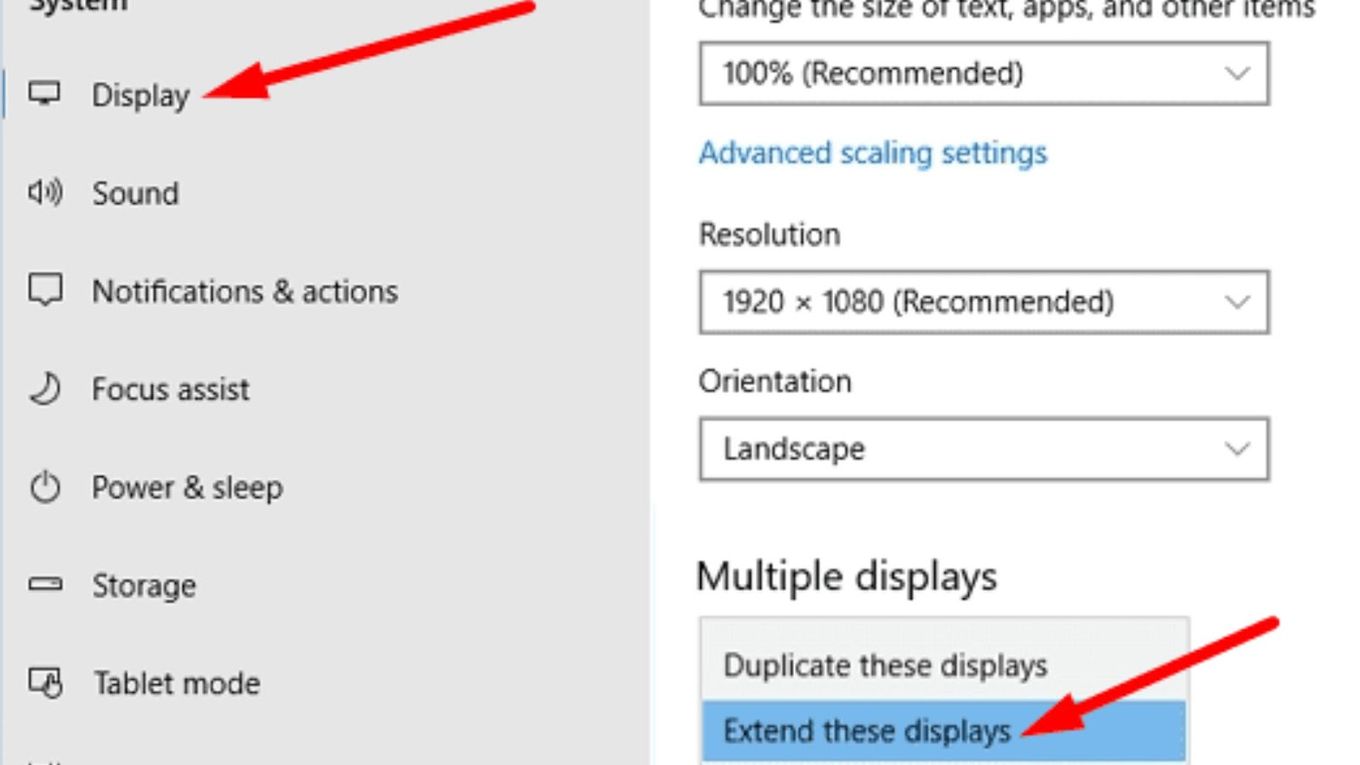
Right-click your Windows desktop
-
Select “Display Settings” on the pop-up menu.
-
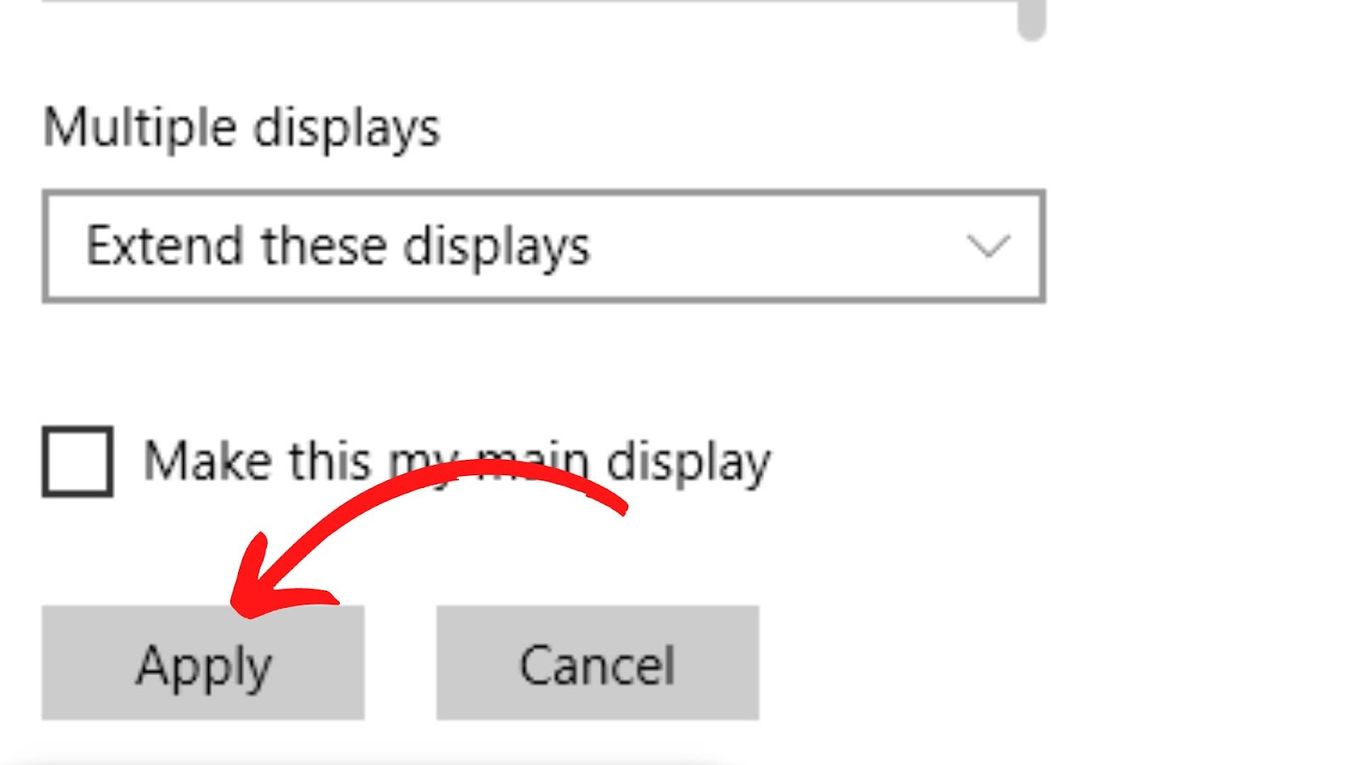
Select “Extend these Displays” under the “Display” header
-
Click “Apply”.
Alternatively, you can:
- Press the “Windows” key and the “P” key simultaneously on the keyboard.
- Click on “Extend” Display.
4. Using “Deskreen” Alternative
This method is specially targeted to Linux users. However, Deskreen also supports Windows and Mac
With Deskreen, an open-source application, you can use your laptop as a second display. The application connects both gadgets wirelessly and features additional options, including teleprompter mode.
The following steps describe how to use a Chromebook as a second monitor with Deskreen:
Step 1: Download & Install Deskreen
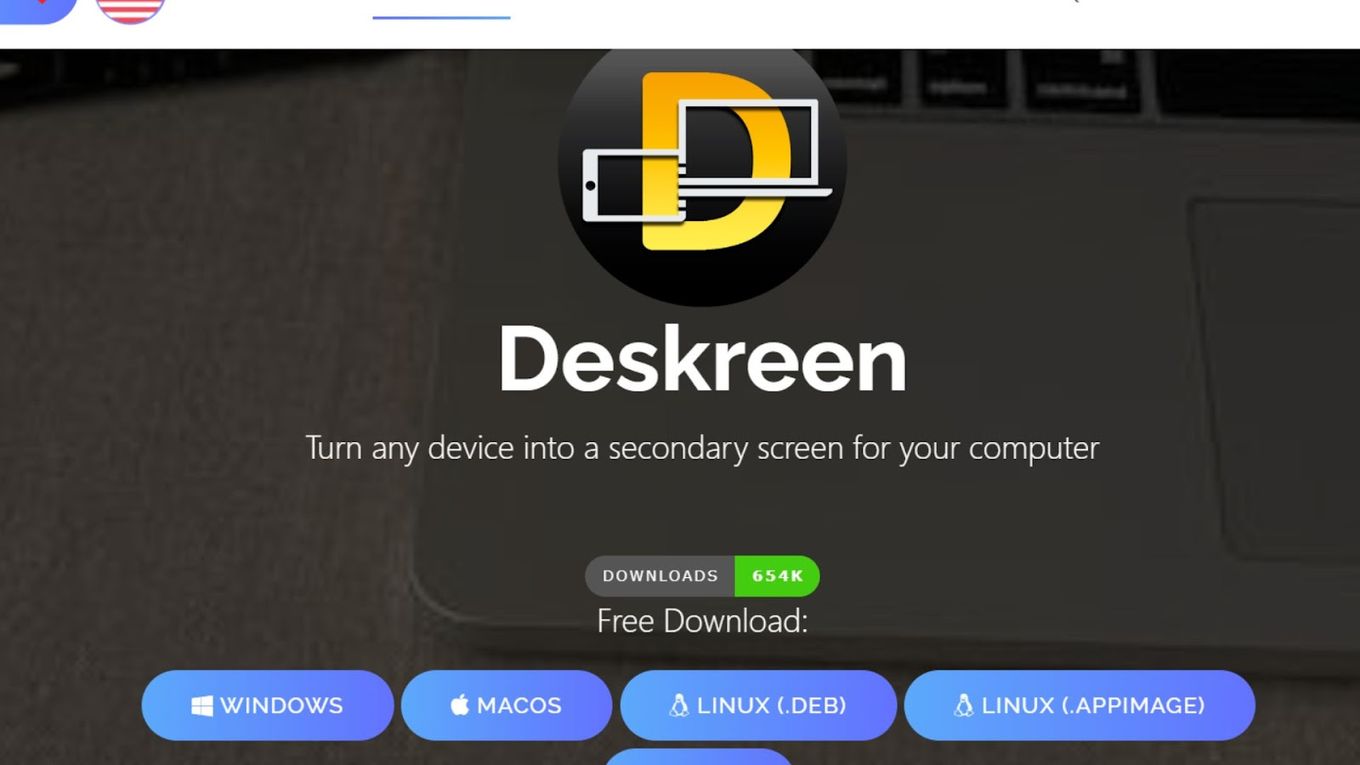
Deskreen doesn’t have a separate app for Chromebooks thus you only need to download and install it for your device.
Step 2: Pair Both Devices to the Same Network
Step 3: Connect the Devices
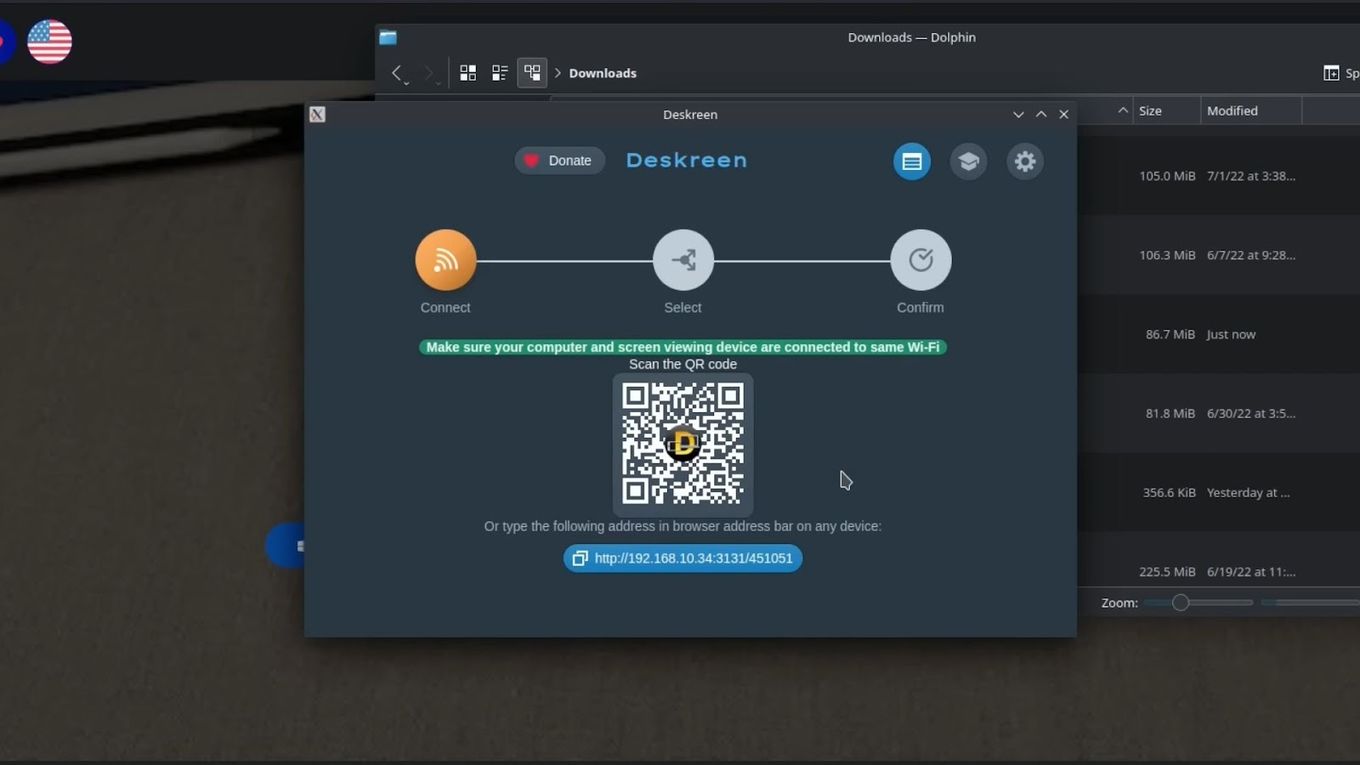
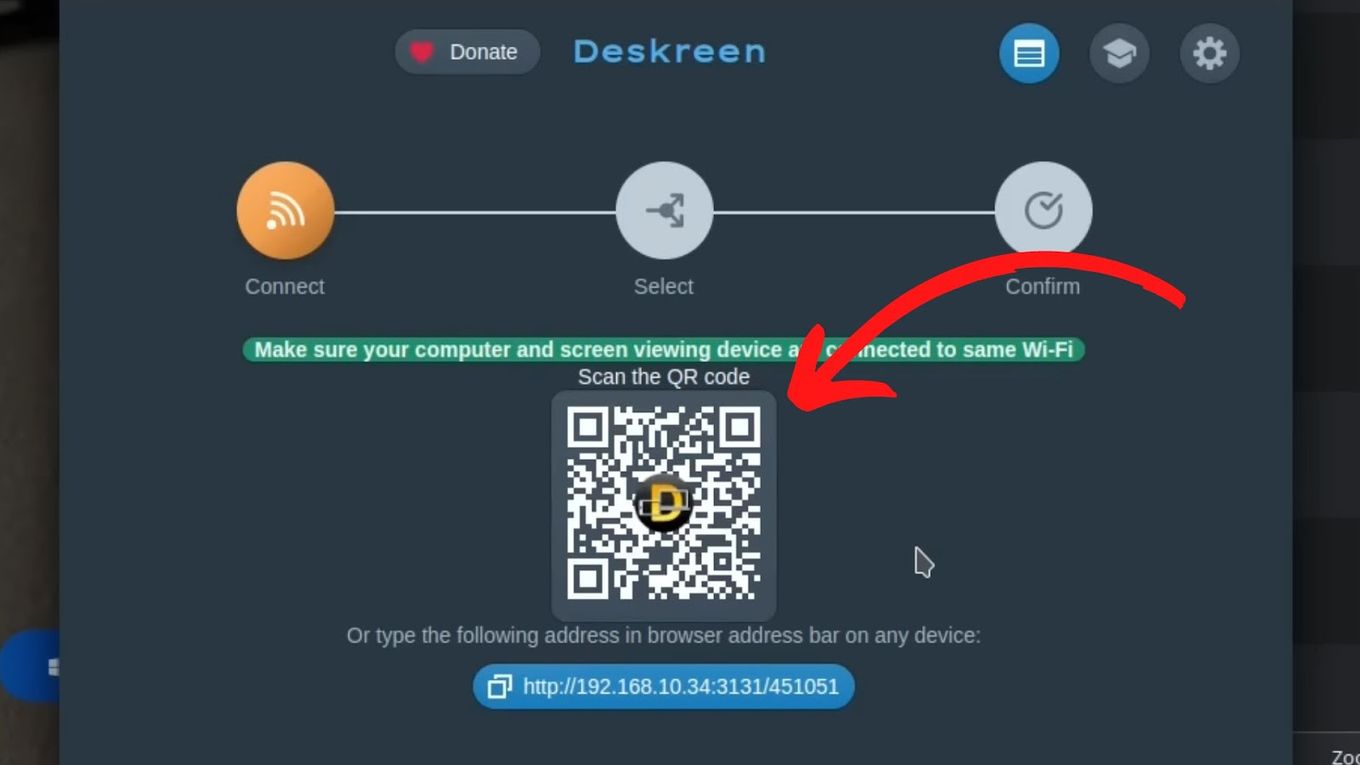
Launch Deskreen on your Host gadget.
Scan that QR code on the screen with any QR Code scanner app on your Chromebook
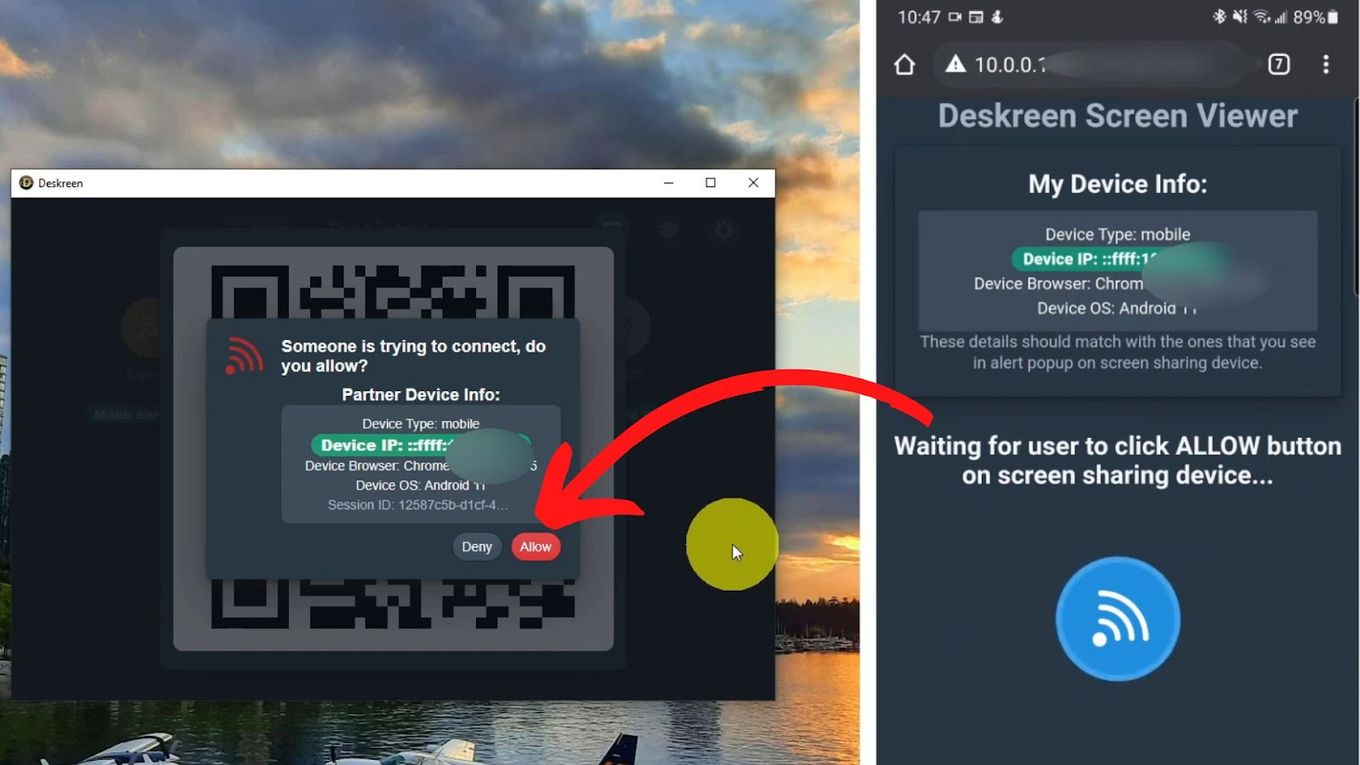
Open the link that pops up on your Chromebook.This action displays the desktop’s second screen on your Chromebook monitor.
Step 4: Start Using Your Chromebook as a Secondary Monitor
Click the full-screen button to use the entire laptop display as a second monitor.
Discover how to exit full-screen on Chromebook
Can You Use Chromebook as Second Monitor with HDMI?
No, you can’t use your ChromeBook as a second display with an HDMI wired connection because Chromebooks don’t have an HDMI input port. They only have an HDMI output connection.
This configuration setup allows sending a video signal from the Chromebook to another gadget, such as a TV, but it cannot do the opposite.
Warning! Don’t try to connect your Chromebook to another laptop via the HDMI docks. It may damage the hardware of both devices. Both gadgets will only send video output to each other.
You need alternative technology to use your Chromebook as a monitor. You can use the software packages mentioned in this article.
This software functions like an emulator, creating a virtual environment that enables the host computer to share input with the Google laptop.
Use a Chromebook as a Secondary Display
Using a Chromebook as a second monitor is entirely possible. Just not through HDMI. You need to use several software tools, such as the ones mentioned in this post. These apps allow for wireless or USB connections to extend or mirror your main screen.
Repurpose your machine and use it as a secondary interface by adapting your preferred method, and enhance your productivity without a significant investment.


